
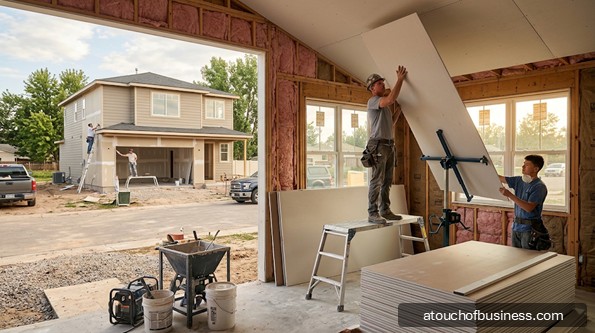
What to Expect From This Guide to Starting a Drywall Contractor Business
This guide walks you through the key decisions and practical steps involved in starting a drywall contractor business, from judging personal fit to preparing for your first paid job. The highlights below point to selected areas of value, with more detail throughout.
Inside the guide, you will find:
- Startup steps: Twenty ordered steps move from assessing skills and demand through licensing, funding, and setup to a small test job before larger bids.
- Startup FAQs: Concise answers on subcontractor licensing exemptions, solo workers’ compensation, OSHA dust and stilt rules, pricing formats, and multi-state jobs.
- Business fit: Reflection questions about physical demands, household support, and uneven income appear throughout the guide, not only at the start.
- Financial planning: Break-even logic, payment lag, retainage, and operating capital explained without figures that depend on your location and choices.
- Local requirements: Licensing paths, lead-safe certification for older homes, asbestos planning, and insurance, with direction on where to verify rules locally.
- Estimates and contracts: How to build estimates, state finish levels in writing, and prepare change orders and lien paperwork before bidding.
- Risks and warnings: Two sets of red flags help you judge whether to start and whether you’re prepared to take paid jobs.
Start by weighing whether owning a drywall company, not just working in the trade, fits the life and income pattern you want.
As a drywall contractor, you hang gypsum panels on walls and ceilings, then tape, coat, and sand the joints until the surface is ready for paint.
Some contractors focus only on hanging board. Others specialize in finishing, texture, repairs, or complete hang-and-finish projects.
Most of your days are spent on jobsites.
Your schedule depends on other trades, compound drying times, and inspections that must clear before board goes up.
This guide follows the startup steps in the order they usually happen, from checking fit to taking your first job.
Before you start, ask whether this trade fits the life you want. That question comes up again throughout the guide.
Is a Drywall Contractor Business a Good Fit for You?
Being a skilled drywall installer and owning a drywall company are two different jobs.
As the owner, you still hang and finish board. You also bid jobs, order materials, chase payments, and fix problems when a schedule falls apart.
Why do you want to own this business instead of working for another contractor? A clear answer helps on days when the job gets hard.
The physical load is real. Most of the day is spent standing, bending, and reaching, often while lifting and positioning heavy panels.
A single sheet can weigh between 50 and 120 pounds.
Falls, back injuries, muscle strain, and dust exposure are routine risks in this trade.
Can your body handle that pace for years, not just months? If not, plan to hire and supervise sooner rather than later.
Money can arrive later than you expect. When you work for general contractors, you often pay for materials and crew wages weeks before you get paid.
Can your household cover living expenses during that gap?
Do the people you live with support the long days and uneven income that come with it?
Be honest about the possibility of failure. Some contractors close because of cash flow, even when their finish quality is excellent.
Skills beyond the trade matter too. You need to read plans, measure and estimate accurately, schedule around other trades, and keep basic books.
If estimating feels unfamiliar, count that as a gap to close before you open.
One underbid job can erase the profit from several good ones.
Input from experienced drywall contractors is one of the best reality checks available. Step 2 covers how to find and prepare for those conversations.
You’ll also need a clear reason why builders, remodelers, or homeowners would call you instead of an established crew. Think about that answer before you commit.
Red Flags Before You Start
Some conditions come with the drywall trade itself. They aren’t reasons to quit, but you should understand them before you commit.
Watch for these warning signs:
- Loyal crews already in place. If local builders are happy with their drywall subs, winning first jobs may take longer than you expect.
- Heavy price competition. Contractors widely describe drywall as a cutthroat trade on price, and low bids are common.
- Built-in payment lag. Materials and payroll go out before general contractor payments come in, and retainage can stay held long after you finish.
- Licensing barriers. Some specialty classifications require documented experience, exams, and bonds before you can contract on your own.
- Physical wear. Heavy lifting, overhead work, and falls take a toll, especially if you plan to handle every job yourself.
- Older housing stock. Lead and asbestos rules add training, containment, testing, and liability when you work in older buildings.
- Construction-cycle swings. New-construction jobs follow builder activity, so slow periods can arrive with little warning.
- Insurance demands. General contractors often require specific liability limits and additional insured status before you can step onsite.
If price competition worries you, consider a niche such as repairs, restoration jobs, or high-level finishes.
A narrower scope can reduce head-to-head bidding.
If you can’t build enough operating capital to survive several slow pay cycles, delay opening until you can.
If your plan depends on paying crew members as independent contractors when they function as employees, change the plan.
Federal investigators have called that a common violation in drywall.
Step 1: Take an Honest Look at Your Skills and Stamina
Start by deciding which part of the drywall trade you’re strongest in.
Hangers measure, cut, and fasten panels.
Tapers, also called finishers, apply tape and compound over joints and sand them smooth for paint.
Many drywall contractors handle both. Others build a reputation around finishing alone, where skill differences are easy for customers to see.
Most people in this trade learn on the job rather than through a formal credential.
That path is common, but some state licenses still require documented experience.
Do you have records of your past jobs, employers, or project types? Gather them now in case a licensing board asks later.
Think honestly about stamina. Ceiling jobs, stilt time, and repetitive sanding add up over a full week.
Does this workload suit the next 10 years of your life, or only the next two? Your answer shapes how soon you’ll need a crew.
Step 2: Talk With Drywall Contractors You Won’t Compete Against
Owners who already run drywall companies can tell you what the trade looks like from the business side.
Speak only with owners outside your planned service area. People you’d compete against have little reason to share honest details.
Also talk with general contractors, remodelers, builders, and restoration contractors who hire drywall subs.
They know what makes a sub worth calling back.
Prepare questions before each conversation, such as:
- How do general contractors choose which drywall subs to use?
- What insurance certificates and limits do they usually require?
- How long does payment typically take, and how is retainage handled?
- Which types of jobs tend to lose money?
- What do they wish they’d known before opening?
Every owner’s path is different, but experience reveals patterns you won’t find anywhere else.
These conversations with real business owners often prevent costly mistakes.
Pay attention to how those owners describe their weeks. Does their routine sound like something you’d want?
Step 3: Choose Your Services, Customers, and Entry Path
Your scope shapes almost everything that follows, including licensing, insurance, tools, crew size, and pricing method.
Common drywall scopes include:
- Hang-only jobs for builders and general contractors
- Finish-only jobs, including taping and texture
- Complete hang-and-finish projects
- Patch and repair jobs for homeowners and property managers
- Texture and skim-coat services
- Commercial interiors, including metal stud framing and acoustical ceilings
Your customer channel matters just as much.
Subcontracting for builders brings larger jobs but slower payment and tighter competition.
Direct residential repair and remodel jobs pay faster.
The trade-off is smaller jobs, more customer communication, and more travel between sites.
Insurance restoration jobs and property management contracts are other paths. Each one comes with its own scheduling and documentation demands.
Decide how you’ll enter the trade. Starting from scratch gives you full control, but you build every relationship yourself.
Buying an existing drywall company may bring general contractor relationships and trained crews.
Before you buy, review open jobs and contracts, and confirm whether the license can transfer.
A franchise path is realistic only if a repair-focused home-service franchise operates in your market.
If one does, review its franchise disclosure document before committing.
Step 4: Confirm Local Demand and Your First Customers
Before you spend on a truck or tools, find out whether your local market has room for another drywall contractor.
Look at who builds and remodels nearby.
Ask general contractors whether they need more drywall subs or feel satisfied with the crews they have.
Check the age of local housing too. Older homes mean more repair demand, but also more lead and asbestos precautions.
Identify your likely first customers. For most drywall contractors, those are general contractors and remodelers who need dependable scheduling.
Homeowners and property managers needing repairs are another common starting point. Their jobs are smaller, but payment usually comes faster.
Next, define why they’d choose you. Strong reasons include finish quality, reliable scheduling, dust control, and clean jobsites.
Availability for small repair jobs can set you apart, since many crews skip them.
Certification for older homes can also open doors other contractors can’t enter.
Plan how you’ll reach those first customers at opening.
Common routes include direct contact with builders and remodelers, supply-yard connections, and a basic online listing.
If you can’t name specific people likely to hire you, pause. Weak demand is easier to fix before you spend than after.
Step 5: Check Your Licensing Path Before You Spend
Drywall licensing varies widely across the country, so confirm your path before buying equipment or signing contracts.
Some states issue a specific drywall or drywall-and-plaster specialty license.
Others require a general or home improvement contractor license above a project-value threshold.
Some states require home improvement registration instead of a full license.
Many cities and counties add their own contractor registration on top of state rules.
Common licensing requirements include:
- Documented trade experience
- Passing a trade exam, a business-law exam, or both
- A surety bond
- Proof of liability insurance
- Proof of workers’ compensation coverage in some states
- A registered business entity before the license is issued
Some states license the company through an individual qualifier.
That person’s status can affect the whole license, so understand the role before you name someone.
Exams, experience reviews, and bonding can take weeks or months. Build that time into your opening plan.
Start with your state contractor licensing board. Search for drywall classifications and home improvement contractor registration.
Then check with your city or county licensing office.
Step 6: Test the Profit Potential of Your Drywall Business
Before major spending, find out whether your chosen model can cover costs and still pay you.
Installation jobs are usually priced by the square foot, by the board, or as a lump sum.
Small repairs often use hourly rates or minimum charges.
Your fixed costs usually include:
- Vehicle payments and upkeep
- Insurance premiums
- License renewals and bond premiums
- Tool or equipment financing
- Phone and software
- Your own pay
Each job adds variable costs. These include board, compound, tape, corner bead, fasteners, fuel, disposal, and crew labor.
Margin pressure comes from several directions. Competitive bidding keeps prices tight.
Callbacks for finish defects eat hours you can’t bill.
Material prices can also change between the day you bid and the day you buy. Account for that risk in your estimates.
Payment timing affects survival as much as profit.
On subcontracts, you typically buy materials on supplier terms while builder payments arrive considerably later.
Finishing crews usually expect weekly pay. That creates a steady gap between money going out and money coming in.
Slow periods matter too.
New-construction jobs can pause between project phases, while repair jobs stay steadier but bring in less per job.
Using your own local numbers, calculate how many jobs or square feet per month cover your fixed costs at your expected margin.
Does that volume feel realistic for your crew size and market? If the math only works in your best month, rethink the model.
Step 7: List Startup Costs and Plan Operating Capital
No single budget fits every drywall startup. Your costs depend on scope, crew size, location, and the equipment you already own.
Startup cost items to price out include:
- Hanging, finishing, and access tools
- A truck or van, plus a trailer if needed
- License fees, exam fees, and bond premiums
- Lead-safe training and firm certification, if you’ll take jobs in older homes
- Insurance premiums
- Software, phone, and business identity items
- Materials for your first jobs
- Operating capital
Your choices move these costs up or down.
Hang-only jobs need fewer finishing tools, while automatic taping tools raise upfront spending.
Buying new, buying used, or renting lifts and scaffolds changes the total too.
Commercial jobs usually add metal framing tools and higher insurance limits.
The most accurate estimate comes from listing everything you need and pricing it locally. Get quotes rather than relying on guesses.
Operating capital deserves its own line. Running out of operating money is one of the main reasons startups close.
Plan enough to cover materials, payroll, and fuel across the full payment cycle.
Include time for retainage to be released after a job ends.
Step 8: Line Up Funding for Tools, Vehicle, and Cash Flow
Once you know your costs, decide how you’ll pay for them before committing to purchases.
Funding options drywall contractors often explore include:
- Personal savings
- Equipment financing for lifts, vehicles, or automatic taping tools
- A small business loan
- A business line of credit
- Credit accounts with material suppliers
Material purchase financing is common in this trade.
It covers board, compound, and accessories before the first builder payment arrives.
Spending all your cash on equipment leaves less for payroll and materials.
Financing larger items can protect the operating capital you’ll need most.
Step 9: Form the Business and Register for Taxes
Choose a legal structure, such as a sole proprietorship, LLC, or corporation. Liability exposure and tax treatment are the main factors to weigh.
This guide on choosing a business structure explains the trade-offs in more detail.
If you form an LLC, partnership, or corporation, register it with your state first.
Applying for an EIN before that can delay your application.
You’ll generally need an EIN from the IRS to hire employees or operate as a partnership or corporation. The IRS issues it free.
Next, register for state tax accounts that apply. These may include sales and use tax, employer withholding, and unemployment insurance.
Sales tax treatment for contractor materials varies by state.
Some contractors pay tax when buying materials, while others bill it to customers.
Verify how your state treats drywall materials with your state revenue department before you set prices.
Step 10: Get Licensed and Certified for Older Homes
With your entity registered, file for the state or local contractor license or registration that matches your drywall scope.
Older homes bring federal lead rules. Anyone paid to disturb paint in housing or child-occupied facilities built before 1978 generally must be certified.
That rule covers special trade contractors, including sole proprietors.
Drywall removal, patching, and sanding on painted surfaces can all trigger it.
Your company needs EPA Lead-Safe firm certification.
Covered jobs must also be performed or directed by a Certified Renovator, which requires a one-day course.
Small repairs below certain thresholds may be exempt. Those limits are under 6 square feet per interior room and under 20 square feet outside.
Some states run their own lead renovation programs in place of the federal one. Check your state’s lead program or environmental health agency.
Plan for asbestos too. Joint compound and textures in older buildings can contain asbestos, even when the panels look ordinary.
You can’t identify it by sight. Confirmation requires lab analysis of a sample that includes the seam and texture.
Federal asbestos rules require a thorough inspection before renovation in commercial buildings and larger multi-unit residential buildings.
Single-family homes are generally excluded unless part of a larger project.
State and local rules may add requirements. Check your state environmental or health agency’s asbestos program.
Write a simple asbestos plan before your first job.
Decide when you’ll stop work, how you’ll arrange testing, and which licensed abatement contractors you’ll refer.
Would you rather avoid tear-out jobs in older buildings entirely? Some contractors limit their scope that way, and it’s a legitimate choice.
Step 11: Put Insurance and Bonds in Place
Arrange required coverage before you step onto a jobsite.
Workers’ compensation is generally required once you have employees, though state rules vary.
Any bond tied to your license must also be active.
Common coverage drywall contractors consider includes:
- General liability
- Commercial auto
- Tool and equipment coverage
General contractors routinely require a certificate of insurance before you start. Many also ask to be listed as an additional insured.
Ask builders about their required limits during your Step 2 conversations.
Then get quotes that match before bidding your first subcontract.
This overview of business insurance can help you prepare questions for an agent.
Step 12: Set Up Business Banking and Payments
Open a business bank account and keep business transactions separate from personal ones from the start.
Homeowners usually expect to pay by card or bank transfer. Set up invoicing and payment acceptance before your first repair job.
Builder jobs often use progress billing.
You submit payment requests as the job moves forward rather than one invoice at the end.
Track retainage as its own category. Money held until project completion is easy to lose track of among regular receivables.
Before signing a subcontract, negotiate when retainage will be released.
Partial release as the job progresses can ease cash flow on longer projects.
Read payment clauses closely.
Pay-when-paid and pay-if-paid terms sound similar but affect whether and when you get paid very differently.
Some states cap retainage or set release deadlines. Check your state’s rules so you know what a builder can and can’t hold back.
Step 13: Plan Your Home Base and Work Vehicle
Most drywall contractors run their operation from home, with a truck or van carrying tools to each jobsite.
Check your local home-occupation and zoning rules before storing materials, a trailer, or a commercial vehicle at your house.
Lease or homeowners-association restrictions can also limit what you keep onsite. Confirm those rules before you buy a trailer.
Choose a vehicle that fits ladders, stilts, a panel lift, and your tools. A ladder rack is standard for most setups.
Ask suppliers whether their drivers deliver board directly to jobsites.
Delivery affects whether you need a larger vehicle or trailer at all.
Think about travel between sites too. A wide service area adds fuel costs and unpaid drive time to every week.
Step 14: Buy the Tools Your Drywall Scope Requires
Buy for the scope you chose in Step 3, not for every possible job. Unused tools tie up capital you need elsewhere.
Hanging tools typically include:
- A cordless drywall screw gun
- Utility knives, a T-square, a rasp, and a tape measure
- A jab saw and rotary cutout tool
- A panel lift for ceilings
- Panel carts and a laser level
Finishing tools typically include:
- Taping knives, mud pans, and a hawk
- Inside and outside corner tools
- A drill with a mixing paddle
- Pole sanders and hand sanders
- A vacuum-assist sander with a dust extractor
Texture and repair jobs may add a hopper gun, air compressor, and knockdown knives.
Access equipment usually includes ladders, adjustable stilts, and a rolling scaffold with guardrails.
Stock safety and dust-control supplies before your first job.
These include respirators, eye protection, plastic sheeting, floor protection, and a HEPA vacuum.
If you’ll take jobs in older homes, add EPA-recognized lead test kits and containment supplies.
Automatic taping tools speed up large jobs but cost more upfront.
Renting a lift or scaffold may make sense until you know how often you’ll use one.
Step 15: Open Supplier Accounts
Open accounts with gypsum supply yards or building material dealers before you bid your first job.
Confirm these details with each supplier:
- Credit terms and whether a personal guarantee is required
- Delivery charges and minimum orders
- Jobsite stocking options
- Return policies for unused board
Board types vary by job.
You’ll order standard, moisture-resistant, mold-resistant, or fire-rated board depending on the room and building codes.
Material delays can stall an entire schedule.
Ask suppliers how they handle shortages and how much notice they need for large orders.
Step 16: Build Your Estimating, Contract, and Change Order System
Bad estimates sink more drywall contractors than bad finishing. Build your system before you bid real jobs.
A common estimating approach starts with wall lengths multiplied by height.
Add ceiling area, convert to board count with waste, then apply labor and markup.
Pricing by the square foot and pricing by the sheet aren’t the same. You rarely hang every full sheet, so waste changes the math.
Labor time shifts with job conditions, including:
- Ceiling height and stairwells
- Tray ceilings and other complex shapes
- The number of corners
- Board type and texture
- Access to the site
Always state the finish level in writing. Industry guidelines define finish levels from Level 0, with no taping, up to Level 5.
Level 5 is recommended for dark paint, glossy paint, or harsh lighting.
It takes considerably more labor, so it must appear clearly in your bid.
Small repair jobs usually need a minimum charge. It should cover drive time, setup, and cleanup, even when the patch itself is tiny.
Our guide to pricing products and services can help you think through markup and overhead.
Prepare your documents before opening:
- A standard proposal and estimate template
- A customer contract for homeowner jobs
- A subcontract review checklist
- A change order form
- Lien waiver forms
Your change order form should list rates for added scope.
Agreeing on those rates upfront prevents arguments when a builder adds rooms mid-job.
Learn your state’s mechanics lien and payment-notice rules before your first builder job.
Deadlines for preliminary notices vary and can be strict.
In some states, working without a required license removes your lien rights and your ability to sue for payment.
Step 17: Create a Jobsite Safety Program
Drywall jobsites carry real hazards.
A written safety program protects your crew and gives general contractors confidence in putting you onsite.
Your program should cover:
- Fall protection on ladders, scaffolds, and stilts
- Dust control during cutting and sanding
- Hazard communication for compounds and other materials
- Respirator use
- Silica exposure checks for dusty or long-duration sanding
Rolling scaffolds need fall protection once the platform reaches 10 feet or more.
Move them properly rather than pulling them along while standing on them.
Mud on floors, ladder rungs, and scaffold planks causes slips. Good housekeeping throughout the day matters as much as any equipment.
Read the safety data sheet for every compound you use. Product ingredients affect which precautions apply.
Step 18: Decide on Crew Structure and Classify Workers Correctly
Decide whether you’ll work solo, hire employees, or use subcontracted crews.
Each choice changes your insurance, paperwork, and control over quality.
Worker classification is a serious issue in drywall. Federal investigators have identified misclassifying drywall workers as independent contractors as a common violation.
Paying piece rates doesn’t remove overtime obligations.
Workers classified as employees are typically still due overtime past 40 hours in a week.
Set up payroll and workers’ compensation before your first hire.
Train new crew members on your tools, safety rules, and finish standards.
Are you comfortable managing people, or do you prefer working alone? Your answer shapes how large this business can realistically grow.
Step 19: Set Up Your Business Identity
Builders and homeowners need a simple way to find and contact you.
Choose a business name and register a DBA if it differs from your legal name. Set up a dedicated phone number and business email.
Create a basic online listing with your service area and scope.
Business cards and vehicle lettering are optional but useful for jobsite visibility.
Some states require your license number on vehicles or advertising. Check your licensing board’s display rules.
Step 20: Run a Final Pre-Opening Review and Take a Small First Job
Before bidding larger jobs, confirm that every license, policy, account, and document is active and ready to use.
A small repair or single-room job makes a good first test. It shows whether your estimate matched the actual hours and materials.
Track every hour and item on that first job.
Compare the results with your estimate, then adjust your pricing before the next bid.
How did the job feel from start to finish? If the pace, paperwork, and physical demands felt manageable, that’s a useful signal.
Business Plan
Your business plan pulls the decisions from each step into one working document you can use and update.
Organize your plan around these drywall-specific decisions:
- Your scope, such as hang-only, finish-only, or complete projects
- Your main customer channel and likely first customers
- Your service area and travel limits
- Licenses, certifications, and insurance you’ll carry
- Crew structure and payroll setup
- Your pricing methods and finish-level standards
Include your startup cost list with local quotes attached. Separate one-time purchases from monthly fixed costs.
Show your break-even logic in plain terms.
List fixed monthly costs, your expected margin, and the job volume needed to cover them.
Map out your cash flow. Show when materials and payroll go out and when builder payments and retainage come back in.
Plan for slow periods between construction phases.
Note how much operating capital you’ll hold and how many lean months it covers.
Add your funding sources and the conditions tied to each one. Lenders often ask for this detail.
If you’ll seek a loan, this guide on writing a business plan explains what lenders typically look for.
Opening-Day Red Flags
These warning signs suggest you aren’t ready to take paid drywall jobs yet.
Hold off on bidding if any of these apply:
- Your license or registration hasn’t been issued for your full scope.
- You can’t send a certificate of insurance the same day a builder asks.
- Your bids don’t state a finish level in writing.
- You plan to take jobs in older homes without lead certification or an asbestos plan.
- Supplier accounts, credit terms, or delivery arrangements aren’t confirmed.
Uninspected equipment is another warning sign.
Check your lift, stilts, scaffold, and power tools before the first job, not on the jobsite.
If you haven’t tested your payment setup, send yourself a trial invoice.
A payment glitch on your first job looks unprofessional to a new customer.
Don’t sign a subcontract you haven’t reviewed for payment terms, retainage, insurance requirements, and scope.
If your crew classification or payroll isn’t set up, delay hiring. Fixing a classification mistake later costs far more than getting it correct from the start.
Finally, know your state’s lien and notice deadlines before starting builder jobs. Missing one can leave you with no way to collect.
Frequently Asked Questions
Do I need my own contractor license if I only work as a sub for licensed general contractors?
Not always. Some states exempt drywall subcontractors working under a licensed prime contractor.
That exemption usually disappears once you contract directly with homeowners.
Confirm your exact situation with your state contractor board before relying on it.
If I work alone with no employees, do I still need workers’ compensation?
Workers’ compensation generally applies to employees, so a solo operator may not be required to carry it.
Even so, many licensing boards and general contractors ask for proof of coverage or an exemption certificate.
Check what your state accepts before bidding.
Does OSHA’s silica standard apply to drywall sanding?
Usually not. OSHA generally excludes drywall and compound containing only trace silica when sanding stays separate from other silica-producing tasks.
Long periods of sanding in very dusty conditions can still push exposure higher.
Old plaster also changes the picture, so assess each job rather than assuming.
Are drywall stilts allowed under OSHA rules?
Yes. OSHA doesn’t prohibit stilts.
When stilts are used near an open edge, though, standard guardrails may need to be raised to account for the added height.
Should I quote customers per square foot, per board, or as a lump sum?
Build every estimate internally from detailed quantities and labor hours.
Then present whichever format your customer expects, as long as it still hits your profit target.
Builders often compare per-square-foot bids. Homeowners usually prefer a single project price they can understand at a glance.
What changes if I take jobs across state lines?
Licensing, lien rules, and tax registration may differ in each state you serve.
For older homes, you may also need both EPA and state lead certification. Verify requirements in every state before accepting jobs there.
Interviews with Drywall Contractor Professionals
These interviews bring together drywall business owners, contractors, and finishers with experience in commercial and residential work.
They discuss subjects including building skills, managing projects, developing a workforce, using technology, marketing a drywall company, and dealing with the demands of self-employment.
Someone considering a drywall contracting business can use these perspectives to better understand the trade before committing to it.
The interviews also provide examples of different paths into the industry and some of the operational and business challenges that can develop as a company grows.
Tradesperson Interview: Lydia Crowder, Drywaller
Lydia Crowder, co-owner of Trinity Drywall, discusses how she entered drywall finishing, the types of projects she handles, tools and techniques, continuing to learn, and educating others about the trade.
She also talks about work-life balance and the challenges of running a business with her husband.
Her experience is useful for understanding both the technical learning required in drywall finishing and the personal demands of self-employment.
She also explains why contractors need to keep improving their skills and recognize when a project may not be a good fit.
Platinum Drywall Installs Rock in Little Rock
Anthony J. Brooks discusses Platinum Drywall, the commercial contracting company he started in 2001.
The interview covers the company’s growth from a two-person operation, its project mix, specialization, prefabricated drywall components, workforce challenges, and the use of technology.
This interview offers a useful look at how a drywall contractor can develop beyond small projects while dealing with staffing and production challenges.
Brooks’ comments also show the importance he places on workforce development and technology when pursuing long-term company growth.
A Drywall Contractor Speaks
Dan Wies, president of Wies Drywall and Construction, discusses running a multigenerational drywall company.
Topics include building a dependable team, defining bid scope, differentiating the company, improving systems, panelization, modular construction, production planning, and adopting digital technology.
His experience is useful for someone thinking beyond the technical drywall work to the systems required to operate a contracting company.
The discussion highlights estimating clarity, consistent execution, team development, efficiency, and evaluating technology as the business becomes more complex.
Hayden Durocher – Duro Tech Design LTD
Drywall business owner Hayden Durocher discusses his business journey and how he uses video content to develop his brand.
The conversation focuses on his approach to business and the role that content has played in increasing his visibility.
This interview is useful for prospective drywall contractors thinking about how they will attract attention in their market.
It provides an example of a contractor using content and personal branding alongside the trade itself to build recognition for the business.
Sasha McDonald: Women in Drywall
Sasha McDonald discusses her transition into professional drywall finishing, the physical and creative aspects of the work, and her decision to begin with structured training.
She explains how training helped her develop basic skills, obtain certifications, and make the transition onto professional jobsites.
Her experience can help someone considering a drywall business think about the skills and training that should come before operating independently.
It also provides a realistic look at the physical nature of drywall finishing and one pathway for developing jobsite knowledge before taking on greater responsibility.
Related Articles
- How To Start a General Contracting Business
- How To Start a Construction Business
- How To Start a Home Renovation Business
- How To Start a Custom Home Construction Business
- How To Start a Kitchen Remodeling Business
- How To Start a House Painting Business
Sources:
- OSHA: Silica Standard Drywall Exclusion, Silica Construction Standard Info, Stilts and Scaffold Interpretation
- U.S. EPA: RRP Program for Contractors, RRP Firm Certification, Lead RRP Rule Q and A, Asbestos Materials and Demolition
- City of Albuquerque Environmental Health: AHERA vs NESHAP Guide
- IRS: Get an EIN
- U.S. Department of Labor: Drywall Worker Misclassification
- Bureau of Labor Statistics: Drywall Installers and Tapers
- Gypsum Association: GA-214 Levels of Finish
- Construction Specifier: Gypsum Finish Report Revision
- Archtoolbox: Drywall Level of Finish
- BNP Media Continuing Education: ASTM C840 and Finish Levels
- Peerless Environmental: Asbestos in Older Drywall
- National Drywall Authority: Drywall Licensing Requirements
- HomeProBadge: Contractor Licensing Checkpoints
- Procore: Contractor License Guide
- AIA Contract Documents: Construction Payment Process
- Werx: Managing Retainage Billing
- Contractor Capital Guide: Drywall Working Capital
- ContractorPlus: Drywall Bid Formula
- SafetyNow: Dangers of Drywall Safety Talk
- LeadCheck: RRP Rule Thresholds