What Is a Button Making Business?
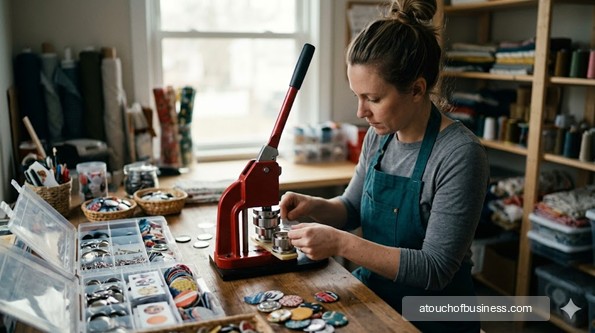
As a business owner in the button industry, you design and produce pinback buttons—small, wearable promotional or novelty items made from a metal shell, a printed paper graphic, a clear protective film, and a pin backing.
You press those four components together using a button-making machine, and the result is a finished, ready-to-wear button in seconds.
Beyond the classic pinback, you can produce magnetic buttons, keychain buttons, pocket mirrors, and bottle opener buttons using the same type of press with different backing components.
Customers range from schools and nonprofits to political campaigns, local small businesses, bands, sports teams, event organizers, and individual buyers looking for custom or novelty items.
The startup cost is low compared to most manufacturing businesses, and many owners start from a spare room at home. But low barriers to entry also mean real competition — and this is a volume-dependent business where the math must work before you spend anything.
The startup process has clear stages. Work through them in order and you’ll avoid the most common early mistakes.
Is This Business a Good Fit for You?
Before you research presses and suppliers, spend some honest time on this question: does this type of work actually suit the life you want?
Button making is hands-on, repetitive production work. A typical day involves printing graphics, cutting circles, pressing buttons in batches, quality-checking each one, packing orders, and communicating with customers about artwork and deadlines.
Do you enjoy that kind of focused, detail-driven routine? Or does the idea of pressing hundreds of buttons by hand sound more tedious than satisfying?
This is also a volume-dependent business. You need to produce and sell a significant number of buttons to generate meaningful income. If you’re looking for high-ticket sales, this isn’t that model.
Not Sure This Is the Right Business for You?
Answer 5 quick questions and instantly match with the best business idea from our library of 677 free startup guides. No email, no sign-up.
Find My Business IdeaAsk yourself these questions before moving forward:
- Are you comfortable with repetitive manual production tasks performed consistently and carefully?
- Do you have basic graphic design skills, or are you willing to learn?
- Can you handle the financial uncertainty of building an order base from scratch?
- Does your household budget allow for a startup period without guaranteed income?
- Does your family or household support this commitment of time, space, and money?
Being passionate about the business matters, too. Read about why passion plays a key role in business success before you commit.
One of the most useful things you can do early is talk with people who already run button-making or small custom print production operations — in non-competing markets or different niches.
Real business owner conversations give you perspective no article can fully replace.
Ask them what a realistic week looks like, how they handle slow periods, and what they wish they’d known before starting.
Go into those conversations with prepared questions. Each owner’s path is different, but the patterns they share are worth paying attention to.
Red Flags Before You Start
Some of these warning signs are about fit. Others are about the business itself. Pay attention to both before you spend anything.
Heavy online competition from large producers:
Companies like Pure Buttons, Busy Beaver Button Co., and Buttonworks operate at industrial scale. They offer one-to-three-day turnaround, free shipping, and pricing driven by automated equipment and bulk supply purchasing that a small manual operation can’t approach.
If your plan is simply to sell custom buttons online, you’re entering a market with well-funded competitors. Your position needs to be about something other than price.
Local relationships, small minimums, niche designs, or on-site event pressing are more defensible angles than competing on volume or cost alone.
Online marketplace saturation:
A search for custom pinback buttons on Etsy returns thousands of sellers. Breaking through without a distinct niche or a strong body of positive reviews is difficult.
If Etsy is your planned primary channel, research the market deeply before committing. Look for a sub-niche that isn’t already crowded before deciding this is your launch path.
Thin margins on small-run custom orders:
A custom order for 25 to 50 buttons carries high per-unit labor cost relative to what you can reasonably charge. Unless you price those jobs correctly from the start, small custom runs can be unprofitable.
Build your pricing model before you open. If the math doesn’t work for the order volume you expect, reconsider the model — not just the price.
Low barrier to entry means ongoing new competition:
No certification, licensing, or significant capital requirement limits who can start a button-making business. New competitors can enter your market or Etsy niche at any time.
Build client relationships and quality consistency from day one. Those are harder to replicate than equipment.
Copyright risk if you don’t vet artwork:
Pressing and selling buttons with unlicensed logos, band artwork, sports team marks, or trademarked characters without authorization exposes you to intellectual property liability. This is a real risk, not a theoretical one.
Build a rights-confirmation step into your order intake process before taking your first custom job.
This is a stable market — but not a fast-growing one:
Pinback buttons are a steady-demand product with consistent institutional buyers. The category isn’t shrinking, but it isn’t surging either. Plan for moderate, consistent demand — not rapid growth.
If your income projections depend on fast sales volume right out of the gate, reassess before committing.
Step 1: Assess Owner Fit and Motivation
The first step isn’t buying a press. It’s being honest with yourself about whether this business suits your personality, your schedule, and your financial situation.
Button making isn’t physically demanding, but it is mentally repetitive. Quality control — catching a misaligned graphic or a poorly crimped edge before it ships — requires consistent attention across every button you press.
Are you the kind of person who maintains that standard through the 200th button of a run, not just the first 20?
Think carefully about the income reality, too. This business earns through volume. You’ll need to press and sell a significant number of buttons consistently to support yourself.
If you’re planning this as supplemental income alongside other work, the volume requirement is more manageable. If you’re hoping this becomes your primary livelihood quickly, verify the numbers first.
Talk with people who run button-making or small custom production operations before you spend money. Seek out owners in non-competing markets — different regions or different niches — so they’ll speak candidly.
Prepare specific questions before those conversations. Ask what a realistic production week looks like, which customer types are most reliable, what they’d do differently if starting over, and whether the income justifies the time investment.
Step 2: Define Your Business Model and Niche
Before you buy equipment, decide how you’ll produce and sell buttons — and who you’ll produce them for. Your model shapes every major decision that follows.
The most common models for a button-making startup are:
- Custom orders for local clients — schools, nonprofits, sports teams, campaigns, local businesses, event organizers. Relationship-based, with repeat clients and lower shipping complexity.
- Online custom orders — through Etsy, Shopify, or a standalone site. Broader reach, but requires photography, order management systems, and reliable shipping setup.
- Craft fair and event sales — selling pre-made designs directly to the public in person. Requires inventory on hand, event permits, and booth logistics.
- Wholesale or bulk supply — producing buttons for other sellers, printers, or organizations at volume. High output, lower per-unit margin, and production efficiency is critical.
- Hybrid models — combining two or more of the above.
Your model also determines which product types you’ll offer at launch. Pinback buttons are the core product, but you may also offer magnetic buttons, keychain buttons, pocket mirrors, bottle opener buttons, or badge reels. Each alternate backing type requires its own matched die and supply components.
Decide which button sizes you’ll press before purchasing anything. The 2.25-inch pinback button is the most commonly used size in the U.S. — the standard for campaigns, photos, and promotional use. Other common sizes include 1 inch, 1.25 inch, 1.5 inch, and 3 inch. Each size requires its own die set and matched supply components.
Also decide whether you’ll offer custom design services or require customers to submit print-ready artwork. Handling design work adds complexity but can increase the value of each order.
Starting with one model, one or two sizes, and a clear target customer gives you a manageable launch. You can add sizes and channels once your production flow is running smoothly.
Step 3: Research Local Demand and Competition
Understanding your local market before committing to equipment is a practical reality check — not optional prep work.
Look for potential custom order clients in your area: schools, PTAs, sports leagues, nonprofits, local political campaigns, faith organizations, small businesses, and event planners. Are there enough active organizations in your market to generate a steady flow of custom orders?
Then check the competitive landscape. Search Etsy, Google, and local directories for button businesses already serving your area or targeting your online niche. Look at their pricing, turnaround times, order minimums, and product range.
Where is the gap? It might be faster local delivery, lower minimums, a specific design style, or on-site pressing at events. Identify your position before spending on equipment.
Understanding local supply and demand dynamics helps you make a better go/no-go decision before you commit.
If you can’t identify a handful of realistic, willing customers through direct conversations before launch, pause before purchasing anything.
Step 4: Assess Profit Potential and Break-Even Logic
Do this before you buy a press. Understanding whether the numbers can work for your specific model is one of the most important steps you’ll take.
Start by identifying your fixed costs — equipment, insurance, platform fees, event fees, and anything you’ll pay regardless of how many buttons you produce.
Then calculate your per-button variable cost: the supply set (shell, mylar, pin back), a share of paper and ink, and a portion of packaging. Add those together and compare them to what you can realistically charge per button in your chosen channel.
Research what comparable sellers charge for buttons at similar quantities. That sets your pricing ceiling. Compare it to your cost floor. The space between them is your working margin — and it’s often tighter than new owners expect.
The large commercial producers in this space operate at industrial scale with bulk purchasing power you can’t match as a small manual operator. You generally can’t compete with them on price for standard online custom orders.
That’s not a reason to walk away — it’s a reason to choose a position that isn’t about price. Local service, small minimums, faster turnaround, or niche design work can all support healthy margins that commodity producers aren’t focused on.
Think through slow periods, too. What do you need in operating capital to keep production running between order cycles? How many buttons per month do you need to press and sell to cover your costs and pay yourself?
Calculate that number with your own projected costs and prices. If the volume seems unrealistic for your market, revise the model before investing further.
For help thinking through profitability before launch, see how to estimate revenue and profitability for a new business.
Business Plan
A written business plan pulls your research and decisions together into a working document before you open.
Document your business model, target customers, product range, sales channels, pricing structure, and supply chain plan.
Include your profit potential analysis. What are your fixed monthly costs? What is your per-button cost at your expected production volume? How many buttons do you need to sell each month to cover those costs and pay yourself?
Work through the break-even logic using your own projected costs and prices — not industry averages. The answer will tell you whether your planned model is viable before you spend on equipment.
Your plan should also document your startup costs, funding source, operating capital reserve, and the legal and permit steps you need to complete before opening.
Lay out what needs to be confirmed and in place before you take your first order. That pre-opening checklist becomes your launch roadmap.
For a structured approach, see how to write a business plan.
Step 5: Choose a Legal Structure and Register the Business
Most button-making startups begin as a sole proprietorship or LLC. Both are common, but they carry different levels of liability protection.
Because you’re manufacturing a product with a pin component — something that could physically injure someone if it fails — an LLC is worth serious consideration. It provides a legal separation between your personal assets and any business liability claim.
Read through the differences between an LLC and a sole proprietorship before deciding.
Once you’ve chosen a structure, register your business with the appropriate state agency. Check your state’s Secretary of State website or business registration portal for the correct process and filing fees.
If you plan to operate under a business name different from your legal name, you’ll need to register a DBA (doing business as), sometimes called a fictitious business name. Some states handle this at the state level; others require county registration. Check with your state’s Secretary of State or your county clerk’s office.
Apply for an Employer Identification Number (EIN) from the IRS at irs.gov. You’ll need it to open a business bank account and for tax filing, even if you have no employees.
Step 6: Obtain Licenses, Permits, and Tax Registrations
No federal manufacturing license is required to produce pinback buttons. Federal special permits apply only to regulated product categories — alcohol, tobacco, firearms, food, and drugs — none of which apply here.
At the state and local level, several registrations apply to most button-making operations.
Verify each of these before your first sale:
- General business license: Most cities and counties require one. Check your city or county clerk’s office or local business licensing portal.
- Home occupation permit: If you’re working from home, many jurisdictions require this permit to confirm your production activity is allowed in a residential zone. Check your local zoning or planning department.
- Zoning confirmation: Verify your workspace is zoned for light manufacturing or home-based production. Do this before signing any lease or committing to a location.
- Seller’s permit / sales tax registration: Pinback buttons are tangible goods subject to sales tax in most states. You’ll need to register before making your first taxable sale. Contact your state’s Department of Revenue or Taxation for the correct process and registration name — it varies by state.
- Online and multi-state sales tax: If you sell online and ship to buyers in multiple states, economic nexus rules may require you to collect and remit sales tax in states where you reach certain thresholds. Consult a tax professional if your online sales span many states.
For more on the licensing and permit landscape, see business licenses and permits.
Ask your local zoning and licensing offices these questions:
- Does my workspace allow light manufacturing or home-based production at this address?
- Do I need a home occupation permit, and are there restrictions on customer pickups or delivery activity?
- Does my city or county impose a local sales tax I must collect in addition to state sales tax?
Step 7: Choose Your Workspace and Production Setup
Most button-making startups begin at home — in a spare room, a dedicated corner, or a garage space. Low overhead is one of the real advantages of this model, and a home setup is a practical and common starting point.
If you plan to lease a commercial or studio space, confirm zoning for light manufacturing before signing anything. Check whether a certificate of occupancy is required before you can operate. Requirements vary by jurisdiction — contact your local building or planning department.
A functional home production space needs a few practical elements: a stable, flat worktable for your press and printer, organized storage for supplies sorted by size and type, a designated area for quality-checking and packing finished buttons, and adequate lighting for catching production defects.
Think about your production flow before you set up. Where does the printed graphic go after it comes off the printer? Where does it move after you cut it? Where does the finished button go after pressing and inspection?
Laying out your workspace so each step flows naturally into the next reduces wasted motion and speeds your output.
Poor workflow layout is one of the more common early production problems. Fix it before you start taking orders.
Step 8: Select and Purchase Equipment
Your button press is the core production tool. Choose it carefully — the press determines which supply sets you can use, which sizes you can produce, and how fast you can work.
Key decisions about your press:
- Manual vs. pneumatic: Manual lever presses are standard for small to medium production volume. Pneumatic and automatic presses handle higher volume but cost significantly more.
- Single-size vs. multi-size: A dedicated single-size press is faster for production runs but limited to one button diameter. A press with interchangeable dies can produce multiple sizes but requires die changes between sizes, which slows your workflow.
- Multiple presses: If you plan to offer several sizes regularly, owning a separate press for each size is faster and more efficient — at higher upfront cost.
Common press brands include Tecre, American Button Machines (ABM), and MPRO. Research compatibility carefully before purchasing supplies for any press.
You’ll also need these production tools and materials:
- Circle cutter or graphic punch: One per button size you plan to produce. Cuts your printed artwork to the correct diameter before pressing.
- Color inkjet printer: Inkjet printers generally produce higher-resolution color output than laser printers and are the more common choice for button production. Compatible paper is standard bright white stock in the 20–32 lb weight range — not photo paper, which is typically too thick for standard button presses.
- Computer and design software: For creating and adjusting customer artwork. Common options include Adobe Illustrator, Adobe Photoshop, Canva, GIMP (free), and press-manufacturer-provided tools. You’ll need correctly sized templates for every button diameter you produce.
- Button supply sets: Each finished button requires three or four components — a metal front shell, a clear mylar film cover, and a pin back (plus a collet for some smaller sizes). Supply sets must match your press brand and the U.S. American Standard specification. Foreign-made metric-spec parts — sometimes labeled “58 mm” or “25 mm” — are dimensionally different from U.S.-standard parts and will not crimp correctly in a U.S.-spec press.
- Packaging materials: Poly bags, small boxes, padded mailers, labels, tape, and a postage scale if you’re shipping orders.
Order a small test batch of supplies before buying in bulk. Confirm they crimp correctly in your specific press before committing to a large supply inventory.
Step 9: Source Suppliers and Set Up Reordering
Supply chain reliability directly affects your ability to fulfill orders on time. Set this up before you launch.
Identify at least two reliable button supply vendors before you open. Depending on a single supplier creates real risk — a backorder or shipping delay can stall your entire production.
Well-known U.S. supply sources include American Button Machines, Tecre (through Brick City ButtonMakers), MPRO, and UMakeButtons. Confirm that each vendor’s supply components are spec-compatible with your press model before placing any order.
Establish a reorder point for each supply type — the quantity level at which you place a new order. Running out of shells or mylar mid-job forces production stops and missed deadlines.
Track your supply consumption from the start. Knowing how many sets you use per week at your typical order volume tells you how far in advance you need to reorder and how much inventory to keep on hand.
Source packaging materials separately from a general office supply or shipping supply vendor. Compare per-unit costs at different purchase quantities — packaging adds up across high-volume orders.
Step 10: Set Up Pricing
Pricing for a button-making business starts with your actual cost per button for each size you produce.
Add together your per-button supply cost (shell, mylar, pin back), a pro-rated share of paper and ink per button, your packaging cost, and a portion of your overhead and time for each job. That’s your cost floor — the minimum you need to charge to break even on that order.
Then research what comparable sellers charge for the same sizes and quantities on Etsy and through direct competitors in your area. That gives you a realistic pricing ceiling for your market.
For guidance on building a pricing structure, see how to price your products and services.
Key pricing decisions to make before you open:
- Tiered quantity pricing: Per-button price decreases as order size increases. Build your tiers based on your actual cost curve, not competitor pricing alone.
- Size differential: Larger buttons use more material per set and cost more to produce. Price accordingly.
- Design or setup fee: If you’re doing custom design work for clients, charge for that service separately. Your design time has real cost.
- Rush fee: Build a premium for rush orders into your pricing before you take your first one. Rush jobs disrupt your production schedule and should be priced to reflect that.
- Minimum order quantities: Set a minimum for custom jobs that protects your time and covers your setup cost. Small-run custom orders with no minimum can be unprofitable at low prices.
- Platform fees: If selling on Etsy, account for listing fees, transaction fees, and payment processing fees in your pricing. These are real costs per sale.
Prepare a simple quote sheet or pricing table before you open. You’ll need it for the first customer inquiry you receive.
Step 11: Set Up Business Banking and Payment Processing
Open a dedicated business checking account once your EIN and business registration are complete.
Keep your business transactions completely separate from your personal finances from the very start. Mixing them creates accounting problems at tax time and makes it harder to understand whether your business is actually profitable.
For guidance on opening the right account, see how to open a business bank account.
Set up a payment processor for your online channel — Stripe, PayPal, Etsy Payments, or Square are common choices. If you plan to sell at craft fairs or events, you’ll need a mobile card reader that lets you accept cards in person.
For custom orders, set up a simple invoicing tool and decide your deposit terms before taking your first job. A deposit collected before production starts is standard practice — it protects you if a client cancels after you’ve pressed their order.
Step 12: Set Up Insurance
As a manufacturer of a physical product with a pin component, you carry product liability exposure. A pin back that fails and injures someone, or a button ingested by a child, can generate a claim against you.
Obtain general liability insurance that includes product liability coverage before you take your first order. This is a risk-planning step — the exposure is real, and skipping it is a meaningful financial risk.
If you’re operating from home, check your homeowner’s or renter’s insurance policy carefully. Most don’t cover home-based business property or business liability. You may need a separate business rider or a business owner’s policy (BOP) to be properly covered.
If you lease a commercial or studio space, the landlord will likely require proof of general liability coverage before you move in.
If you hire employees at any point, workers’ compensation insurance is required in most states. Check your state’s labor or workers’ compensation agency for the requirements that apply to you.
For an overview of coverage options, see business insurance.
Step 13: Create Your Order Intake and Production Systems
Your production process and order intake systems need to be in place before you take your first job — not built on the fly after you’ve already promised a deadline.
Before opening, set up a clear process for each of these:
- Order intake: How customers submit requests, which artwork file formats you accept, what information you need to produce a quote, and how you confirm order details before production starts.
- Artwork review: How you check that submitted artwork is print-ready, correctly sized for the button diameter, and at sufficient resolution for quality output.
- Copyright confirmation: A step in your intake process where customers confirm they own or hold commercial rights to the artwork they’re submitting. This protects you from intellectual property liability.
- Production batching: Group similar jobs by size and backing type during production runs. Batching reduces die changes and setup time, which directly affects your per-button cost and output speed.
- Quality inspection: Inspect every finished button before packing. Check for proper crimp (the button’s edge should be cleanly folded with no gaps or loose material), correct graphic alignment, clean mylar seating, and functional pin back operation.
- Record keeping: Log every order, invoice, supply purchase, and business expense from day one. You’ll need this for tax filing and for understanding which order types are profitable.
A production calendar helps you manage lead times. Know your cut-off for standard orders versus rush orders, and don’t accept overlapping deadlines you can’t physically meet.
Step 14: Address Copyright and Artwork Compliance
This step protects you from one of the more serious legal risks in the button-making business.
You may only press and sell buttons using artwork you created yourself, artwork a customer owns the commercial rights to, or artwork that is properly licensed for commercial use.
Pressing buttons with copyrighted or trademarked imagery — including band logos, movie and TV characters, sports team marks, gaming characters, or brand identifiers — without proper authorization is a federal intellectual property violation. This applies whether the customer submits the artwork or you source it yourself.
Build these protections into your process before taking any order:
- Include a rights-confirmation clause in your order intake form. Require customers to confirm they own or have commercial rights to any artwork they submit.
- Refuse orders that clearly involve licensed or trademarked imagery unless the customer can provide documentation of their authorization.
- Don’t use stock images, clip art, or design elements in your own button designs unless you’ve confirmed they are licensed for commercial use.
This needs to be a standard part of your workflow from the start — not something you address after a problem arises.
Step 15: Test Production and Create Samples
Before you take your first live order, press a full test batch using your actual equipment, supplies, and production process.
Test every size you plan to offer. Check the crimp, the graphic alignment, the mylar seating, and the pin back function on every button in the test batch. Identify any problems with your press setup, your cutter calibration, or your print output and resolve them now — not during a rush order for a paying customer.
This is also your chance to identify bottlenecks in your production flow. Where does the process slow down? Where do defects tend to occur? Adjust your workspace layout or workflow before those problems cost you a customer.
Create a set of finished sample buttons in each size and backing type you offer. You’ll need these for customer reference — showing print quality, size options, and product types.
Photograph your samples well. If you’re selling online or showing your work to prospective clients, your photos are the first thing customers use to judge your quality.
If you plan to sell at craft fairs or events, do a dry run of your full booth setup before your first actual event. Work out the table arrangement, supply organization, payment setup, and sample display before you’re doing it in front of customers.
Opening-Day Red Flags
Before you take your first order, run through this list. Each item is a known source of early production failures or missed deadlines.
Supply compatibility not confirmed:
If you haven’t tested your actual supply sets in your actual press before going live, do it now. U.S.-spec presses don’t produce a correct crimp with foreign-metric-spec parts. Discovering this on a live order is expensive.
No proof-approval step before production:
If you’re handling design or print setup for a client, confirm their approval in writing before you press a single button. Reprinting an order because the customer wanted a different font or color is a cost you absorb.
No deposit requirement in place:
Custom orders represent real material and time cost before the customer pays. Without a deposit policy, a cancellation after production starts is a loss you carry. Set your deposit terms before you open.
No copyright intake step:
If your order intake process doesn’t include a step where customers confirm their rights to submitted artwork, you’re exposed to intellectual property liability from your very first custom order.
Supply inventory too low to complete a first order:
Have enough supply sets on hand to complete at least one or two full orders before you open. Running out of shells or mylar mid-production on your first job damages your reputation before you’ve had a chance to build one.
Insurance not in place:
General liability coverage with product liability protection should be active before you take any order or attend any event. Don’t open without it.
No quality-check step before packing:
Shipping defective buttons — poor crimp, misaligned graphic, stuck pin back — on your first few orders is the fastest way to generate negative reviews. Build the inspection step into your process before launch.
Frequently Asked Questions
Do I need a special license to start a button-making business?
No industry-specific manufacturing license is required for pinback button production at the small-business level.
You’ll need a general business license from your city or county, a seller’s permit from your state before making taxable sales, and possibly a home occupation permit if you’re operating from home. Requirements vary by location — verify with your city, county, and state business agencies before opening.
Can I legally press and sell buttons using any artwork I want?
No. You may only press and sell buttons using artwork you created yourself, artwork a customer owns the commercial rights to, or artwork properly licensed for commercial use.
Pressing buttons with copyrighted or trademarked imagery — band logos, sports team marks, movie characters, brand identifiers — without authorization from the rights holder is an intellectual property violation. Build a rights-confirmation step into every order intake process.
What button size should I start with?
The 2.25-inch pinback button is the most commonly produced size in the U.S. — the standard for campaign, photo, and promotional buttons. Starting here gives you the widest range of customer applications.
You can add other sizes — 1.25 inch, 1.5 inch, 3 inch — as your operation grows. Each size requires its own die set and matched supply components.
Can I use any button supplies in my press, or do parts need to match?
Parts must match your press brand and specification. U.S.-made presses are built to American Standard dimensions. Foreign-made metric-spec parts — often listed as “58 mm” or “25 mm” — are dimensionally different and won’t crimp correctly in a U.S.-spec press.
Always confirm supply compatibility with your press manufacturer before ordering in bulk. Order a small test batch first.
Is a home-based button-making operation legal?
In most locations, yes — but home occupation rules vary widely. Your local zoning ordinance may restrict the type of production activity allowed in a residential zone, limit customer visits to your home, cap the percentage of your home used for business, or restrict signage.
Check with your city or county planning or zoning department before operating from home.
How do I handle sales tax on button sales?
Pinback buttons are tangible goods subject to sales tax in most states with a general sales tax. You’ll need a seller’s permit — the name varies by state — before your first taxable sale. Register through your state’s Department of Revenue or Taxation.
If you sell online and ship to buyers in multiple states, research whether you have economic nexus obligations in those states. Consult a tax professional if your online sales reach buyers across many states.
How do I compete with large online button companies that offer very low prices?
Small operators generally can’t match large producers on per-unit price for standard custom orders. Those companies use industrial-scale equipment and bulk supply purchasing that a manual home-based operation can’t replicate.
The most effective positions for small operators are local relationships, very small minimums, faster turnaround for tight deadlines, on-site pressing at events, or niche design markets that large producers aren’t focused on.
What does a typical custom order workflow look like?
A standard workflow runs like this: receive the inquiry, confirm size and quantity, deliver a quote, collect a deposit, receive and review artwork files, confirm print-readiness and artwork rights, print and cut the graphics, press buttons in batches by size, quality-inspect each button, then pack and ship or arrange pickup.
For repeat clients with pre-approved artwork, the process shortens significantly. Batching jobs by size during production reduces die changes and speeds your overall output.
Expert Advice From People in the Button Making Business
These interviews share practical lessons from people involved in pinback buttons, button badges, custom promotional buttons, and garment button manufacturing. They discuss equipment, materials, design, pricing, customer demand, production flow, niche focus, and the realities of turning button making into a business.
Readers can use these examples to compare different button business models before starting. The advice can help with choosing a niche, testing demand, planning production capacity, setting up customer-facing offers, and avoiding scattered decisions that slow progress.
This interview covers how Tracy Updike moved from handmade accessories into a button-making business, then developed live event products using pinback buttons, magnets, coasters, and pocket mirrors.
It is useful for someone starting this business because it shows how a small product can become part of a focused creative offer. Her advice about planning, focus, and not chasing every idea is especially practical.
Meet the PureButtons Staff, Jeff Nemecek-Owner
This interview features Jeff Nemecek of PureButtons discussing custom promotional pinback buttons, customer value, pricing, stress, production improvements, and running a growing button company.
It is useful because it gives insight into service quality, production efficiency, and pricing decisions. Someone starting out can learn how customer expectations and operations affect the business behind the product.
Business Spotlight: Becka Makes Buttons
This article contains an interview-style profile of Becka Brisbin, owner of Becka Makes Buttons, covering hand-pressed button orders, button parties, off-site events, and a retail button shop.
It is useful because it shows how button making can be packaged as both a product and an experience. New business planners can study how community, events, and custom orders create different revenue paths.
This written interview with Sylvester Kay-Adade discusses Pearl Kreations, a business that began with button badges, including startup research, equipment, materials, networking, social media, and business planning.
It is useful because it explains how a button badge idea moved from research to sales activity. The discussion of networking, marketing, and business plans gives practical points for a low-cost startup model.
Reviving the UK Button Making Industry with Courtney & Co Button Makers
This audio interview features Andrea and David Courtney of Courtney & Co, a UK button manufacturer producing buttons from different materials for brands and designers.
It is useful because it highlights machinery, materials, specialist skills, and supplier relationships. Someone considering a more production-focused button business can learn what goes into manufacturing beyond simple craft production.
Related Articles
- How To Start a Keychain Business
- How To Start a Mug Printing Business
- How To Start a Screen Printing Business
- How To Start a Promotional Products Business
- How To Start a Laser Engraving Business
- How To Start a Vinyl Decal Business
Sources:
- American Button Machines: How to Start a Button Business, Can I Make Money Selling Buttons, How to Start a Home Button Business, 5 Reasons Button Making Is a Great Home Business, Button Making Tutorial, 2.25-Inch Pinback Button Set, 1-Inch Pinback Button Set
- MPRO USA: How to Start a Button-Making Business
- ButtonMakers.net (Brick City): Button Maker Machines & Supplies, What You Need to Get Started
- UMakeButtons.com: Standard Pinback Button Parts
- People Power Press: Printer & Ink for Button Graphics
- ButtonMaker.app: Paper, Ink & Printing Guide
- Buttonworks: Bulk & Wholesale Custom Buttons
- Busy Beaver Button Co.: Custom Button Maker
- Pure Buttons: Custom Button Pins
- 4OVER4: Pin Back Buttons Marketing Guide
- Wikipedia: Pin-back Button
- Nolo (legal-info.lawyers.com): Licenses & Permits for Manufacturers
- Nolo: Home-Based Business Licenses & Permits
- Wolters Kluwer: Seller’s Permits Explained
- U.S. Chamber of Commerce (CO-): Seller’s Permit & Sales Tax ID
- Avalara: Sales Tax Permits Guide
- Wexford Insurance: Manufacturing License & Certification
- Insurance.com: Product Liability for Small Businesses
- General Liability Insure: Button Manufacturers Insurance
- FindLaw: Product Liability & Small Business
- U.S. Copyright Office: Visual Artists & Copyright
- FitSmallBusiness: Credit Card Payments at Craft Shows
- Legalzoom: Business License & Permit Checklist