A First-Time Owner’s Startup Plan for a Concession Stand
Concession Stand Overview
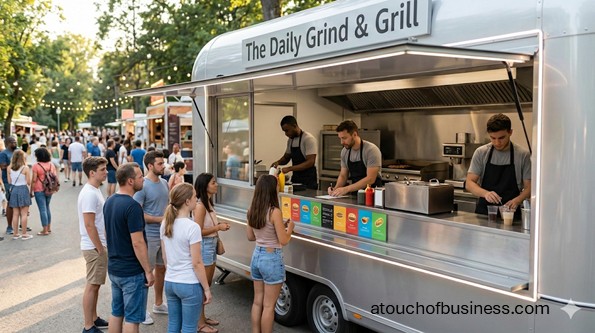
A concession stand is a small food-and-drink setup that serves ready-to-eat items to the public. You’ll usually sell at fairs, sports fields, community festivals, parks, school events, or inside a venue that already has foot traffic.
Your format can be temporary (set up for a single event), permanent (a fixed stand at a venue), or mobile (a cart, trailer, or truck). That choice changes what you’re allowed to serve, what equipment you need, and how inspections work.
Many people buy from a concession setup for the same reasons: it’s nearby, it’s fast, and it fits the moment. That means your early planning should focus on speed, food safety, and the realities of selling in a tight time window.
Common items include hot foods (like grilled items, fries, nachos, pretzels), cold treats (like shaved ice or ice cream), and drinks (bottled, fountain, or prepared beverages). Some operators also sell shelf-stable, prepackaged items, but packaging and labeling questions can come up if you produce packaged foods yourself.
The tradeoffs show up quickly in this business.
- Pros: You can start smaller than a full restaurant, test demand at specific events, and keep the offer tight to reduce equipment and compliance complexity.
- Cons: Approvals can stack (health, event, local licensing, fire), site limits can restrict what you can serve, and seasonality or event acceptance can impact your early planning.
Is A Concession Stand The Right Fit For You?
A concession stand can look simple from the outside. In reality, you’re building a small, regulated food setup that has to work under pressure, in public, with real safety rules.
Ask yourself if you like the pace. Can you stay calm when the line grows, the power outlet is far away, and you still need to keep food at safe temperatures?
Here’s a gentle reality check: income can be uneven, hours can be long around event days, and your family schedule may need flexibility. If you want a predictable routine and guaranteed weekends, this may not match the life you want.
“Are you moving toward something or running away from something?”
Starting to leave a job or change your situation can be part of your motivation. But if that’s the only reason, the hard parts of setup and approvals can feel heavier than you expected. If you want a broader readiness check, read Points to consider before starting a business.
Not Sure This Is the Right Business for You?
Answer 5 quick questions and instantly match with the best business idea from our library of 677 free startup guides. No email, no sign-up.
Find My Business IdeaPassion matters here in a practical way. It helps you keep working when paperwork piles up, equipment fails a test run, or you need to simplify your offer to meet local rules. If you want a grounded view of how persistence shows up in real businesses, see how passion affects your business.
One more important fit move: talk to owners you will not compete with (different city, region, or market). For more context on what to ask, visit inside advice from real business owners.
Practical fit questions to ask those non-competing owners:
- What surprised you most about permits and inspections for your setup type?
- Which item caused the biggest delay before your first sale?
- What part of the day did you underestimate: prep, transport, setup, or cleanup?
- If you started again, what would you simplify in your offer to make opening easier?
Choose Your Selling Model And First Locations
In a concession business, a “good idea” only becomes real when it fits a specific place. A booth at a weekend festival, a cart near a sports field, and a permanent stand inside a venue can have totally different requirements.
Start by choosing your first selling path: temporary event booth, mobile cart/trailer, or a fixed stand. Then pick a short list of target venues or events and gather their vendor rules.
What to collect from each organizer before you commit:
- Vendor application process, deadlines, and fees (flat booth fee or percentage of sales)
- Whether proof of insurance is required and who must be listed
- Hours, setup time, teardown rules, and waste disposal expectations
- What utilities exist on-site (power access, water access, distance from your space)
Validate Demand Without Overbuilding
A concession stand is easiest to launch when you prove demand first and build gear second. The fastest way to learn is to focus on one or two event types where your offer matches the crowd.
Look for signs of real demand: repeat events with steady attendance, long lines at food vendors, and organizers who publish vendor requirements early. If you can’t get accepted into events or secure a selling spot, your plan may stall no matter how good the concept is.
Before you spend, make sure you can answer: who is buying (families, sports fans, students), when they buy (short breaks, halftime, after performances), and what speed they expect at the counter.
Build A Simple Offer That Matches The Setup
This business rewards a tight offer. The more items you add, the more you multiply prep steps, storage needs, and food safety risks.
Decide what you will do on-site versus what will be prepared elsewhere. Some setups rely on prepackaged items, some use a commissary/shared kitchen, and others cook on-site with grills, fryers, or griddles.
As you finalize what you’ll sell, keep one constraint front and center: your equipment must support safe hot holding and cold holding for the items you plan to serve.
Learn The Permit Path For Food Sales In Your Area
Before you buy major equipment, figure out which food permit category your setup falls into. Temporary event operations, mobile units, and fixed stands often follow different approval paths.
Your permitting authority is usually your city/county health department or a state health agency. Use their website to find the correct program and the exact application list for your model.
When you’re verifying your path, use direct sources that explain the steps and documents you’ll need. For example, the federal government publishes the FDA Food Code as a model for safe retail food practices, and the Food and Drug Administration also maintains a directory to find state retail food codes and regulations.
If you plan to package foods for retail sale (not just serve for immediate consumption), labeling rules may apply. A starting point is the federal regulation for nutrition labeling requirements, along with the Food and Drug Administration’s Food Labeling Guide.
Decide What Must Be True For Opening Day To Work
In a concession setup, a small missing piece can wreck the day. A single forgotten thermometer, an undersized cooler, or no plan for wastewater can turn into a shutdown or a scramble.
Write down what must be true for your first event or opening day to go smoothly. Keep it practical and specific to your setup type: utilities, transport, holding capacity, handwashing, and proof documents.
If you’re unsure about anything, make a short list of items to confirm with the permitting office and the event organizer, then get those answers before you spend.
Choose A Business Name And Lock Down Your Online Basics
Even a small concession stand benefits from a clean identity. Your name needs to work on a banner, a menu board, and vendor applications.
Pick a name you can use consistently, then secure the matching domain and social handles. If you’re applying to events, having a simple website or landing page can help organizers and venues verify who you are.
Brand assets to have ready before you apply to events:
- Logo or simple wordmark
- Basic brand colors and readable fonts
- Clean photos of your setup concept (even mockups at first)
- A short description of what you sell and how you operate
Form The Business And Get Your Tax IDs
This is the part where you make the business “real” on paper. Your state handles entity registration (like a limited liability company), and the federal government handles your Employer Identification Number.
If you want an Employer Identification Number for banking, permits, or hiring, the Internal Revenue Service explains how to get an employer identification number.
You’ll also want to understand how federal and state tax IDs fit into startup tasks. The U.S. Small Business Administration summarizes what owners typically do to get federal and state tax ID numbers.
Set Up Sales Tax And Employer Accounts If Needed
A concession stand may sell taxable items, but the details can differ by state and sometimes by locality.
If you plan to hire, employer accounts can add another layer.
Start by checking your state’s tax agency site for sales and use tax registration steps. If you’re selling in multiple cities or counties, get clear on where returns are filed and what records you should keep by location.
If you plan to hire within the first 90 days, also check your state’s labor or workforce agency for employer registration steps, including unemployment insurance and withholding requirements.
Plan Your Concession Stand Equipment By Category
Don’t chase the biggest setup first. Build the equipment list around your offer and your first selling locations, especially power access and food safety requirements.
Start with categories, then choose specific items that fit your model (event booth, cart, trailer, or fixed stand). Here’s an organized launch list you can tailor:
- Cooking And Heating: griddle/flat-top, grill/charbroiler, fryer, steam table or hot wells, heat lamps, hot holding cabinet
- Cold Holding: commercial refrigerator (fixed or larger unit), portable coolers, insulated carriers, dedicated ice chests
- Prep Tools: food-grade prep tables, cutting boards, knives, tongs, spatulas, ladles, mixing bowls, lidded storage bins, portion tools
- Service Items: serving baskets/trays, condiment dispensers, cup and lid organizers, beverage dispensers (if used)
- Food Safety Tools: probe thermometers, temperature logs, time/temperature control supplies
- Point Of Sale: payment device/tablet, card reader, receipt option, cash box
- Transport And Setup: labeled totes, folding tables/canopy (if allowed), dolly/hand truck, tent weights, anti-slip mats
Set Up Handwashing, Sanitizing, Water, And Waste Handling
Food safety is not optional in this business. Even when the setup is small, you still need a workable plan for handwashing and cleaning food-contact surfaces.
Your permitting office will tell you what’s required for your model, but many setups require a handwashing method (soap and paper towels), sanitizer and test strips, and a plan for trash and wastewater.
If you use multiuse utensils, a warewashing method may also be required.
What to verify for your exact setup:
- Whether a portable sink is required or if another handwashing method is accepted
- Whether you need a potable water container/tank and a wastewater container/tank
- Whether utensil washing must be done on-site, at a commissary, or through approved processes
Plan Power, Fuel, And Fire Safety Before You Buy Gear
This decision changes your whole build. A fryer and a grill can push you toward more power, more fuel, and more safety requirements than you expected.
Confirm if your events provide power, and if not, whether you’ll use a generator. If you use propane for cooking, plan for safe cylinders, regulators, and transport rules, and ask the fire marshal or fire prevention office what inspection or equipment is expected for your type of operation.
At minimum, plan for the right fire extinguisher type for your equipment, and make sure your setup can be operated safely in a crowded public space.
Choose A Commissary Or Shared Kitchen If Your Model Needs One
Some concession setups can prepare everything on-site. Others need a commissary/shared kitchen for prep, storage, water filling, wastewater disposal, or daily servicing.
If your permit path requires a commissary agreement, get it in writing early. You don’t want your first event delayed because you can’t show where prep or servicing happens.
When you compare locations, focus on fit: storage access, hours, cleaning expectations, and how easy it is to load and unload before event days.
Estimate Startup Costs And Decide What To Buy First
Concession startups can scale from simple to expensive fast. Common cost drivers include your build type (cart vs trailer vs fixed stand), cooking equipment, cold holding capacity, utilities (generator or hookups), and approvals/inspections.
Build your budget using categories so you can stage purchases. Typical planning buckets include legal setup, permits and inspections, commissary access, equipment and build-out, initial food and packaging inventory, branding/signage, payment setup, and insurance.
A practical way to stay ready without overbuying is to purchase essentials that match your first selling location, then expand after you prove demand. If you want a general checklist for permits and setup tasks, the Small Business Administration has a launch guide on how owners apply for licenses and permits.
Set Prices Using A Method You Can Explain
Pricing in a concession stand is not just about food cost. Your event fees, packaging costs, payment processing fees, and expected waste all affect what you need to charge.
Common ways owners set pricing include cost-plus (ingredients and packaging plus margin), bundles (main item plus drink), and tiered sizing (small/regular/large, plus add-ons). Your best method is the one you can keep consistent while still hitting your targets.
Before you finalize prices, confirm how you’ll handle sales tax in your area and whether prices must be displayed in a specific way at your venue.
Choose Funding And Get Banking Ready For Payments
Funding choices should match your first selling plan. A temporary event booth can often start with staged purchases, while a trailer build might push you toward financing.
Common funding paths include owner cash, small business loans or lines of credit, equipment financing, and SBA-backed options. The Small Business Administration explains its Microloan program if you want a starting point for smaller financing routes.
Before you accept your first payment, set up business banking and a payment processor. The Small Business Administration outlines what owners typically need to open a business bank account.
Set Up Suppliers And Event-Day Inventory
Early supplier setup can prevent the last-minute scramble that kills your first event. You’ll likely need food ingredients, beverages, ice, packaging, and fuel (if applicable).
Supplier options range from broadline distributors to cash-and-carry restaurant supply stores, beverage distributors, and packaging suppliers. Some require account approval, resale certificates, or minimum orders, while others allow fast pickup with fewer steps.
When you pick vendors, prioritize reliability, consistent stock, and packaging compatibility (cups and lids that actually fit, heat tolerance, and leak resistance).
Choose Insurance For Venues And Real Risks
Many venues and events require proof of insurance before you can sell. Even when insurance isn’t a legal requirement for your setup, it can be a practical gate you have to pass to get accepted.
Separate what’s legally required from what’s commonly requested. Legal requirements often depend on whether you have employees or specific vehicle use; recommended coverage often includes general liability and product liability for food service risks.
If you want a plain-language overview of common startup coverage, the Small Business Administration explains how owners get business insurance.
Create Your Vendor Packet And Proof Items
Organizers and inspectors usually want the same types of proof. Having a simple “vendor packet” keeps you from rebuilding documents every time you apply to a new event.
Build a folder (digital and printed) that includes your permits, your insurance certificate when required, your business identity details, and your setup description. Keep it updated so you can respond quickly when a venue asks for documents on a deadline.
Typical items to include:
- Business registration basics and tax ID details (as needed for applications)
- Food permit documents required to operate for your model
- Proof of food safety training if your area requires it
- Insurance certificate and any “additional insured” paperwork when a venue requires it
Plan The Physical Setup And Storage For A Smooth Day
A concession setup is a moving system: transport, setup, service, teardown. If your physical layout is messy, your day will feel messy too.
Plan where everything goes: hot side, cold side, service window, payment point, condiment area, and trash. Build storage and transport bins so your setup can be repeated without guesswork.
If you’re using a canopy or tent at events, check whether weights are required and what footprint you’re assigned. Don’t assume you’ll have extra space.
Decide If You Need Help On Busy Days
Many concession stands start with a solo owner, especially at small events. But busy days can overwhelm one person once you add cooking, payment, restocking, and compliance tasks.
If you expect long lines, plan whether you’ll add help early (even part-time). If you hire, you’ll need employer registrations and you may trigger insurance and training requirements tied to employees.
Fit question: do you enjoy fast teamwork in public, or do you prefer working alone? Your answer should influence the model you choose.
Do A Full Test Run Before You Sell To The Public
Don’t aim for perfect. Aim for stable. A test run shows you whether your power plan works, your cold holding lasts, and your service timing makes sense.
Run a full setup practice with the same equipment, the same transport method, and the same packaging you’ll use on event day. Cook and hold items like you will in real service, and confirm food temperatures with probe thermometers.
If you need a reference for safe internal cooking temperatures while building procedures, the Food Safety and Inspection Service provides a Safe Minimum Internal Temperature Chart.
Concession Stand Pre-Opening Readiness Checklist
This checklist is meant to reduce last-minute surprises. Your final week should be about confirming, testing, and staging—not making major decisions.
Use this as a last-pass readiness list and adjust it to your model and your local requirements.
- Approvals: correct food permit type confirmed; applications approved; inspections completed as required
- Event Access: vendor acceptance confirmed; setup time and teardown rules confirmed; booth location and utilities confirmed
- Food Safety: thermometers ready; temperature logging method ready; handwashing and sanitizing supplies staged
- Water And Waste: potable water plan and wastewater plan confirmed where required; trash plan confirmed with event rules
- Equipment: cooking and holding equipment tested; backup essentials packed (extra utensils, cords, gloves, sanitizer supplies)
- Suppliers: food, ice, and packaging orders confirmed; pickup or delivery timing confirmed
- Payments: payment device tested; items and tax settings set as needed; cash box and starting change prepared
- Proof Folder: permits, training proof, and insurance certificate ready to carry on-site
- Signage: pricing display ready; business name signage ready; any required postings prepared
A Pre-Launch Day In Your Life
In the pre-launch phase, a lot of your time is paperwork and testing, not selling. That’s why fit matters: you need to be willing to do the setup work before you get the fun part.
You might spend the morning finishing vendor forms, confirming utility access with an organizer, and scheduling or preparing for inspections. Midday could be a commissary visit to test prep flow and storage. Late afternoon is often staging: labeled totes, sanitizer supplies, thermometers, packaging, and a final check of your payment device.
Then you place orders, review your checklist, and make sure nothing depends on a last-minute store run.
Red Flags To Fix Before You Open
If you spot these issues, pause and tighten the plan. A concession stand can fail at launch because of one missing compliance or infrastructure detail.
Red flags that deserve attention:
- You can’t clearly identify the permitting authority for where you’ll sell (city/county vs state program)
- Your offer requires hot holding or cold holding capacity you don’t actually have
- You don’t have a workable handwashing and sanitizing plan for your setup type
- You’re counting on one event without confirmed acceptance, rules, and proof requirements
- Your power and fuel plan hasn’t been tested under real load
How Customers Find You At Launch
Most concession stand customers don’t “discover” you online first. They find you where they already are: an event, a venue, or a public space with foot traffic.
Your launch marketing plan should focus on getting placed in the right locations and making it obvious what you sell once people see you. That means clear signage, readable pricing, and a simple offer that moves fast.
Online still helps for credibility and booking. Keep your basics updated: website or landing page, social profiles, a way for organizers to contact you, and photos that show your setup and items clearly.
27 Tips to Start a Successful Concession Stand
A concession stand looks simple until you plan the first real selling day.
These tips focus on decisions you make before you open, when changes are cheaper and easier.
Use them to stress-test your plan against your first event, your first inspection, and your first busy rush.
Keep your setup small on purpose until you know what your location, permit path, and demand will actually support.
Before You Commit
1. Picture yourself working in a crowd, on your feet, with time pressure and a public line watching you. If that sounds draining instead of energizing, a concession stand may not fit the life you want.
2. Talk to concession owners you will not compete with (a different city or region) and ask what delayed their first sale. You’re looking for the unglamorous stuff: approvals, inspections, utilities, and cleanup.
3. Decide if you can handle uneven income tied to event calendars and weather. If you need steady weekly sales right away, you may want a model with a more consistent selling location.
Demand And Profit Validation
4. Pick your first 3–5 target venues or events and get their vendor rules before you buy equipment. Ask about vendor fees, required insurance proof, utilities available, and setup/teardown windows.
5. Visit those events in person and watch what actually sells fast during peak moments (halftime, breaks, after performances). Take notes on line length, how many vendors compete for the same crowd, and how quickly orders move.
6. Validate demand with a tight food-and-drink lineup that can be served quickly with safe hot holding and cold holding. If an item slows down service or requires new equipment, save it for later.
Business Model And Scale Decisions
7. Choose your launch model first: temporary event booth, permanent stand at a venue, or a mobile cart/trailer. That one choice drives your permit category, inspection steps, and how much infrastructure you must bring.
8. Decide where food prep will happen: on-site cooking, commissary/shared kitchen prep, or selling only prepackaged items. This affects what the health authority will expect for storage, cleaning, and daily servicing.
9. Be honest about staffing for busy moments. A solo operator can work at smaller events, but if you’ll cook, take payments, restock, and keep logs, you may need at least one helper for peak periods.
Legal And Compliance Setup
10. Identify your regulating food authority for the places you plan to sell and learn the exact terms they use. Search your city/county site for phrases like “temporary food permit,” “mobile food permit,” or “food establishment permit.”
11. Confirm your permit category before you buy major gear. The same item can be allowed in one setup type and rejected in another, especially when power, water, or wastewater rules differ.
12. Write a basic handwashing and sanitizing plan that matches your setup type. At minimum, plan for soap, paper towels, food-safe sanitizer, sanitizer test strips, and a clear method for trash and wastewater handling.
13. If you will use propane, open-flame cooking, fryers, or a generator, contact the fire prevention office early. Ask what inspection they expect and what fire extinguisher types and placement they want for your equipment.
14. If you will package foods for retail sale under your own labeling (not just serving for immediate consumption), verify whether federal labeling rules apply. If you want a simpler launch, consider avoiding packaged-for-retail items until you confirm what is required.
Budget, Funding, And Financial Setup
15. Build your startup budget using real categories instead of guessing a single number. Include permits/inspections, equipment and build-out, commissary access (if needed), initial food and packaging inventory, vendor/event fees, insurance, and payment setup.
16. Stage your purchases to match your first selling location. Prove demand with a smaller setup before you commit to expensive builds like a trailer retrofit or high-capacity cooking equipment.
17. Set up business banking and payment acceptance before opening day, then test it in the real environment. If your locations have weak signal, prepare a backup plan so you’re not stuck with a line and no way to take payment.
Location, Build-Out, And Equipment
18. Build your equipment list by category so you don’t forget the “boring” essentials. Include cooking/heating, cold holding, prep tools, service items, food safety tools (probe thermometers), handwashing/sanitizing supplies, point of sale hardware, and transport/setup gear.
19. Size hot holding and cold holding for peak demand, not average demand. Do a timed simulation of your first 30 orders and confirm you can keep foods at safe temperatures the whole time.
20. Stress-test your power plan before you open. Add up the wattage of every device you will run at once, then confirm you have safe cords, correct load ratings, and a realistic generator or on-site power solution.
21. Plan your physical layout like a repeatable system: where cooking happens, where cold items live, where payment happens, and where finished orders are handed off. Pack your setup into labeled bins so you can set up fast without guessing.
Suppliers, Contracts, And Pre-Opening Setup
22. Line up suppliers for your core needs early: ingredients, beverages, ice, packaging, and fuel (if used). Confirm minimum order requirements, lead times, and whether you can get reliable resupply close to event day.
23. If your permit path requires a commissary/shared kitchen, secure it in writing before you apply or schedule inspections. Also build a reusable “proof folder” with your permits, training proof if required, and insurance certificate when venues ask for it.
Branding And Pre-Launch Marketing
24. Lock down your business name, domain, and social handles before you apply to multiple events. Even a simple landing page with a contact method helps organizers confirm you’re legitimate.
25. Create signage that does one job: make it obvious what you sell and what it costs from several feet away. Take clean photos of your setup concept and key items for vendor applications and approvals.
Final Pre-Opening Checks And Red Flags
26. Run a full test setup exactly as you will operate: transport, power, cooking, hot holding, cold holding, handwashing, sanitizing, and payment. Fix anything that forces you to improvise, because improvising in public usually turns into delays or safety problems.
27. Pause your launch if any of these are still unclear: who permits you, what permit category you fall under, how you handle water and wastewater, or whether the venue accepts your proof documents. One unresolved item can cancel your first selling day.
FAQs
Question: Do I need a special permit to sell food at a festival or sports event?
Answer: In many places, yes.
Question: Who regulates concession stands where I live?
Answer: It is usually a city or county health department, sometimes a state health agency. Start by searching your local health site for “temporary food,” “mobile food,” or “food establishment permit.”
Question: What is the difference between a temporary food permit and a mobile food permit?
Answer: A temporary permit is often tied to a specific event and dates. A mobile permit is often tied to a cart, trailer, or truck and may include extra requirements like commissary use.
Question: Do I need a commissary or shared kitchen to start?
Answer: Some setups require one, and some do not. It often depends on your permit type, what food you handle, and whether you need an approved place for prep, storage, water fill, or wastewater disposal.
Question: What food safety training do I need before I can open?
Answer: Training rules vary by location and permit type. Ask your health authority if you need a food handler credential, a food protection manager credential, or both.
Question: What equipment is considered “must-have” for inspection readiness?
Answer: Plan for safe hot holding and cold holding, a handwashing method, and a sanitizing setup. You should also have probe thermometers to verify safe internal temperatures for cooked foods.
Question: How do I know if my food lineup is too complicated for a first launch?
Answer: If an item needs extra equipment, extra steps, or slows service, it adds risk before you even open. A tight lineup is easier to permit, easier to stock, and easier to run during a rush.
Question: Do I need a general business license for a concession stand?
Answer: Many cities and counties require a general business license in addition to health approvals. Check your city or county licensing portal for “business license application” and vendor rules for event-specific requirements.
Question: Do I need an Employer Identification Number to start?
Answer: Many owners get one early for banking, permits, and hiring. The Internal Revenue Service issues Employer Identification Numbers.
Question: Do I need to register for sales tax to sell food and drinks?
Answer: Often, yes, but it depends on the state and what you sell. Confirm with your state revenue agency how prepared foods and beverages are taxed in your selling locations.
Question: If I sell packaged foods, do labeling rules apply?
Answer: They can, especially if you package items for retail sale under your own label. If you want a simpler start, avoid packaged-for-retail items until you confirm labeling and disclosure rules for your products.
Question: Do I need fire approval if I use propane, a fryer, or a generator?
Answer: Many places have fire safety rules for cooking equipment, propane, and generators. Ask the fire prevention office what inspection they require and what extinguisher type they expect for your setup.
Question: What insurance do I need before I can sell at events?
Answer: Events and venues often require proof of insurance before they approve you as a vendor. Common requirements include general liability, and food-related coverage is often requested by organizers.
Question: When is insurance legally required for a concession stand?
Answer: Legal requirements often depend on your state and whether you have employees or business vehicles. Check your state labor agency for workers’ compensation rules and your state motor vehicle guidance for commercial use questions.
Question: How should I set prices before opening without guessing?
Answer: Use a method like cost-plus and include ingredients, packaging, vendor fees, and payment processing costs. If sales tax applies, confirm how you must collect and report it before you finalize price displays.
Question: What should my day-one workflow look like at a first event?
Answer: Plan a repeatable flow: load out, setup, verify power and temperatures, open for service, restock, and teardown. Build a simple checklist so nothing critical is left behind.
Question: What should I test before my first selling day?
Answer: Test your full setup under real conditions, including power load, hot holding, cold holding, and handwashing supplies. Verify cooking temperatures with a probe thermometer, not guesswork.
Question: When should I hire help for the first month?
Answer: Hire early if you expect long lines or if cooking and payment must happen at the same time. If you bring on staff, confirm training and employer registration steps before their first shift.
Question: How do I take payments reliably at events?
Answer: Set up your payment processor and test transactions before opening day. Have a backup plan for weak signal so you do not lose sales when the line is long.
Question: What causes first-month cash flow surprises in this business?
Answer: Vendor fees, inventory purchases, packaging, ice, fuel, and replacement supplies can hit before you earn a dollar. Keep a buffer for permit costs, inspection delays, and last-minute equipment fixes.
Real-World Startup Advice From People In The Business
Owner interviews can save you time because they surface the real-world constraints that shape a concession stand, like permits, utilities, commissary needs, and how fast you can serve during a rush.
Use the resources below to learn what operators wish they knew before their first selling day, and to sanity-check your own plan before you spend on equipment or commit to events.
- StartingABiz — Starting a Food Concession Business (Interview)
- KaTom — Captain Muchacho’s Tips on Starting a Food Truck (Interview)
- Food Truck Empire — Smart Startup Advice From a Veteran Food Truck Builder (Q&A)
- Roaming Hunger — Daniel Shemtob of The Lime Truck (Interview)
- Food Truck Operator — Lessons Learned Launching a Food Truck (Email Interview)
- Mobile Food Alliance — Propane Safety for Mobile Food Setups (Expert Interview)
Related Articles
- Starting a Food Truck Business
- Start a Mall Kiosk Business
- Vending Machine Startup Guide
- Start an Ice Cream Shop
- Start a Barbecue Business
- Pizza Shop Startup Guide
- Starting a Bubble Tea Shop
- Start a Cookie Business
- How to Start a Bakery
- Starting a Bagel Shop
- How to Open a Breakfast Restaurant
- Start a Delicatessen
Sources:
- SBA: Licenses And Permits, Open Business Bank Account, Get Business Insurance, Federal And State Tax IDs, Microloan Program
- IRS: Employer ID Number
- FDA: FDA Food Code, State Food Codes Directory, Food Labeling Guide
- ECFR: Nutrition Labeling Rule
- FSIS: Safe Temperature Chart
- NYC Health: Mobile Food Vendors