
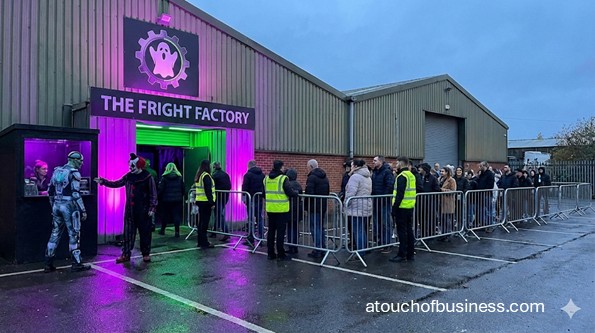
What to Expect From This Guide to Starting a Haunted House Business
This guide walks you through the key decisions and practical steps for starting a haunted house business. The bullets below highlight selected areas, not everything the guide covers.
Inside the guide, you will find:
- Startup steps: Follow 16 ordered steps, from choosing an attraction model and checking demand through funding, approvals, build-out, and final opening checks.
- Business fit: Weigh your motivation, household support, income uncertainty, and risk tolerance before you commit.
- Profit and funding: Learn what to calculate for break-even, funding, and operating capital, plus how a business plan ties those numbers together.
- Safety and approvals: See how zoning, fire marshal review, permits, inspections, accessibility, and insurance affect your site, layout, and timeline.
- Build and staffing: Review essentials to price out, from scenic construction to ticketing tools, plus staff roles and training.
- Industry interviews: Listen to podcast interviews with haunted attraction owners about owning and operating their attractions.
- Common questions: Find answers to situational questions, such as temporary buildings, outdoor rain plans, food sales, and pre-sale tickets.
Begin with what a haunted attraction is, how revenue works, and who buys tickets, then decide whether this business suits you.
Haunted Attractions: What This Business Really Is
A haunted attraction is a walk-through entertainment experience built around sets, lighting, sound, performers, and controlled guest flow.
Most are seasonal events, often in the fall. Some are pop-ups or special-event experiences.
A haunted house business often requires upfront build-out, permits or approvals, safety planning, and multiple staff roles for guest flow and safety.
Even a small attraction can involve building approvals, safety planning, and a team for guest control, performers, and emergency response.
How Does a Haunted House Business Generate Revenue?
Revenue is usually tied to attendance. You sell admission to a scheduled experience, often with timed entry or ticket windows.
Common revenue methods include:
- General admission tickets (online and onsite)
- Timed-entry tickets (reserved entry slots)
- Premium tickets (front-of-line access or small-group entry)
- Group sales (private nights or reserved blocks for organizations)
- Merchandise (theme items, apparel, souvenirs)
- Photo add-ons (branded photo area or photo package)
- Off-season events (special nights, pop-up themes, or holiday overlays)
Products and Services You’ll Offer
The “product” is the experience, including the physical build, the story theme, and how guests move through it.
Typical offerings include:
- Walk-through attraction experience (indoor or outdoor)
- Queue-line entertainment (actors, video, themed staging)
- Ticketing and entry services (timed entry, scanning, wristbands)
- Optional add-ons (premium entry, photos, merchandise)
- Private bookings (when your venue, local rules, and staffing allow it)
Who Your Customers Usually Are
Your customer mix depends on your theme, intensity level, and local demand.
Many owners set expectations through age guidance and intensity levels.
Common customer groups include:
- Local and regional visitors looking for seasonal entertainment
- Friend groups and couples planning an evening out
- Families attending a “lighter scare” version (when offered)
- Corporate or organization groups booking a private time slot
- Tourists if you’re near a travel corridor or destination area
Pros and Cons to Know Up Front
This is a high-planning, safety-sensitive entertainment business. The trade-offs are real, so weigh both sides before you commit.
Common advantages and constraints include:
- Pros: Strong seasonal demand in many areas; repeat annual interest; clear event-style marketing windows
- Pros: Multiple pricing formats (timed entry, premium access) and add-ons
- Cons: Upfront build-out and permitting work can be significant
- Cons: Staffing needs can spike during open nights
- Cons: Compliance and inspections can affect timelines and layout
- Cons: Weather can impact outdoor events and customer turnout
A Quick “Day in the Life” During the Pre-Opening Phase
Pre-opening days usually revolve around build progress, compliance steps, and final checks.
You’re coordinating people, materials, and deadlines.
A typical day might include a site walk-through, a call with a contractor, and a permit or inspection question for the city or county.
Then you spend time on ticketing setup and marketing.
Late-day work often shifts to lighting and sound testing once the space is quiet.
Is This Business a Good Fit for You?
This business fits best when you can handle uncertain income, long hours, and full responsibility for guest safety.
Decide two things before you plan anything else: whether owning a business suits you, and whether this business does.
For a broader view of what you’re taking on, start with startup considerations so you don’t miss the big decisions that shape everything later.
Next, pressure-test your motivation. Passion matters because it helps you persist and solve problems when challenges hit.
Without passion, many people look for an exit instead of solutions.
For a practical way to think about motivation, read why passion matters before you start.
Ask yourself this exact question: “Are you moving toward something or running away from something?”
If you’re starting mainly to escape a job or a financial bind, that may not sustain your motivation.
Your motivation gets tested when the build runs late, approvals take longer, or staffing falls through.
Be honest with yourself. Can you handle uncertain income, long hours, difficult tasks, fewer vacations, and full responsibility?
Is your family or support system on board with the time and stress this can create?
Do you have the skills, or can you learn them? Can you secure enough funds to start and operate through the first phase?
Ask who your first guests will be and why they would choose your attraction over other seasonal entertainment.
Talk to people who own similar attractions, but only owners you won’t compete against.
Think a different city, a different region, or a market you won’t serve.
To learn from real operators, use this guide on getting an inside look.
Bring focused questions, such as:
- “What surprised you most about permits, inspections, or fire department requirements?”
- “What did your opening timeline look like from lease signing to first ticket sold?”
- “On a busy night, how many staff did you need on site for guest flow and safety?”
Red Flags Before You Start
Delay, change your model, or reconsider if a venue can’t meet exit requirements or your budget leaves out major costs.
Some problems don’t show up until you’re close to opening. Spotting them sooner can save you months of work and a lot of sunk cost.
Common red flags during startup include:
- A venue that can’t realistically meet exit, alarm, or approval requirements for your design
- Unclear answers from a landlord or venue about what construction and effects are allowed
- A timeline that depends on “hoping” inspections happen quickly instead of scheduling based on official guidance
- Budget totals that don’t include staffing, insurance, permits, and entry tools
- Marketing plans that assume huge attendance without a demand check
For general startup pitfalls beyond this niche, see common startup mistakes.
Step 1: Choose Your Attraction Model and Scale
Start by choosing what you’re building, because your model affects your timeline, approvals, staffing, and startup budget.
Common models include an indoor walk-through in a leased building or an outdoor walk-through on private land.
Others include a pop-up inside a shared venue or a multi-attraction event with separate ticketed experiences.
Make these decisions:
- Decide if you’re building a single attraction or multiple experiences (main walk-through plus add-ons)
- Decide if it will be full time or part time (most are seasonal, but build work can take months)
- Decide whether you’re going solo, partnering with others, or bringing in investors (a haunted attraction is rarely a “just me” startup once you count safety staffing)
- Decide what you’ll do yourself and what you’ll hire out before the build begins (construction, electrical, fire protection, legal, accounting)
- Decide your intensity level and who you want attending, so you can describe the experience clearly
Step 2: Validate Demand and Profit Potential
You’re checking whether demand is strong enough to cover all costs and still pay you.
Whether people like the idea is only the starting point.
Start with basic local research, then validate with real signals before you commit to a lease or major build work.
Validate demand with these checks:
- List direct and indirect competitors (other haunted attractions, seasonal events, entertainment venues), noting what they offer, when they run, and how they price
- Visit attractions outside your area and note guest flow, signage, and queue management (choose regions where you won’t compete)
- Estimate your realistic capacity (entry rate, hours open, season length) and compare it to local demand
- Test interest with pre-season sign-ups, email list growth, social engagement, and interest by zip code in your area
- Run numbers to confirm you can cover expenses and still pay yourself
Check your break-even logic before you commit:
Break-even is the point where ticket and add-on revenue covers every cost of running your season.
Start with capacity. Your entry rate, hours open, and season length set the most guests you can serve.
Next, list your fixed costs, such as build materials, equipment, permits, insurance, and lease payments.
Then add nightly costs, such as staffing for open nights.
Compare those costs to your planned ticket prices to see how many paid guests you need to cover them.
Busy nights cluster around weekends and late-season dates, so don’t assume every open night sells at capacity.
Weather can cut turnout for outdoor attractions.
If your break-even numbers don’t cover your costs and still pay you, change your model, scale, or ticket structure before you spend.
For a simple demand-checking framework, see this market demand guide.
Step 3: Price Out Your Essentials List
List everything you need to open in compliance with safety and legal requirements, then gather price quotes for each item.
Scale drives your cost totals. A short attraction in a small space and a large multi-scene build are not the same project.
Use real quotes rather than guesses. Real quotes force trade-offs sooner than a wish list does.
For a structured way to estimate startup costs, use this startup cost estimating guide.
Essential items often include the following categories:
- Facility Build-Out and Scenic Construction: framing and wall panels, fasteners, lumber and sheet goods, paints and coatings, adhesives, scenic foam and fabric, doors and hardware, flooring protection, tools and ladders
- Electrical and Power Distribution: power distribution equipment, approved extension cords as needed, cable protection and management, work lighting, backup power planning (when required by your design and local rules)
- Lighting, Audio, and Show Control: lighting fixtures, controllers (when used), speakers, amplifiers, audio playback devices, wiring and connectors, control hardware for timed effects
- Effects and Props: animatronic props, pneumatic or mechanical components (when used), fog or haze equipment (when used), scent effects (when used), set dressing props, mannequins, themed décor
- Costumes and Character Gear: costumes, masks, makeup supplies, storage racks, cleaning and maintenance supplies
- Guest Flow and Queue Setup: stanchions or barricades, directional and safety signage, wristbands or entry identifiers, queue lighting, weather coverings when outdoors (when allowed)
- Ticketing and Payment Tools: ticketing platform account, scanners, tablets or handheld devices, card readers to accept payment, receipt printing (when used), secure storage for onsite materials
- Safety and Emergency Equipment: fire extinguishers as required, first aid kits, emergency exit signs and emergency lighting where required, radios for staff communication, flashlights
- Security and Monitoring: cameras where allowed, incident log tools, access control for staff-only areas
- Office and Admin Basics: computer, printer, internet equipment, secure document storage, basic office supplies
As you price items, keep the quotes organized by category, so you can see what drives your total.
Category totals also show what changes when you scale up or down.
Step 4: Plan Funding and Operating Capital
Plan to fund both your build and the operating money that keeps the season running.
Even if you’re not seeking a loan, you need a plan for startup spending and your first bills.
Build costs come months before opening night. Ticket revenue arrives only after doors open.
Operating capital is the cash that pays your bills until ticket revenue catches up.
Running out of operating money is one of the main reasons startups close.
Decide how you’ll fund the build and the season:
- Savings
- Partners
- Investors
- Financing
Compare what each option requires from you before you commit to a lease or major build work.
Set a startup budget from your priced essentials list.
Include a cushion for delays, because approvals and build work can run longer than planned.
If financing is part of your plan, start with this business loan overview so you know what lenders usually expect.
Step 5: Choose a Legal Structure and Register the Business
Your legal structure affects taxes, liability exposure, and how you bring in partners or investors.
Many U.S. small businesses start as sole proprietorships. Many later form a Limited Liability Company (LLC) as liability risk and complexity increase.
Work through these actions:
- Pick an entity type based on your risk profile, staffing plan, and ownership structure
- Register the business with your state (usually through your Secretary of State or similar office)
- Apply for an Employer Identification Number (EIN) with the Internal Revenue Service if needed for hiring, banking, or tax accounts
- Open a business bank account once you have your registration and tax IDs
- Keep personal and business transactions separate
For a plain-language overview of registration steps, see SBA guidance on registering a business and this registration walkthrough.
For the EIN process, start here: IRS EIN information.
Step 6: Choose a Location That Can Be Approved
A suitable location supports safe entry and exit and the build you plan, not just customer convenience.
For a location-based attraction, choose a site that’s easy for customers to reach, with adequate parking or transit access.
The site also needs room for queue lines that don’t create hazards.
Before you commit to a site, confirm:
- Zoning allows the use (and ask what approvals apply)
- The Certificate of Occupancy process, if you’re using a building open to the public
- You can meet exit access and crowd-flow needs for your planned attendance and occupancy
- Landlord or venue restrictions on construction, décor, fog, sound, and hours
- What proof of insurance the landlord or venue requires before you sign
Get key permissions in writing before you sign, including hours, noise limits, and what you can attach to walls and ceilings.
Don’t sign a lease or buy major build materials until you know which permits and inspections apply.
For a practical way to think through site selection, use this location guide.
Step 7: Start Safety and Code Conversations Before You Build
Talk to your building department and fire marshal before you build sets. Many jurisdictions expect a review before you build.
Example guidance from a local fire marshal’s office shows how detailed haunted attraction requirements can be, including planning and inspections.
Review a fire marshal haunted house guideline to see the kinds of issues that often come up.
Prepare a one-paragraph concept summary: venue type, dates, expected attendance, and whether you use fog or strobe lighting.
Officials can guide you faster when the plan is clear.
Ask what approvals apply to a temporary seasonal attraction versus a permanent installation, and document what they tell you.
Ask whether your design counts as a “special amusement building.” Many jurisdictions treat haunted attractions that way when exits are hard to see.
In some adopted building codes, a special amusement building can trigger sprinkler requirements, so verify before you commit to a site.
Plan for these safety points:
- Clear, unobstructed exits and emergency lighting, with exits easy to identify under normal and emergency conditions
- Never rely on darkness to hide safety features
- How you’ll manage lines, crowd density, and entry timing
- Materials and décor that local fire rules may restrict
- Fog or similar effects, which can affect alarms and visibility
- Fireworks, pyrotechnics, or flame effects, which fire departments often restrict without specific approval
- How lights come up and sound and effects shut down in an emergency
Step 8: List the Permits, Licenses, and Accounts You May Need
Build an approval checklist: list what may apply, then confirm each item with the correct office.
The Small Business Administration maintains a high-level overview of the licenses and permits process here: SBA licenses and permits guidance.
Approvals and accounts to check:
- Business registration and tax accounts: state and local tax registration (including sales and use tax when applicable), employer accounts for payroll taxes when you hire
- Local permission to operate: general business license or local registration where required
- Name filing: assumed name or “doing business as” registration when you operate under a name different from the legal entity name
- Building approvals: building permits for build-out work, inspections, and a Certificate of Occupancy when operating in a public-facing building
- Fire department review: plan review, inspections, and any fire operational permits that apply to your setup
- Sign approvals: signage permits where required by the city or county
- Employment compliance: wage and hour compliance and child labor rules when you hire minors
These rules vary by U.S. jurisdiction. Requirements change by state, county, and city.
Verify requirements directly with official offices and portals, then document what each office tells you.
Use this verification checklist:
- State: Secretary of State or business filing office → use your state’s official link directory via USAGov state government links → search “business entity search” and “register an LLC” (wording varies by state)
- State corporate filing help: use NASS corporate registration resources to find official business registration entry points
- State tax: Department of Revenue or Taxation → search “sales and use tax registration” + your state (wording varies by state)
- City or county: business licensing portal → search “business license” + your city or county (wording varies by jurisdiction)
- Zoning and building: planning/building department → search “zoning verification” and “Certificate of Occupancy” + your city or county
- Fire marshal: fire prevention bureau or fire marshal office → search “haunted attraction” or “special amusement building” + your city or county (wording varies by jurisdiction)
When you contact an office, ask two or three practical questions, such as:
- “What approvals apply to an indoor walk-through attraction open to the public in this building?”
- “Will you require a plan review before construction, and what is the inspection timeline?”
- “Are there restrictions on materials, effects, or queue setup that I should design around?”
Step 9: Plan Accessibility and Public Accommodation Basics
If you’re open to the public, accessibility is part of your pre-opening planning.
Accessibility can affect entry routes, restrooms, and how guests reach parts of the experience.
Plan for it before you finalize your layout, because late changes to entrances and routes get expensive.
Start with the Department of Justice overview for public-facing businesses: Businesses Open to the Public (ADA Title III).
For standards and technical detail, the Access Board is a key reference: ADA Accessibility Standards.
Step 10: Plan Insurance and Risk Requirements
At a minimum, many owners plan for general liability, then add coverage based on the venue and what they own.
Landlords, venues, and contracts may require proof of coverage before you can open.
Venue contracts may also require specific endorsements, such as additional insured status.
Coverage to consider:
- General liability
- Property or equipment coverage if you own significant gear
- Workers’ compensation when required by your state rules and employee count (verification varies by state)
- Event-related requirements when required by a venue contract or local permit
For a plain-language overview, see business insurance basics.
Step 11: Set Pricing and Confirm Key Suppliers
Pricing starts with your capacity, season length, and cost base.
Before you publish prices, confirm that each ticket sold helps cover the full cost of opening.
For a clear pricing framework, use this pricing guide.
Timed entry can reduce crowd pressure and make staffing more predictable, especially with tight hallways or limited capacity.
Settle these pricing and supplier decisions:
- Choose your base ticket structure (general admission versus timed entry)
- Decide whether to offer premium entry and group packages
- Choose ticket scanning tools that work in low light and at a fast pace, and test them with real devices and staff
- Decide how you’ll accept payment and handle chargebacks
- Write a refund and exchange policy that matches your ticketing system and staffing limits
- Identify core suppliers: scenic materials, props, costumes, audio/lighting gear, printing and signage
Seasonal demand puts pressure on vendors, so order key items ahead of time.
Supply delays can push back your opening date.
Step 12: Choose Your Name and Lock Down Your Online Presence
Pick a name you can use consistently across registration, signage, and online listings.
Then check that you can secure a matching domain and social profiles before you invest in design work.
For a structured approach, see this guide to choosing a business name.
Complete these name and website tasks:
- Run a state business name search (where available) before filing
- Secure your domain name and key social handles
- Plan a basic website that shows location, dates, ticket types, age guidance, what guests should expect, and how to ask ticket questions
- Claim your local listings so hours and directions are accurate
If you’re building your first site, this helps you avoid random pages and missing basics: how to build a business website.
Step 13: Plan for Staff, Training, and Hiring Rules
Most attractions need a seasonal team for performers, guest flow, ticket scanning, and safety roles.
Decide what you’ll hire before the build and what you’ll do yourself until you’re closer to opening.
For a simple hiring framework, see how and when to hire.
Build your staffing plan around these points:
- Decide your minimum staffing per open night and build it into your budget
- Create role outlines (actors, queue staff, ticketing, security, safety leads, and technical support for lights and sound)
- Build the plan around safety roles, not just performers
- If you plan to hire minors, review federal child labor guidance and verify state rules before you set schedules
Write short procedures for entry, line control, emergency response, and shutdown of sound and effects.
Train staff before opening on:
- Guiding guests to exits and helping people who need assistance
- Raising the lights and stopping sound and effects quickly
- Who calls emergency services and how first aid is handled
- The full guest path from parking to exit
Run a walk-through drill so staff understand the guest path and key risk points.
For federal child labor basics, start with: U.S. Department of Labor Fact Sheet 43.
Step 14: Build-Out, Installation, and Pre-Opening Inspections
Timelines slip at this stage when approvals weren’t clarified before construction.
Keep your build aligned with what local officials and your lease allow.
Plan how you’ll handle chemicals used for effects and cleaning.
If employees are exposed to hazardous chemicals, federal hazard communication rules may apply. A starting point is OSHA Hazard Communication.
Keep safety data sheets accessible and train staff on handling.
Complete these tasks before you open:
- Schedule building, electrical, and fire inspections based on local timelines
- Build in time to correct issues, so a failed inspection doesn’t end your season before it starts
- Prepare documentation that inspectors may ask for (plans, materials info, equipment specs)
- Route cables and protect floors as part of the build, not afterward
- Photograph and note the build as you go to support inspections and staff training
- Run full walk-through tests with staff to confirm lighting, exits, and guest flow
- Test the experience with different types of guests and watch for bottlenecks, confusion points, and safety issues
To see how some fire code references treat “special amusement buildings,” review this special amusement buildings code review.
Step 15: Brand Basics and Reaching Your First Guests
Your brand is more than a logo: it’s your name, your promise to guests, and the basic materials people see before they buy.
Keep it simple: consistent look, clear info, and easy ticket access.
- Logo, colors, and basic visual identity (when you’re ready, use corporate identity basics)
- Business cards for partnerships and local outreach (see business card basics)
- Signage planning (see sign considerations)
- A local outreach plan for your first ticket sales and opening week
Define a realistic drive radius and focus your opening outreach there.
Local organizations can book group nights or fundraisers, and those ties can make permitting conversations easier.
Set clear guest expectations before tickets go on sale:
- State age guidance and content warnings
- Describe strobe lighting, fog, and intense scenes
- Make entry rules visible before purchase and again at arrival
If you’re a brick-and-mortar attraction, you’ll also want a plan for local visibility and partnerships. Start here: getting customers in the door.
If you plan to use promotional email, review federal requirements under the CAN-SPAM Act: FTC CAN-SPAM compliance guide.
Step 16: Plan Your Opening Event and Final Checklist
Even without a traditional “grand opening,” plan a kickoff with clear dates, clear ticket flow, and a controlled first night.
For a structured checklist approach, use grand opening planning basics and adapt it to an event-style opening.
Pre-opening checklist items often include:
- Final confirmation of required permits, inspections, and approvals
- Final test of lighting, sound, and any timed effects
- Exit signs, emergency lighting, and safety equipment verified and accessible
- Emergency procedure for raising lights and stopping effects rehearsed with staff
- Ticketing system tested end-to-end (purchase, scan, entry flow)
- Payment processing and refund policy in place
- Staff schedules and role assignments finalized
- Opening-week outreach scheduled (posts, local outreach, partner reminders)
Business Plan
A business plan turns your startup steps, costs, funding, and break-even math into one plan you can act on.
Use this business plan guide as a simple framework, then expand only as needed.
Include these pieces:
- Your attraction model, scale, and capacity
- Demand checks, including competitors and pre-season interest
- Your priced essentials list, organized by category
- Funding sources and the operating capital needed to reach your first ticket revenue
- Ticket prices, add-ons, and staffing costs for each open night
- Your break-even calculation and how it holds up on slow nights or in bad weather
- A timeline built backward from your opening date, with time for approvals, inspections, and corrections
If your break-even math only works with a full house every night, revisit your model, scale, or pricing before you commit.
When to Bring in Professional Help
Many owners lean on professionals for legal structure, accounting, insurance, construction, electrical work, fire protection systems, and branding.
You don’t have to do everything yourself.
Experienced help matters most when public safety and compliance are involved. Paying for expertise can protect your timeline.
For a practical overview of building a support team, start here: building a professional advisor team.
Final Reality Check
A haunted house business can be a real business, but it’s not a casual weekend project when you’re inviting the public into a built environment.
Your safest path is a clear model, verified demand, documented approvals, and a budget that matches your scale.
If you handle the planning steps in order, you can move forward with fewer surprises and a much cleaner opening timeline.
Frequently Asked Questions
Is a temporary seasonal haunted house exempt from building and fire rules?
No. Temporary builds still trigger rules in many areas.
Ask your building official which inspections apply to temporary walls, electrical runs, and large scenic structures.
In some places, converting a building for this use counts as a change of use, which may require code upgrades.
Ask about change-of-use rules before you commit to a site.
Should I sell food and drinks at my haunted house?
Only if you can handle the extra approvals and staffing.
Food and drink can trigger health department rules, which can expand your permit list.
Decide before you finalize your approvals checklist and staffing plan.
What should I plan for if my attraction is outdoors?
Plan for bad weather before you sell tickets.
Build a clear rain plan that covers safe walking surfaces and how you’ll announce schedule changes.
Make the plan visible before guests buy tickets.
What if my attraction is close to homes or neighbors?
Expect possible complaints about noise and traffic, so check local rules before you finalize your site.
Plan parking and line control so your queue doesn’t create a public safety issue outside your property.
Should I sell tickets before my permits and inspections are approved?
Usually not.
Pre-sale tickets can lead to refunds and reputation damage if your opening date moves.
Wait to announce dates until your approvals and inspection schedule are solid.
Should I build modular scenery or one-off sets?
It depends on how many seasons you plan to run.
Reusable walls and set pieces reduce rebuild time and can lower costs across multiple seasons.
Whichever you choose, decide where materials will go after teardown before you build.
Haunted Attraction Owner Interviews and Insights
Learn from people connected to the haunted attraction industry through podcast interviews and an owner-written article.
Carroll Lee Moore III and Erica McElroy: Owners of Halloween Hollow
Carroll Lee Moore III and Erica McElroy own Halloween Hollow, a large outdoor haunted attraction.
Their HaunTopic Radio episode discusses what it takes to own and operate the attraction, which is useful when you’re deciding whether to start one.
Eddie McLaurin: Creator and Owner of Woods of Terror
Eddie McLaurin is the creator and owner of the Woods of Terror haunted attraction.
His episode describes how family property inspired the attraction, offering one owner’s view of how an idea becomes an attraction.
Jan Knuth and Suzie Flesik: Women in the Haunted Attraction Industry
The guests are Jan Knuth of Grey House Haunts, a rural attraction, and Suzie Flesik of Crawford School of Terror.
The episode focuses on women in the haunted attraction industry, and these two attractions show how varied their settings can be.
Cydney Neil: Owner-Producer of Rocky Point Haunted House
Cydney Neil is the owner-producer of Rocky Point Haunted House and wrote a step-by-step guide to planning and running an attraction.
Her article walks through location, permits, layout, budget, capital, crew, and safety, so you can compare her sequence with your own plan.
Related Articles
- Start an Escape Room Business
- Start a Costume Rental Business
- Starting a Theatre Company
- Starting a Dinner Theatre
Sources:
- ADA.gov: Businesses open public, ADA Design Standards
- Fairfax County, Virginia: Haunted house guideline
- Federal Trade Commission: CAN-SPAM compliance guide
- HaunTopic: Haunter interviews, HaunTopic Radio, iHeart, HaunTopic Radio, Apple
- Hauntworld: Haunted attraction business plan
- Internal Revenue Service: Employer ID number
- International Code Council: Special amusement definition, Special amusement sprinklers
- National Association of Secretaries of State: Corporate registration
- NFPA: NFPA 1 haunted houses
- North Carolina Department of Insurance: Special amusement buildings
- Occupational Safety and Health Administration: Hazard Communication
- U.S. Department of Labor: Child labor Fact Sheet
- U.S. Small Business Administration: Register your business, Licenses permits, Get business insurance
- USAGov: State governments