Retail Clothing Startup Steps From Idea to Opening
Retail Clothing Business Overview
A Retail Clothing Business sells apparel and related items directly to customers through a storefront, pop-up, online store, or a mix of all three. Your earliest choices—what you sell, how you source it, and where you sell it—show up later in your cash needs, your setup workload, and how smooth opening day feels.
Most launches start simple: a tight assortment of apparel categories plus a few accessories like bags, hats, belts, or jewelry. Some owners add gift cards, basic styling appointments, or a clear returns and exchanges policy from day one so customers know what to expect.
Think of your launch as a chain: supplier account approval, inventory arrival, receiving and tagging, merchandising, then checkout and receipts. If one link breaks, you feel it fast.
Right Fit
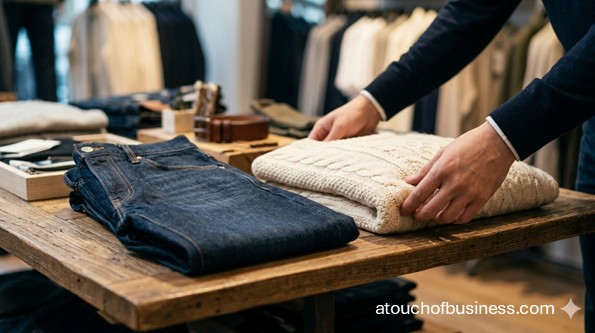
A Retail Clothing Business can be a great match if you enjoy choosing products, building displays, and handling the details that make shopping easy for a customer. Before you fall in love with the idea, picture a normal week leading up to opening: vendor emails, deliveries, tagging, steaming, price labels, and testing the checkout flow again and again.
Ask yourself this once and take it seriously: “Are you moving toward something or running away from something?” Starting because you hate your job, feel financial stress, or want status can be part of the reason, but it can’t be the whole reason.
Passion helps most when the pressure shows up. In a clothing shop, pressure often looks like late shipments, missing sizes, returns, and last-minute permit tasks. If you want a deeper self-check, read how passion can support you when the work gets hard.
Now the reality check. Income can be uneven early on. You may work long days. You may take fewer vacations. And when something breaks—inventory counts, tax setup, a register issue—it’s your responsibility to fix it.
Don’t build this alone in your head. Talk to owners you will not compete against, like someone in a different city, region, or shopping area, so the conversation stays open and useful. If you want a structure for those talks, use this inside advice from real business owners as your guide.
Here are a few fit questions you can ask without turning it into legal or financial advice:
- What surprised you most about receiving and preparing inventory before opening?
- How long did it take you to get supplier accounts approved and inventory delivered?
- Which setup choice created the most friction later: location, product mix, or point-of-sale?
- What did you wish you had tested twice before your first real customer?
If you want a broader readiness check before you spend money, review these points to consider before starting your business.
Choose A Model
A Retail Clothing Business can launch as a storefront boutique, a pop-up seller, an online-first shop with shipping, a resale shop, a consignment store, a private label brand, or an omnichannel mix. This one decision changes your permits, your equipment list, your staffing needs, and how you handle returns.
A storefront with fitting rooms needs fixtures, a register area, and a plan for theft controls like cameras or locked storage. An online-first shop needs shipping supplies, label printing, and a simple returns flow that won’t overwhelm you.
Decide early whether you’ll run it solo at launch or schedule help. The rule isn’t “staff or no staff.” The rule is: can you safely cover checkout, customer questions, receiving deliveries, and basic backroom work during your open hours?
Pick Your Niche
A Retail Clothing Business becomes clearer when you choose who you serve and why they buy from you. Your customer might be a walk-in local shopper, a fit-and-size focused buyer, a style-community shopper, or an online customer who wants a specific look delivered fast.
Keep your niche practical. If you can’t explain your shop in one short sentence, your first inventory buy will get messy.
Write down a simple starting offer list. Use apparel categories like tops, bottoms, dresses, outerwear, activewear, sleepwear, and a small set of accessories. If you plan to add footwear or undergarments, decide that now because it changes fixtures, sizing, and stocking depth.
Validate Demand
A Retail Clothing Business should not open on hope alone, because inventory ties up cash until it sells. Your goal is to see real demand signals before you commit to a lease or a large opening order.
If you want a storefront, look at foot traffic, nearby anchors, and direct competitors within an easy drive. If you want an online store, check whether people search for what you sell and whether your niche is crowded with look-alike shops.
This is where “generic business advice” fails. In clothing retail, being slightly wrong about demand often means being stuck with the wrong sizes or the wrong season.
Plan The Assortment
A Retail Clothing Business lives or dies by its opening assortment, because your first buy sets your size curve, your price tier, and your brand feel. Don’t aim for a huge catalog at launch; aim for an assortment you can receive, tag, steam, and display without chaos.
Decide your opening scope in plain terms: how many styles, how many sizes per style, and how seasonal your mix will be. Seasonality matters because the wrong timing can leave you marking down items fast.
If you plan to offer gift cards, set them up before opening. If you plan styling appointments, keep it simple and define what it includes so it doesn’t slow down your checkout flow.
Build Supplier Plan
A Retail Clothing Business usually sources inventory through wholesale brands, distributors, marketplaces, private label manufacturers, or resale and consignment intake. Your job pre-launch is to choose supplier types that match your cash, your space, and your timing.
Supplier account setup often asks for business details and proof you’re a resale business, like a sales tax permit or resale documentation, depending on the supplier and state. Before you commit, request these items in writing from each supplier: minimum order, opening order minimum, reorder minimum, and lead time.
Selection is not just about style. Look at quality consistency, size availability, reorder ability, shipping speed, and how defects and damage are handled. If you can’t restock winners, you’ll feel it right after opening.
Retail Clothing Compliance
A Retail Clothing Business needs a plan for product labeling and safety, especially if you private label, import, or sell children’s items. Even if you’re buying finished goods, you want a repeatable way to confirm your suppliers are handling the rules that apply to your product mix.
Textile and wool items can fall under federal labeling requirements, and apparel can be covered by care labeling rules. Clothing textiles can be subject to federal flammability standards, and children’s products can require specific testing and documentation.
Here are the big categories to watch as you choose what to sell:
- Textile and wool labeling: fiber content, country of origin, and who is responsible for the label can matter for covered products.
- Care labels: textile wearing apparel can require care instructions.
- Flammability: clothing textiles can be covered by federal flammability rules.
- Children’s documentation: certain children’s products can require a children’s product certificate and related records.
- Origin claims: if you advertise “Made in USA,” follow the federal standard for those claims.
When you’re unsure whether a specific item triggers a rule, don’t guess. Use the FTC and Consumer Product Safety Commission guidance and ask your supplier for compliance documents that match the exact product.
Set Pricing Rules
A Retail Clothing Business pricing system should be built before you tag a single item, because your price tags and your point-of-sale need to agree. If your pricing is inconsistent, returns and exchanges become a daily headache.
Common approaches include markup pricing based on cost, aligning to a brand’s suggested retail price when provided, competitive pricing against comparable shops, and value-based pricing tied to your positioning. If you run consignment, pricing also ties to the split terms you set with consignors.
Your price has to cover more than the wholesale tag. Work from your landed cost: product cost plus inbound freight, packaging, and payment processing fees, plus an allowance for returns and discounts.
Build Startup Budget
A Retail Clothing Business budget should separate one-time opening needs from the cash you need to survive the first months. This is how you avoid opening with a beautiful store and an empty bank account.
Major startup cost categories often include business formation and filings, licenses and permits, location deposits and buildout, fixtures and displays, initial inventory, point-of-sale hardware and software, insurance, branding and signage, and working capital reserve. Inventory is often the biggest driver because supplier minimums and size runs can push the opening buy higher than expected.
Only use cost ranges when you can confirm them. For example, the U.S. Patent and Trademark Office lists a base application fee of $350 per class for certain trademark filings, with possible per-class surcharges depending on the application details, and GS1 US publishes pricing options for barcodes depending on what you need.
If you want a budgeting framework you can follow, use the SBA’s startup cost worksheet guidance to make sure you didn’t miss a category.
Form The Business
A Retail Clothing Business usually starts with a choice: operate as a sole proprietor or form an entity like a limited liability company, depending on your risk comfort and tax setup. Your state’s Secretary of State site is the place to confirm name rules and entity filing steps.
After you choose a name, do a reality check: state name availability, trademark conflict risk, and whether the domain and social handles are available. If you want federal trademark protection, the U.S. Patent and Trademark Office explains trademark basics and fee structure.
When you’re ready to register, the SBA’s business registration overview helps you see the common federal and state steps you may need.
Get Tax Accounts
A Retail Clothing Business typically needs state sales and use tax registration if you’re making taxable retail sales, and clothing taxability can differ by state and sometimes by local area. Your state Department of Revenue or tax agency is the authority for what is taxable and how to register.
If you buy inventory for resale, you may need resale documentation to purchase without paying sales tax at the time of purchase, depending on your state’s system. Many wholesalers also require this documentation for account approval.
If you plan to hire, you may need state withholding and unemployment insurance registrations. This is a “do it early” task, because payroll setup can take time when you’re also building the store.
Get An EIN
A Retail Clothing Business may need an employer identification number to handle federal tax administration, open a business bank account, hire employees, or satisfy vendor requirements. The Internal Revenue Service provides the official EIN application process.
Use the IRS guide to get an employer identification number, and keep your confirmation letter where you can find it quickly for banking and account setup.
Pick The Location
A Retail Clothing Business location decision includes more than rent, because the space drives your layout, your storage, and what approvals you’ll need before opening. If you choose a storefront, confirm the space fits retail use under local zoning before you sign a lease.
If you’re home-based or pop-up focused, your city or county may still have rules that apply, like home occupation limits or temporary vendor requirements. If you’ll ship products, plan your backroom workflow for packing, label printing, and returns processing.
The SBA’s location selection guidance can help you compare options without skipping the practical details.
Handle Local Approvals
A Retail Clothing Business with a public-facing space often runs into local licensing and building steps that can slow your timeline if you ignore them. Your city or county business licensing office and building department are the places to confirm your exact requirements.
Common local items can include a general business license, zoning approval for retail use, a certificate of occupancy for a new space or a change of use, building permits for tenant improvements, fire inspection, and a sign permit for exterior signage. Which ones apply depends on your address and your buildout scope.
Use the SBA’s licenses and permits overview to see the typical categories, then confirm the exact steps using your city and county portals.
If you want a short list of what to ask locally, bring these questions to your calls or emails:
- Is a general business license required for a clothing retailer at this address?
- Is retail apparel an allowed use in this zoning district?
- Will a certificate of occupancy or inspections be required before opening?
- Are building permits required for fitting rooms, electrical changes, or signage?
Set Up Banking
A Retail Clothing Business should separate personal and business transactions early, because your records, tax collection, and merchant payouts get confusing fast when everything mixes. Banks commonly ask for formation documents, an EIN, and owner identification, though the exact checklist varies by bank.
Before you open, make sure you can accept payment the way your customers expect. That usually means card payments, tap payments, and a clean receipt process, even if you also accept cash.
The SBA’s guide to opening a business bank account is a helpful checklist starter when you’re gathering documents.
Choose Your POS
A Retail Clothing Business point-of-sale setup is more than a card reader, because it also controls inventory counts, tax settings, returns, and receipts. A retail-capable point-of-sale system often includes a register device, card reader, barcode scanner, receipt setup, and software that can track inventory and handle exchanges.
Plan the workflow you will actually use: receive inventory, create or import SKUs, tag items, sell items, process returns, and adjust counts. Then test it with real scenarios before any customer sees it.
Payment security matters too. Use your processor’s tools and follow merchant guidance tied to the Payment Card Industry Data Security Standard so you don’t create avoidable risk when you start taking cards.
Plan Insurance
A Retail Clothing Business insurance plan should separate what the law requires from what is simply smart for your risk. Requirements are often tied to employees and vehicles, and the details depend on your state.
Legal requirements can include workers’ compensation when you have employees and auto liability rules if you use vehicles for business. Some states also have disability insurance requirements for employers, and unemployment insurance registration is commonly required when you hire.
Commonly recommended coverage often includes general liability, commercial property coverage for inventory and fixtures, business interruption options, theft and crime coverage choices, cyber coverage if you sell online, and product liability concerns if you private label or import.
If you want a clear starting point for questions to ask an agent, the SBA’s business insurance overview lays out common coverage types and why they matter.
Retail Clothing Equipment
A Retail Clothing Business equipment list depends on how you sell, but most physical setups need fixtures, fitting rooms, point-of-sale tools, and backroom receiving supplies. Getting the basics installed early reduces last-minute scrambling when inventory arrives.
Here are essential categories to plan for, without getting lost in brand choices:
- Fixtures and displays: garment racks, wall systems, shelving, display tables, mirrors, mannequins, and signage holders.
- Fitting rooms: stalls or curtains, hooks, mirrors, and a bench or stool.
- Checkout tools: register or tablet, card reader, barcode scanner, receipt setup, and a cash drawer if you accept cash.
- Receiving and prep: backroom shelving, storage bins, a hand truck or dolly, a tag gun if you tag in-house, and a garment steamer or iron setup.
- Security: lockable backroom storage, cameras, and optional anti-theft tagging systems depending on your product mix.
- E-commerce tools: shipping scale, label printing, mailers or boxes, packing surface, and returns bins if you ship orders.
Don’t chase fancy fixtures first. Chase a layout that makes receiving, tagging, and restocking easy, because that work starts before your grand opening sign goes up.
Set Up Inventory
A Retail Clothing Business needs an inventory system that matches the way you’ll receive and sell items, because clothing has sizes, colors, and style variants that can break messy systems fast. Your goal is clean SKUs, clear categories, and a tagging process you can repeat every time a shipment arrives.
Decide whether you will print barcode labels and use a scanner. If you plan to sell on multiple channels, keep your naming and SKU rules consistent so you don’t create duplicates.
If you need product barcodes for your channel or process, GS1 US publishes options for single barcodes and company prefixes. Choose the smallest option that fits your real plan.
Name And Domain
A Retail Clothing Business name has to work in the real world: it should be available at your state filing level and usable online without confusion. Secure your domain early, and reserve social handles on the platforms you plan to use so you don’t get boxed out later.
Also plan the basic brand assets you need before opening: a logo and wordmark, a simple color palette, and signage-ready design files if you have a storefront. A basic product photo style guide helps too, because consistent photos make your listings and social posts look professional without extra effort.
If you want a structured way to weigh name and brand decisions, revisit these startup considerations before you commit to signage or printed packaging.
Build Digital Basics
A Retail Clothing Business benefits from a clean digital footprint before opening, even if you expect most sales to be in person. At minimum, set up a simple site or landing page with hours, location, contact info, and your returns policy if you have one.
If you operate a storefront, set up your Google Business Profile and make sure your address and hours are consistent everywhere. If you sell online, make sure your checkout, tax settings, and receipts are tested before you announce a launch date.
Use owner-to-owner insights to learn what people wish they had set up online before their first day of sales.
Write Key Policies
A Retail Clothing Business feels more trustworthy when your policies are clear, because customers ask about returns, exchanges, and refunds right away. Set these policies before you print tags or build your website so everything matches.
At a minimum, decide how you handle returns and exchanges, what counts as damaged goods, and how receipts work. If you sell online, you’ll also want basic privacy and terms pages so customers know what happens with their information and payments.
If you run consignment, write down the split terms and payout timing, and keep a consistent record system for consignor items. If you do private label, keep supplier compliance documentation organized in the same place you store invoices and shipping records.
Plan Physical Setup
A Retail Clothing Business layout should make shopping easy and backroom work practical, because you will restock and re-merchandise constantly in the first weeks. Your front-of-house needs clear sight lines, fitting room flow, and a checkout area that doesn’t bottleneck.
Your backroom needs space to receive cartons, inspect items, store backstock, and prep garments with a steamer or iron. If you don’t design for that, you end up steaming next to the register and stacking boxes where customers can see them.
Also consider accessibility. Public-facing retail spaces generally have obligations under the Americans with Disabilities Act, and the practical review often happens through local permitting and inspections tied to your buildout.
Hire And Train
A Retail Clothing Business may start owner-run, but a storefront schedule can force staffing decisions earlier than you expect. If you plan to hire before opening, build time into your timeline for employer registration, payroll setup, and basic training.
Training for early launch is simple and specific: checkout steps, returns and exchanges, receipt rules, basic loss prevention habits, and how you tag and restock items without breaking inventory counts.
If you’re unsure whether you need help right away, talk to non-competing owners and ask how they handled register coverage during deliveries and restocking. You can use these owner conversation prompts to keep it practical.
Plan Day-To-Day
A Retail Clothing Business is not just “opening the doors,” because the daily work starts before launch and continues after. Pre-launch responsibilities usually include vendor emails, tracking deliveries, receiving cartons, inspecting for damage, tagging, steaming, building displays, and testing checkout and returns workflows.
Early launch responsibilities often include re-merchandising, restocking, handling returns and exchanges, adjusting inventory counts, watching for shrink risk, and keeping policies consistent across in-store and online channels.
If that list makes you think, “I’d rather do something else,” take that seriously now. If it sounds satisfying, you’re closer to the right fit.
Marketing Launch Plan
A Retail Clothing Business launch plan should focus on how customers will find you in the first weeks, not long-term campaigns. Your basics are consistent business listings, a clear storefront presence if you have one, and product photos that match your brand feel.
If you’re opening a physical shop, plan a soft opening window and a grand opening moment that matches your capacity. If you’re online-first, plan how you’ll announce products, handle customer questions, and manage returns without delays.
For a mindset check that keeps you steady during launch pressure, revisit why passion matters when the to-do list feels endless.
Run A Soft Opening
A Retail Clothing Business should run a controlled test before a full launch, because small system errors get expensive when real customers are involved. A soft opening can be limited hours, invite-only, or a quiet first week with fewer promotions.
Test real transactions, taxes, receipts, refunds, exchanges, gift cards if you offer them, and inventory adjustments after each return. Also test online checkout and shipping workflows if you sell online.
Don’t chase perfect. Chase a setup that works reliably with your actual inventory and your actual point-of-sale flow.
Pre-Launch Snapshot
A Retail Clothing Business pre-launch day often starts with vendor follow-ups about shipments and backorders, because lead times and missing sizes can change your display plan. Midday is usually paperwork: business license questions, building department calls, and confirming signage rules.
Later in the day, you may be building SKUs in your point-of-sale, setting tax settings, and testing transactions. If inventory arrives, you’re inspecting labeling and tags, steaming garments, and staging floor sets so your displays look intentional on day one.
Red Flags First
A Retail Clothing Business should pause before opening if a few warning signs show up, because these issues often snowball. Look for signals that your plan is built on assumptions you can’t support yet.
Here are common pre-launch red flags you can act on:
- Supplier minimum orders or lead times that don’t match your cash and storage space.
- No repeatable way to verify labeling and safety documentation for children’s products if you sell them.
- A lease or location decision made before confirming zoning and certificate of occupancy requirements.
- Pricing set without knowing landed cost, including freight, packaging, and payment fees.
- No shrink plan even though your product mix is easy to steal or easy to damage.
If you need a structured gut-check before you keep spending, go back to these startup decision points and confirm what must be true for opening day to work.
Final Opening Checklist
A Retail Clothing Business is ready to open when the legal basics, systems, inventory, and customer-facing details are all aligned. This last checklist is about preventing last-minute chaos.
Here’s what should be true before you open:
- Business setup: entity registered if applicable, EIN obtained if needed, business bank account active.
- Tax setup: sales and use tax registration complete where required, tax settings tested in your point-of-sale.
- Employer setup: withholding and unemployment registrations complete if hiring, workers’ compensation confirmed where required.
- Local approvals: zoning confirmed for your address, business license complete where required, building and fire steps completed if triggered by your space.
- Store readiness: fixtures installed, fitting rooms ready, mirrors and signage in place, backroom storage organized.
- Point-of-sale readiness: card reader, barcode scanner, receipts, refunds, exchanges, and gift cards tested if offered.
- Inventory readiness: receiving checks complete, items tagged, garments steamed, displays set, backstock controlled.
- Policy readiness: returns and exchanges policy posted, damaged goods rules written, privacy and terms pages live if selling online.
- Digital readiness: domain and business email active, listings accurate, storefront hours ready, launch announcement prepared.
27 Tips to Consider Before Starting a Retail Clothing Business
Starting a Retail Clothing Business can feel simple until you price your first item, place your first opening order, and realize how many details have to line up at the same time.
These tips stay focused on startup and pre-launch decisions so you can open with fewer surprises and fewer last-minute fixes.
Use them as a checklist while you choose your model, line up approvals, set up suppliers, and test your checkout and inventory flow before you open.
Before You Commit (Fit, Skills, Reality Check)
1. Picture a pre-launch week, not a dream opening day, and decide if you enjoy the work: vendor follow-ups, delivery scheduling, tagging, steaming, pricing, and testing the point-of-sale flow.
2. Decide whether you’re comfortable tying up cash in inventory, because apparel inventory often sits on racks until the right size and season sells.
3. List the skills you’ll need to open: assortment planning (sizes and variants), basic retail math (markup versus margin), visual merchandising, and setting up a point-of-sale system that tracks inventory and returns.
Demand And Profit Validation
4. Validate demand before you sign a lease by checking who already sells your style category nearby and what makes your shop different (fit focus, price tier, resale, private label, or a tighter niche).
5. If you plan a storefront, visit the area at multiple times and days to confirm real foot traffic, nearby anchors, and whether the street actually supports shopping trips.
6. If you plan an online-first launch, confirm people search for what you sell and that you can source and ship it fast enough to meet expectations without rushing.
Business Model And Scale Decisions
7. Choose your primary model early (storefront, pop-up, online-first, resale, consignment, private label, or a mix) because it changes your approvals, equipment list, supplier setup, and returns handling.
8. Decide if you can truly open solo, especially in a storefront, because deliveries, restocking, fitting room traffic, and checkout coverage can overlap on the same day.
9. If you plan consignment, define the split terms and payout timing before you accept a single item so pricing and records don’t become a fight later.
Legal And Compliance Setup
10. Choose your legal structure and register it through your state’s business filing office, then confirm your name is available at the state level before you order signage or packaging.
11. Get an Employer Identification Number early if you need it for banking, hiring, or vendor setup, and store the confirmation where you can access it quickly during account applications.
12. Register for sales and use tax in your state before opening, and confirm whether clothing is taxable where you sell, because apparel tax rules vary by state and sometimes local area.
13. If you buy inventory for resale, confirm what resale documentation your state uses and what your suppliers require, because many wholesalers will not approve accounts without it.
14. If you sell children’s apparel or children’s products, ask suppliers for the documentation required for covered items and keep it organized before you launch.
15. Build a compliance check for apparel labeling and safety that matches what you sell, including care labeling expectations and clothing textile flammability rules when they apply.
Budget, Funding, And Financial Setup
16. Separate startup costs into buckets so you don’t underestimate cash needs: initial inventory, fixtures, build-out, point-of-sale, permits, insurance, branding, and a working capital reserve.
17. Treat supplier minimum order quantities and lead times as budget drivers, because they can force a larger opening buy and a longer pre-launch runway than you planned.
18. Pick your funding path based on how fast you need inventory and fixtures in place, and avoid taking on financing that depends on immediate sales to cover payments.
19. Open a business bank account and keep business transactions separate from day one so sales tax tracking, merchant payouts, and inventory purchasing records stay clean.
Location, Build-Out, And Equipment
20. Confirm zoning and use approval for a storefront before you commit, and ask your local building department whether a certificate of occupancy or inspections are required for that address and planned use.
21. If you’re building fitting rooms or changing lighting, walls, or electrical, confirm whether permits and inspections are triggered before construction starts so your opening date doesn’t slip.
22. Build your equipment list around your real workflow: receiving cartons, inspecting items, tagging, steaming, backstock storage, merchandising, and checkout with receipts and returns.
Suppliers, Systems, And Pre-Opening Setup
23. Choose a retail-capable point-of-sale system that can handle SKUs, size and color variants, sales tax settings, barcode scanning, and returns and exchanges, then test it with real scenarios before opening.
24. Create simple SKU rules and a tagging process before inventory arrives so you don’t end up with untracked sizes, duplicate listings, or a backroom pile you can’t sell.
25. Write your returns and exchanges policy before you print tags or publish product listings so customers see consistent rules in-store and online.
Final Pre-Opening Checks And Red Flags
26. Do a soft opening test that includes real transactions, receipts, refunds, exchanges, tax collection settings, and inventory adjustments after returns, because small errors compound fast in clothing retail.
27. Pause and re-check your plan if you see red flags like long supplier lead times that break your opening schedule, pricing set without landed cost, or no theft controls for an easy-to-steal product mix.
Use these tips as a working checklist while you plan your assortment, line up suppliers, and confirm what your location and product mix require.
If you can’t verify a requirement with your state or local agency, or with the supplier responsible for compliance documentation, slow down until you can.
FAQs
Question: What type of Retail Clothing Business should I start: storefront, pop-up, online-first, resale, or consignment?
Answer: Pick the model that matches your cash, your time, and how you will source inventory. This choice changes your permits, your equipment list, and how you handle returns and inventory tracking.
Question: Do I need to register my business before I buy inventory?
Answer: Many suppliers and payment providers want business details and tax paperwork before they approve accounts. Set up your business structure and key registrations before you place large opening orders.
Question: Do I need an Employer Identification Number (EIN) for a Retail Clothing Business?
Answer: You may need an EIN for banking, hiring, and some vendor or merchant setups. If you apply through the Internal Revenue Service, you can get an EIN directly from the official tool.
Question: What tax accounts do I need to start selling clothing legally?
Answer: You usually need a state sales and use tax registration if you make taxable retail sales. Clothing tax rules differ by state and sometimes by local area, so confirm taxability with your state tax agency before you set up your point-of-sale taxes.
Question: What local permits or approvals might I need for a storefront?
Answer: Many cities and counties require a general business license, and your building department may require approvals tied to the space. Check your city or county licensing portal and building department before you sign a lease or schedule contractors.
Question: Will I need a certificate of occupancy before I open?
Answer: Some locations require a certificate of occupancy when you open in a new space or change how a space is used. Ask the local building department what triggers it for your address and build-out plan.
Question: What insurance is legally required versus just smart to have?
Answer: Requirements often depend on whether you have employees and your state’s rules. Many owners also carry coverage like general liability and property coverage for inventory and fixtures, and landlords may require certain policies.
Question: What do I need to know about accessibility rules for a retail store?
Answer: Public-facing retail spaces generally have responsibilities under the Americans with Disabilities Act. Accessibility often comes up during build-out permits and inspections, so plan for it before you commit to a layout.
Question: What product labels should I verify for apparel I sell?
Answer: Apparel can involve federal labeling rules like fiber content and country of origin for many textile and wool products. Care instructions may also be required on textile wearing apparel under federal rules.
Question: Do flammability rules apply to the clothing I sell?
Answer: Clothing textiles can be covered by a federal flammability standard. If you private label, import, or alter garments, confirm which items fall under the standard and keep supplier testing documentation organized.
Question: What changes if I sell children’s clothing or children’s products?
Answer: Children’s products covered by safety rules often need testing and a Children’s Product Certificate from the manufacturer or importer. Ask suppliers for the certificate and related records before you accept inventory.
Question: How do I plan my opening inventory without overbuying?
Answer: Start with a tight assortment and clear size runs so you can receive, tag, steam, and display items without chaos. Supplier minimum order quantities and lead times can force a larger buy, so confirm them in writing before you budget.
Question: How should I set prices without guessing?
Answer: Base pricing on landed cost, not just the wholesale tag, and include freight, packaging, and payment fees. Choose a method like markup pricing or aligning to brand suggested pricing when it exists, then set discount rules before you print tags.
Question: What should be in my startup budget for a Retail Clothing Business?
Answer: Include inventory, fixtures, point-of-sale hardware and software, permits, insurance, branding, and a cash reserve. Use a worksheet approach so you don’t forget deposits, build-out work, and the time it takes inventory to sell.
Question: What equipment do I need to open a clothing store?
Answer: Most openings require fixtures like racks and shelving, fitting room basics, point-of-sale tools, and backroom receiving and prep tools like storage and a garment steamer. Build the list around your workflow from delivery to tagging to checkout.
Question: What should my point-of-sale system do on day one?
Answer: It should handle inventory with variants, sales tax settings, barcode scanning if you use it, and returns and exchanges without breaking counts. Test real scenarios like refunds and exchanges before you open.
Question: What do I need to do to handle card payments safely?
Answer: Use a reputable payment provider and follow the Payment Card Industry Data Security Standard (PCI DSS) requirements that apply to merchants. Avoid storing card data yourself unless you fully understand the security duties that come with it.
Question: What should I test during a soft opening?
Answer: Run test sales, receipts, tax collection, refunds, exchanges, and inventory adjustments after returns. If you sell online, test checkout, packing, and return processing with a real order flow.
Question: Should I hire before opening, and what should I train first?
Answer: A storefront may need help sooner than you expect to cover checkout while deliveries and restocking happen. Train first on point-of-sale steps, refunds and exchanges, tagging rules, and basic loss prevention habits.
Question: What should I watch for in first-month cash flow?
Answer: Inventory payments can hit before sales settle, so plan for timing gaps and keep a cash reserve. Track how fast inventory turns and how returns and discounts affect cash, not just revenue.
Question: What basic policies should I finalize before the first sale?
Answer: Write clear rules for returns and exchanges, damaged goods, and how you handle proof of purchase. Keep the policy consistent across your point-of-sale, receipts, and online listings if you sell in more than one place.
Question: What early marketing tasks should I do before opening week?
Answer: Secure your domain and social handles, and publish accurate contact details, address, and hours where you will be found. If you have a storefront, make sure your online listings match your signage and your opening plan.
Expert Advice From Boutique Owners
You can save a lot of time by learning from people who have already opened and run a clothing shop.
These interviews and founder stories can help you think through sourcing, store model choices, early cash planning, and what to test before you open.
- Square — Hot Sam’s owners on running a legacy clothing store
- BigCommerce — Interview spotlight with retailer Joanne Bienskie (Alpinistas)
- Shopify Masters — Interview with Alex Mill founder on building an apparel business
- The Boutique Hub — Boutique model talk: fashion truck vs storefront (KooKoo’s Nest)
- Lavendaire Podcast — Interview with Morning Lavender founder on opening boutiques
- The Brava Podcast — Boutique owner interview notes (No14 Boutique)
- How I Built This — Founder interview: Rent the Runway (Jenn Hyman)
- Inventory Genius Podcast — Interview with boutique owner Meagan Cole
Related Articles
- Fashion Accessories Store Startup Guide
- Dress Rental Startup Guide
- How to Open a Dancewear Shop
- Start a Costume Rental Business
- Start a Baby Clothing Store
- How to Start a Shoe Store
- Starting a T-Shirt Business
- Starting an Athletic Clothing Line
- How to Start a Sneaker Shop
- How to Start a Fashion Consulting Business
- Starting a Jewelry Business
- How to Start a Tie Dye Business
Sources:
- SBA: Calculate Startup Costs, Register Your Business, Pick Business Location, Licenses and Permits, Open Business Bank, Get Business Insurance, Tax ID Numbers
- IRS: Get Employer ID Number
- USPTO: Trademark Costs
- FTC: Textile Wool Labeling, Care Labeling Rule
- eCFR: Clothing Flammability (16 CFR 1610)
- CPSC: Children’s Product Certificate
- ADA: Title III Primer
- GS1 US: Get UPC Barcodes
- PCI SSC: Merchant Resources