What to Plan for Before Opening a Dermatology Clinic
You’ve probably had this moment: you spot a skin issue, you search online, and you end up with ten scary answers and no clear next step. A dermatology practice exists to be that clear next step.
A dermatology practice is a medical clinic typically led by a dermatologist (a medical doctor) who diagnoses and treats conditions of the skin, hair, and nails, and may also perform procedures and surgery. Dermatologists are medical doctors who specialize in these areas. Learn what a dermatologist is (AAD).
This is a regulated, clinician-led business. If you are not a licensed clinician, you cannot provide clinical care, and non-physician clinicians may only provide care within state scope-of-practice and supervision rules. Also, some states restrict who may own a medical practice and how it can be structured. Plan on verifying ownership and entity rules early with your state medical board and a healthcare attorney.
How Does a Dermatology Practice Generate Revenue
Most revenue comes from professional medical services billed to patients and, when contracted, to insurance programs. A dermatology practice can also offer services that are paid directly by patients.
Your exact mix depends on your scope (medical dermatology, procedural dermatology, surgical dermatology, cosmetic dermatology, or a mix) and whether you participate with payers.
Common revenue streams include:
- Office visits and evaluation services for skin, hair, and nail conditions.
- In-office procedures (for example, cryotherapy, biopsies, and certain injections).
- Dermatologic surgery (for example, excisions and certain skin cancer procedures, depending on training and setup).
- Phototherapy services when you offer in-office ultraviolet light treatment. See UVB phototherapy basics (DermNet).
- Teledermatology visits when permitted by your state rules and payer policies. See Medicare telehealth policy hub (CMS).
- Cosmetic services (for example, certain lasers and cosmetic procedures, depending on training, equipment, and state scope-of-practice rules). See FDA overview of medical lasers (FDA).
- Retail sales (for example, skin care products) when you choose to carry them; this can add tax registration and sales tax collection requirements, depending on your state.
Products And Services You Can Offer
Dermatologists diagnose and treat a wide range of conditions that affect skin, hair, and nails. See an A–Z of conditions (AAD).
What you offer should match your credentials, training, your facility setup, and your local market demand.
Common service categories include:
- Medical dermatology: evaluation and treatment of acne, eczema, psoriasis, infections, rashes, hair and nail disorders, and more.
- Skin cancer care: skin exams, biopsies, excisions, and related care within your scope and training.
- Procedures: cryotherapy for certain lesions (uses extreme cold to treat abnormal tissue). Cryotherapy overview (Cleveland Clinic).
- Phototherapy: in-office ultraviolet light therapy for certain conditions when appropriate. UVB phototherapy overview (DermNet).
- Cosmetic dermatology: cosmetic consultations and selected cosmetic procedures where appropriate, including certain laser-based treatments (requires specialized equipment and safety controls). Laser products and safety context (FDA).
- Teledermatology: remote care using compliant platforms, aligned with licensure rules and clinical standards. Teledermatology standards (AAD).
Who Your Customers Are
Your customers are patients, and they come from several channels: self-referral, primary care referrals, referrals from other specialists, employer or school needs, and (in some markets) cosmetic self-pay demand.
Common patient groups include:
- Adults and seniors seeking diagnosis and treatment of chronic or new skin conditions.
- Parents bringing children for pediatric skin concerns.
- Patients needing evaluation for suspicious lesions and skin cancer screening.
- Patients seeking procedure-based care (for example, treatment for warts or certain benign lesions).
- Patients seeking cosmetic dermatology services (self-pay in many cases).
Pros And Cons Of Owning A Dermatology Practice
This business can be professionally rewarding, but it has a high bar for credentials, compliance, and startup planning. Your practice model (medical, cosmetic, mixed, or teledermatology-forward) changes the risks and the setup load.
Potential upsides include:
- Work that directly improves patient health and quality of life.
- A wide range of clinical niches (medical, surgical, pediatric, cosmetic, teledermatology).
- Ability to build a clinic culture and patient experience you control.
Potential downsides include:
- Licensure, payer enrollment, and compliance requirements can slow your launch.
- Significant equipment needs if you offer procedures, lasers, or phototherapy.
- Medical records privacy and security obligations under the Health Insurance Portability and Accountability Act (HIPAA). HIPAA Privacy Rule summary (HHS).
- Workplace safety compliance for staff exposure risks (for example, bloodborne pathogens). OSHA bloodborne pathogens standard (OSHA).
- Complex contracting decisions (insurance participation versus cash-pay services) that affect scheduling, billing, and staffing needs.
Is This The Right Fit For You
Before you build anything, decide two things: whether owning and operating a business is for you, and whether a dermatology practice is the right fit. This is not a casual decision. It’s a licensed healthcare clinic.
Start with a practical reality check. Review business start-up considerations and then read a business inside look so you understand what day-to-day responsibility feels like.
Next, pressure-test your motivation. Passion matters because it helps you keep going and solve problems when challenges hit. Without it, many people look for an exit instead of solutions. If you want to explore that idea, read why passion matters in business.
Ask yourself this exact question: “Are you moving toward something or running away from something?” If your main goal is escaping a job or a financial bind, that may not sustain you when the work gets hard.
Also be honest about responsibility and readiness. Can you handle uncertain income, long hours, difficult tasks, fewer vacations, and full responsibility? Is your family or support system on board? Do you have (or can you learn) the skills needed, and can you secure funds to start and operate?
Finally, talk to real owners, but only talk to owners you will not be competing against. Choose a different city, region, or service area so you’re not asking a direct competitor for sensitive details.
Smart questions to ask non-competing owners:
- What took longer than expected before opening, and why?
- What were the top three costs or commitments that surprised you during setup?
- If you could restart, what would you lock in earlier (location, payer enrollment, staffing, equipment, or vendor choices)?
Startup Steps To Start A Dermatology Practice
The steps below are written for startup and pre-launch only. Each step is about getting legally ready, practically ready, and market-ready to open your doors.
If you want extra planning support, you can also use these guides as you go: understanding supply and demand, estimating startup costs, and how to write a business plan.
Step 1: Confirm Clinical Credentials And Ownership Rules
Start with the non-negotiable: who is legally allowed to practice dermatology and who is allowed to own the practice in your state. A dermatology practice is typically led by a dermatologist, and a dermatologist is a medical doctor specializing in skin, hair, and nails. Definition and scope (AAD).
If you are not the physician, your first step is confirming whether your state allows non-physicians to own any portion of a medical practice, and what structures are permitted. Ownership restrictions and professional entity rules vary by state, so verify directly with your state medical board. Find your state medical board (FSMB).
This one step can change everything about your plan: solo owner-physician, physician partners, or a model where a separate management company supports non-clinical functions. Do not build your business structure until you confirm what your state allows.
Step 2: Choose Your Practice Model And Service Scope
Decide what type of dermatology practice you are building before you shop for space or equipment. Your scope drives your licensing needs, your build-out, your staffing, and your startup spending.
Common models include medical dermatology-focused clinics, combined medical and procedural clinics, surgical dermatology clinics, cosmetic dermatology-forward clinics, and hybrid models that include teledermatology. If teledermatology is part of your plan, align it with clinical standards and licensure expectations. Teledermatology standards (AAD).
Now decide staffing direction at a high level. Will you open solo, with partners, or with outside capital where allowed? Will you staff up immediately, or will you do most non-clinical setup tasks yourself and add staff closer to opening? Your answer affects your timeline and compliance obligations (for example, employer registrations and workplace training).
Step 3: Validate Demand And Confirm The Business Can Support You
Verify demand in your target area before you sign a lease. Look at population size, age mix, and how many dermatology providers already serve the area. Confirm whether patients typically self-refer, whether primary care referral patterns matter in your market, and whether local wait times signal unmet demand.
Then verify profit ability, not just revenue. Your plan must cover clinic expenses and still pay the owner. Build a realistic model around your chosen scope and payer participation. If you want a structured way to think about demand, use this guide to check supply and demand.
Be specific about what you will measure: expected patient volume, appointment mix, procedure mix, and the time required per visit. You’re not guessing; you’re building a launch plan you can defend.
Step 4: Build A Starter Budget And Price Framework
List the essentials you need to open, then get real pricing estimates for each item. Your totals will depend heavily on scale, scope, and whether you add high-cost services like lasers or phototherapy. Use a structured method for estimating startup costs.
Next, set a pricing approach that matches your model. If you accept insurance, your contracted rates will drive much of your pricing reality. If you offer self-pay services (often the case in cosmetic dermatology), your posted fees and packages become central. Use this guide on pricing products and services to organize your thinking.
Do not lock pricing until you know your costs, your payer participation plan, and your local competitive landscape.
Step 5: Choose A Location That Fits Patients And Compliance
A dermatology practice is location-based for most models, even if you offer teledermatology. Pick a location that is convenient for patients, supports accessibility needs, and fits your services (exam rooms, procedure rooms, storage, and privacy requirements).
Match the space to your scope. A medical dermatology clinic may need fewer specialized rooms than a practice that offers surgery, lasers, or phototherapy. Phototherapy requires dedicated space and safety controls. Phototherapy overview (DermNet).
Use this location-planning guide to think through practical tradeoffs: business location considerations.
Step 6: Plan Compliance Early
Healthcare compliance is not a “later” item. Build it into your launch plan while you still have time to correct gaps.
HIPAA applies to covered entities, including healthcare providers who transmit health information electronically in connection with standard transactions. Start by confirming whether and how your practice will meet HIPAA covered entity criteria, and plan your privacy and security safeguards accordingly. Covered entities overview (HHS) and Privacy Rule summary (HHS).
Workplace safety is also foundational. If staff can have occupational exposure to blood or other potentially infectious materials, you must follow the Bloodborne Pathogens standard. Bloodborne pathogens standard (OSHA). Covered employers are also required to display the “It’s the Law” poster. OSHA workplace poster guidance (OSHA).
Step 7: Decide Whether You Need CLIA, DEA, Or Laser-Related Controls
Your services determine whether you need additional federal registrations or oversight. This step is about matching your clinical plan to the right compliance path.
If you plan to perform certain in-office lab tests, you may need a Clinical Laboratory Improvement Amendments (CLIA) certificate. CMS provides the official application overview and form guidance. How to apply for a CLIA certificate (CMS). If you only perform waived tests, the Centers for Disease Control and Prevention provides CLIA waiver preparation materials. Waived tests resources (CDC).
If you will handle controlled substances, you may need a Drug Enforcement Administration registration. Start with the DEA Diversion Control Division registration hub. DEA registration resources (USDOJ).
If you plan to offer laser services, build safety and device compliance into your launch plan. The Food and Drug Administration maintains information on medical lasers and laser products. Medical lasers (FDA) and Laser products and instruments (FDA).
Step 8: Form The Business And Set Up Tax Accounts
Once you have confirmed ownership rules and your model, form the legal entity and register for tax accounts. Many small businesses start as sole proprietorships and later form a limited liability company as they grow because it can provide structure and liability separation. In healthcare, entity choices can be constrained by professional practice rules, so confirm your state requirements before you choose.
At minimum, you will typically need an Employer Identification Number for banking and tax reporting if you are forming an entity or hiring employees. The official place to obtain an Employer Identification Number is the Internal Revenue Service. Get an Employer Identification Number (IRS).
For the business registration path, use your state Secretary of State business portal and your state Department of Revenue or taxation portal for state tax registrations. If you sell retail products, confirm whether you must register to collect sales tax.
Step 9: Get Provider Identifiers And Start Payer Enrollment
Provider identification is a core pre-launch step. Many healthcare transactions require a National Provider Identifier, which is a HIPAA administrative simplification standard. National Provider Identifier standard (CMS).
For application mechanics, the National Plan and Provider Enumeration System provides official application guidance. Apply for an NPI help page (NPPES).
If you plan to bill Medicare, enroll through PECOS using the official Centers for Medicare and Medicaid Services enrollment pathway. Medicare enrollment applications (CMS). Start this early because enrollment and credentialing can be a pacing item for your opening timeline.
Step 10: Set Up Banking, Funding, And Your Business Plan
Even if you are not seeking funding, write a business plan. It forces you to document your services, market assumptions, startup budget, compliance path, staffing plan, and timeline. Use a practical approach with this business plan guide.
Then set up business accounts at a financial institution. Keep business funds separate from personal funds from day one. If you need financing, prepare your documents and options. This guide can help you understand the basics of getting a business loan.
If you are unsure about accounting setup, payroll, or tax workflow, professional help is common here. Getting it done correctly matters more than doing it alone.
Step 11: Build Your Staffing Plan And Required Training
Your staffing needs depend on scope. A medical dermatology clinic might open with fewer clinical support roles than a procedure-heavy clinic. Think in phases: what you must have to open safely, and what you can add after the clinic is stable.
At minimum, plan for front-desk scheduling, patient registration paperwork, medical assisting support, and billing support (in-house or outsourced). If you will have employees, you must also plan workplace training that applies to your setting. For example, if job roles include occupational exposure risks, compliance with bloodborne pathogens requirements is part of your pre-launch readiness. OSHA bloodborne pathogens standard (OSHA).
If you need help deciding when to add staff, use this guide on how and when to hire. If you plan to build a support group (legal, accounting, insurance, and technology), review building a team of professional advisors.
Step 12: Choose Your Business Name And Lock Your Online Presence
Pick a name that is available legally in your state and also works online. Secure a matching domain and consistent social handles before you finalize brand assets.
Use this guide to keep your naming work organized: selecting a business name.
Once the name is set, build a basic web presence that makes it easy for patients to find you, understand your services, and request an appointment. For a practical approach, start with how to build a business website.
Step 13: Set Up Insurance And Risk Coverage
Insurance is part of startup readiness. At a baseline, plan for general liability insurance because you have a physical location and public foot traffic. Also plan for property and equipment coverage if you own or lease valuable clinical equipment.
In a clinical setting, professional liability insurance (medical malpractice) is typically central to risk planning. Requirements can come from state rules, hospital privileges, payer contracts, or your lease terms. Confirm requirements in writing and keep proof of coverage organized.
If you want a simple framework for evaluating business coverage, use this business insurance overview.
Step 14: Build Your Brand Assets And Patient-Facing Materials
Brand assets are not just for marketing. In a medical clinic, patients need clear identification, signage, and credible basic materials. Keep it simple and consistent.
Your basic package often includes a logo, business cards, exterior and interior signage, a letterhead template, and a clean website. Helpful guides include business card basics, business sign considerations, and corporate identity basics.
If you plan a grand opening, keep the goal practical: awareness and appointment requests. You can pull ideas from grand opening planning.
Step 15: Finalize Setup, Forms, And Opening Readiness
This is the step where your clinic becomes real. Confirm your build-out is complete, your equipment is installed and tested, and your privacy and safety safeguards are in place.
Prepare patient-facing documents such as consent forms, privacy notices, and new patient forms, and confirm they align with your privacy obligations. HIPAA planning belongs here too. HIPAA Privacy Rule summary (HHS).
Set up scheduling, billing workflow, and payment processing so you can accept payment. Then plan your first marketing push. If you want a simple local approach, review how to get customers through the door.
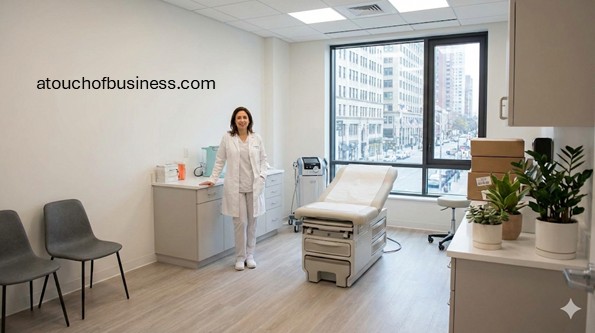
Essential Equipment Checklist
Equipment needs vary by scope. A medical dermatology clinic can open with fewer specialty systems than a clinic offering lasers or phototherapy. Use this list as a baseline and tailor it to your services.
Below is an itemized list of common essential equipment by category. Add or remove items based on what you will offer on day one.
- Clinical Exam And Diagnostic Equipment
- Exam tables with adjustable positioning
- Provider stools and patient seating
- Exam lights (ceiling-mounted or mobile)
- Dermatoscopes
- Otoscope/ophthalmoscope set (when needed for related evaluations)
- Blood pressure monitors
- Thermometers
- Pulse oximeters
- Scales (adult and pediatric if applicable)
- Procedure Room Equipment
- Procedure tables and procedure lighting
- Electrosurgical unit (when offering electrosurgery)
- Smoke evacuator (when using electrosurgery/laser where applicable)
- Cryotherapy delivery system (for example, liquid nitrogen equipment) Cryotherapy overview (Cleveland Clinic)
- Biopsy instruments and sterile trays
- Specimen containers and labeling tools
- Sharps containers and puncture-resistant disposal systems
- Surgical Dermatology Setup
- Surgical instrument sets for excisions and repairs
- Sterile field supplies and instrument trays
- Surgical lighting
- Cautery tools and accessories
- Autoclave or contracted sterilization workflow support equipment
- Laser And Energy-Based Devices
- Medical laser systems appropriate to your services Medical lasers (FDA)
- Laser safety eyewear (patient and staff)
- Laser warning signage
- Laser safety accessories and controls appropriate to the device
- Emergency stop and safety interlocks as required by device setup
- Device maintenance tools and manufacturer-required accessories
- General laser safety reference materials Laser products and instruments (FDA)
- Phototherapy Equipment
- Narrowband UVB phototherapy unit (cabinet or panel system as appropriate)
- Protective eyewear for phototherapy sessions
- Phototherapy room safety signage and controls
- Timing and dose tracking tools consistent with your clinical protocols
- Ventilation considerations as required by the equipment and room design
- In-Office Lab Equipment (When Applicable)
- Equipment for any planned waived tests (only if you will perform them)
- Refrigeration unit for specimens or test materials when required
- Labeling and specimen handling tools
- Biohazard waste containers
- CLIA certificate support documentation and inspection-ready storage (when applicable) CLIA certificate application (CMS)
- Sterilization, Infection Control, And Safety
- Autoclave (if sterilizing instruments on-site)
- Ultrasonic cleaner (when applicable)
- Instrument drying and storage cabinets
- Personal protective equipment storage and dispensers
- Handwashing sinks or sanitation stations in required locations
- Spill kits and exposure response supplies
- Workplace compliance posting materials (including required OSHA poster) OSHA poster guidance (OSHA)
- Biohazard waste management containers and pickup coordination tools
- Medical Records And Technology
- Computers or terminals for clinical documentation
- Secure network equipment (routers, firewalls, managed Wi-Fi)
- Scanners for document capture
- Printers for clinical and administrative use
- Secure backup and data recovery tools consistent with privacy requirements HIPAA Privacy Rule summary (HHS)
- Telehealth-capable audio/video setup when offering teledermatology Telehealth hub (CMS)
- Front Desk And Administrative Equipment
- Check-in desk and secure storage for sensitive documents
- Phone system and voicemail
- Appointment scheduling tools (software or integrated system)
- Payment processing equipment (card reader and secure terminal) to accept payment
- Waiting room seating and basic furnishings
- Signage systems for directions and policies
Skills You Need Before You Open
You do not have to be great at every skill personally, but you do need a plan to cover them. You can learn, delegate, or bring in qualified professionals.
Core skills and capabilities include:
- Clinical competence aligned with the services you plan to offer (physician-led care)
- Regulatory awareness for privacy, safety, and clinical documentation HIPAA covered entity basics (HHS)
- Scheduling and patient flow planning (without sacrificing privacy and safety)
- Vendor and equipment evaluation, including installation requirements
- Basic financial planning, budgeting, and cash-flow planning
- Hiring readiness and training planning how and when to hire
- Communication skills for patient education and consent
- Risk awareness and documentation discipline
Day-To-Day Activities In A Dermatology Practice
This is here so you can decide if the work style fits you. These are common daily activities once the doors are open, and they also tell you what you must prepare for during setup.
Typical day-to-day activities include:
- Review schedule, urgent needs, and procedure blocks
- Patient visits: assessment, diagnosis, treatment planning
- Procedures (for example, biopsies, cryotherapy, excisions when offered) Cryotherapy overview (Cleveland Clinic)
- Documentation and care coordination
- Pathology tracking and follow-up workflows (when biopsies are performed)
- Team huddles, training, and safety checks
- Equipment checks and room readiness
- Privacy and security safeguards for records and communications HIPAA Privacy Rule summary (HHS)
A Day In The Life Of A Practice Owner
As the owner, you’re balancing two lanes: clinical care and business responsibility. Your clinical schedule may be full, but you still have to make decisions about staffing, compliance readiness, equipment, and patient experience.
On a typical day, you may start with a quick review of the schedule, then move through patient visits and procedures. Between patients, you may approve orders, review vendor messages, handle an urgent compliance or facility issue, and review a short financial snapshot. If you offer teledermatology, you may also have remote consult blocks aligned with standards and payer rules. Teledermatology standards (AAD).
Red Flags To Watch For Before You Commit
Red flags are things that can derail your timeline, your licensing path, or your risk exposure. Catching them early is part of smart startup work.
Common red flags include:
- Unclear ownership legality in your state (especially for non-physician involvement) and no plan to verify with the state medical board Find your board (FSMB)
- Signing a lease before confirming zoning and a Certificate of Occupancy (CO) path for medical use
- Buying high-cost devices (lasers, phototherapy) before confirming space, power needs, safety controls, and training requirements Medical lasers (FDA)
- Assuming payer enrollment will be fast instead of starting early Medicare enrollment (CMS)
- Not planning HIPAA safeguards before setting up electronic records and communications HIPAA Privacy Rule summary (HHS)
- Hiring staff without planning required workplace training and exposure controls Bloodborne pathogens standard (OSHA)
- Offering in-office lab testing without confirming CLIA requirements CLIA application (CMS)
Pre-Opening Checklist
This is a final sweep before you open. You are confirming compliance readiness, equipment readiness, and patient-ready basics.
Use this checklist as a last-step filter:
- Business entity formed, tax accounts set, and business bank accounts active EIN guidance (IRS)
- Location approved for intended use, and Certificate of Occupancy (CO) obtained when required
- HIPAA privacy and security safeguards prepared for how you will communicate and store records Covered entities overview (HHS)
- Workplace safety program ready, including exposure controls if applicable, and required OSHA poster displayed OSHA poster guidance (OSHA)
- CLIA certificate in place if you will perform qualifying tests CLIA application (CMS)
- DEA registration completed if you will handle controlled substances DEA registration (USDOJ)
- NPI obtained and payer enrollment status confirmed NPI standard (CMS)
- Equipment installed, tested, and staff trained on safety-critical devices (lasers and phototherapy where offered) Medical lasers (FDA)
- Website live and appointment request process tested how to build a business website
- Local awareness plan ready (simple outreach and opening announcement) grand opening ideas
Varies By Jurisdiction
Medical practices are shaped by federal rules and state-level professional regulation, and then layered with local licensing, zoning, and building requirements. Your job is to verify, not assume.
Use this quick verification checklist:
- State medical board: Confirm licensure, supervision rules, and ownership structure limits. Use FSMB’s directory to find the right board.
- City or county planning and zoning: Confirm medical office use is allowed at your address, and ask what triggers a Certificate of Occupancy (CO).
- City or county business licensing portal: Search for “business license” plus your city/county name and confirm whether a general business license is required.
- State tax agency: Confirm employer registrations and any sales tax registration if you will sell retail products.
- Federal registrations tied to your services: CLIA (testing), DEA (controlled substances), and device safety planning (lasers) using official sources. CLIA (CMS), DEA (USDOJ), Lasers (FDA).
Two smart questions to ask locally (and document the answers):
- Is this address approved for medical clinic use, and what is the exact process for occupancy approval?
- What local licenses, signage approvals, or inspections apply before opening?
- If we add a procedure room, laser services, or in-office testing, what additional approvals are triggered?
Simple Self-Check
Before you spend serious money, can you clearly answer this: who will legally provide care, what services you will offer on day one, and which registrations and approvals your exact scope triggers?
101 Tips to Start and Grow a Dermatology Practice
These tips come from different parts of building a real business, so you can pick what fits your situation.
Some will click right away, and some will matter later when you hit a new stage.
Save this page, try one tip, and come back when you’re ready for the next move.
What to Do Before Starting
1. Confirm you can legally provide dermatology care in your state before you plan anything else.
2. If you are not a physician, verify whether your state limits non-physician ownership of medical practices and what structures are allowed.
3. Decide what you will offer at launch: medical dermatology only, procedures, surgery, cosmetic services, teledermatology, or a mix.
4. Write down what you will not offer in the first 6–12 months so your lease and equipment list stays realistic.
5. Pick a target patient profile to start with, such as acne, eczema, psoriasis, suspicious lesions, or a cosmetic-focused patient base.
6. Check local demand by calling competing clinics and noting new-patient wait times and availability for urgent visits.
7. Build a competitor snapshot that includes their hours, services, payer participation, and how easy it is to book an appointment.
8. Decide early whether you will accept insurance, be cash-pay, or run a mixed model because it changes staffing, billing tools, and timing.
9. Create a startup budget from the ground up using only real quotes, not guesses.
10. Split your budget into “must-have to open” and “nice-to-have later” to protect cash for essentials.
11. Decide whether you will do in-office lab testing; if yes, research federal requirements tied to testing complexity.
12. If you plan to prescribe controlled substances, confirm the federal registration steps and any separate state registration requirements.
13. Plan your privacy and security setup before you touch patient information, not after.
14. Choose a location based on patient convenience, parking, accessibility, and the services you plan to offer.
15. Verify zoning allows a medical office at the address before you sign a lease.
16. Ask the building office what triggers a Certificate of Occupancy (CO) for medical use and what inspections you must pass.
17. Sketch a basic floor plan that protects privacy and supports exam rooms, a procedure room if needed, storage, and staff workspace.
18. Decide how you will handle biopsies and pathology results, including specimen labeling, transport, and turnaround expectations.
19. Choose an electronic health record system that supports photo documentation and dermatology templates if you plan to use images.
20. Plan workplace safety controls if staff may be exposed to blood or sharps, especially if you will perform procedures.
21. Decide your opening staffing level: minimal team to launch versus a fuller team for faster booking capacity.
22. Build a timeline that treats payer enrollment and credentialing as a pacing item, not a quick checkbox.
23. Form your legal entity only after you confirm state rules for medical practices and professional entities.
24. Get an Employer Identification Number and open a business bank account before you pay vendors or sign major contracts.
What Successful Dermatology Practice Owners Do
25. They run a tight scope at launch and expand only when systems and staffing are stable.
26. They document key decisions in writing so the practice does not rely on memory.
27. They standardize visit types and appointment lengths instead of treating every slot as the same.
28. They build clear referral relationships with primary care, urgent care, and relevant specialists before opening.
29. They set a weekly block for reviewing compliance items, not just finances.
30. They keep equipment choices tied to patient demand, not what looks impressive.
31. They use consistent clinical templates so charting stays accurate and efficient.
32. They treat patient photos as part of medical records and protect them with the same controls as every other record.
33. They train staff on what can be said on the phone, what must be documented, and what must be escalated.
34. They make billing and coding support a planned role, whether in-house or outsourced.
35. They keep a simple dashboard: new patient count, follow-up rate, no-show rate, procedure mix, and claims status.
36. They plan for supply continuity so basic consumables never run out during patient hours.
37. They use written consent and aftercare steps for procedures and treat them like non-negotiables.
38. They build a process for prior authorizations and specialty pharmacy coordination if they expect to prescribe certain therapies.
39. They set patient expectations up front about results, timelines, and follow-up needs.
40. They invest in staff cross-training so one absence does not shut down a critical workflow.
41. They schedule regular device maintenance and keep service records organized.
42. They review their website and public statements quarterly to ensure claims remain accurate and supportable.
Running the Business (Operations, Staffing, SOPs)
43. Create a written “new patient” workflow that covers check-in, medical history capture, photo permissions, and follow-up scheduling.
44. Build a written procedure workflow for biopsies that includes labeling, documentation, and pathology tracking.
45. Set a hard rule for how quickly pathology results are reviewed and communicated, and document every contact attempt.
46. Use a standard process for urgent lesion concerns so the decision is consistent and trackable.
47. Write a simple phone script for common requests so staff give consistent answers and avoid accidental promises.
48. Define which situations require same-day clinician review, such as severe drug reactions or rapid changes in lesions.
49. Standardize room setup with a checklist so every exam room has the same essentials every morning.
50. Build a supply par level list for gloves, gauze, specimen containers, and sharps disposal so reordering is automatic.
51. Keep medication samples and prescription pads controlled and logged if your practice uses them.
52. Create a process for medication refills that requires an up-to-date visit when clinically appropriate.
53. Use a clear policy for missed appointments that is fair and consistently applied.
54. Make a written policy for releasing medical records, including identity verification and timelines.
55. Decide how you will handle patient messages and portal requests so nothing sits unseen for days.
56. Train staff to protect privacy at the front desk by using low voices and avoiding unnecessary details in public areas.
57. Use role-based access in your software so staff only see what they need to do their job.
58. Keep a written process for closing out the day: chart completion, claims submission checks, and backup verification.
59. Document cleaning and disinfection routines by room type, especially procedure rooms.
60. If you sterilize instruments on-site, document each step and keep logs that can be reviewed if an issue occurs.
61. If you outsource sterilization or use disposable instruments, document your vendor and quality checks.
62. Create a clear hiring plan for the first year that prioritizes roles tied to patient safety and revenue capture.
63. Train all staff on blood and sharps safety if their job could involve exposure, and keep training records.
64. Write a basic incident process so any exposure, fall, or adverse reaction is documented and escalated correctly.
65. Build a simple onboarding checklist so every new hire gets the same training, passwords, and policy review.
66. Use checklists for opening and closing tasks so you do not depend on a single person’s habits.
67. Separate duties where possible so the same person does not handle cash, refunds, and reconciliation without oversight.
68. Review your payer mix monthly so you notice claim denials and reimbursement shifts early.
What to Know About the Industry (Rules, Seasons, Supply, Risks)
69. Treat privacy and security as core requirements; you are handling sensitive health information from day one.
70. Know that teledermatology can trigger additional licensure needs when patients are located in different states.
71. If you advertise results, make sure every claim is truthful and you can support it with evidence, especially for health-related statements.
72. Avoid implying guaranteed outcomes for cosmetic services; instead, explain variables and set realistic expectations.
73. If you offer lasers, verify device legitimacy and safety requirements before purchase, installation, and staff use.
74. Plan extra time and budget for buildouts when you need procedure rooms, specialized power, ventilation, or safety controls.
75. Expect seasonal shifts in demand, such as increased skin checks in warmer months in some markets, and plan staffing accordingly.
76. Understand that biopsy workflows create time-sensitive tasks; a missed follow-up can become a serious clinical and legal issue.
77. Keep a strong chain of custody mindset for specimens: correct labels, correct patient, correct site, correct date, every time.
78. If you sell retail skin care products, verify whether you must register for sales tax collection in your state.
79. Controlled substances bring added registration, documentation, and monitoring expectations; do not treat them casually.
80. If you perform any tests on human specimens, confirm whether federal laboratory certification rules apply to what you plan to do.
81. Learn your state’s rules on who may perform certain procedures and what supervision is required for non-physician staff.
82. Keep an eye on payer policy changes, especially for telehealth, because coverage rules can shift.
83. Understand that referral relationships must be handled carefully; avoid arrangements that could be viewed as improper inducements.
84. When you lease space, read the insurance, signage, and maintenance clauses closely because medical buildouts often have extra requirements.
85. Document your equipment maintenance and calibration where relevant, because device performance can affect patient outcomes.
Marketing (Local, Digital, Offers, Community)
86. Build your website around patient questions, not marketing slogans, and make appointment booking simple.
87. Create separate service pages for your main offerings so search engines and patients understand what you treat.
88. Keep your business name, address, and phone number identical everywhere it appears online to reduce confusion.
89. Ask satisfied patients for reviews, but do not pressure them and do not reveal any patient details when you respond.
90. Use before-and-after photos only with clear permission and keep them accurate and representative.
91. Build relationships with nearby clinics and primary care offices by making referrals easy and communication reliable.
92. Host a simple community education talk on sun safety or acne basics to build trust without hard selling.
93. Track how new patients found you using a short check-in question and a simple spreadsheet.
94. If you promote cosmetic services, describe what the service does and who it is for, not miracle outcomes.
95. Keep marketing compliant by reviewing any health-related claims for truthfulness and support before publishing.
96. Plan an opening-week outreach plan that includes local announcements, referral introductions, and online booking readiness.
Dealing with Customers (Trust, Education, Retention)
97. Explain the plan in plain language at every visit, including what happens next and what the patient should watch for.
98. Give written aftercare steps for every procedure and confirm the patient understands them before they leave.
99. Use a consistent way to handle complaints: listen, document, respond calmly, and escalate clinical concerns to the clinician quickly.
100. Set expectations for response times to messages so patients know when to call versus when to wait for a portal reply.
101. Protect trust by keeping privacy tight at all times, especially at check-in and when discussing results.
If you want a simple next step, pick one area where mistakes would be costly (privacy, specimens, or procedures) and write a one-page checklist your team can follow tomorrow.
Sources:
- HHS.gov: HIPAA Privacy Rule Summary, Covered Entities, Fraud & Abuse Laws, NPI Application Help
- OSHA.gov: Bloodborne Pathogens Standard, It’s the Law Poster
- IRS.gov: Get Employer ID Number
- CMS.gov: Enrollment Applications, Telehealth, Telehealth Services List, Apply CLIA Certificate, NPI Standard
- CDC.gov: Waived Tests
- USDOJ.gov: DEA Registration, Main USDOJ
- FDA.gov: Medical Lasers, Laser Products Instruments
- AAD.org: What Is a Dermatologist, Diseases and Conditions A-Z, Teledermatology Standards, AAD Home
- Cleveland Clinic: Dermatologists, Cryotherapy Uses Risks
- DermNet: UVB Phototherapy
- FSMB: Contact State Medical Board, FSMB Home
- FTC.gov: Federal Trade Commission
- SBA.gov: Small Business Administration