Startup FAQs for Glass Studios: Steps, Costs, Risks
You see a hand-blown vase in a shop and think, “I could do that.” Then you remember the heat, the equipment, the space, and the learning curve. You are not wrong to pause.
A glassblowing Business can be real. But it is not a “buy a tool kit and start tonight” type of launch. Your early decisions about training, space, and safety shape everything that comes next.
Before you commit, make two fit decisions. First, decide if owning and operating a business is right for you. Second, decide if this business is the right fit for you.
If you want a wider reality check on what business ownership asks from you, start here: Business Start-Up Considerations. Then come back and look at this business with clear eyes.
Passion matters more than people admit. When challenges show up, passion helps you stay in it long enough to solve problems. Without it, many people start looking for an exit instead of solutions. Read this and be honest with yourself: why passion matters in business.
Ask yourself this exact question: “Are you moving toward something or running away from something?” If you are starting only to escape a job or a financial bind, that may not sustain motivation when the work gets hard.
Now do the readiness check. Can you handle uncertain income, long hours, difficult tasks, fewer vacations, and full responsibility? Is your family or support system on board? Do you have (or can you learn) the skills and can you secure funds to start and operate?
One of the fastest ways to see the reality is to talk to owners. Only talk to owners you will not be competing against. That means a different city, region, or customer area.
Use these questions to get real answers:
- What surprised you most about setting up the studio space and getting approvals?
- What did you underestimate before you opened?
- If you had to start again, what would you do first to validate demand?
If you want more candid context from owners and operators, you can also use: Business Inside Look.
What A Glassblowing Studio Actually Is
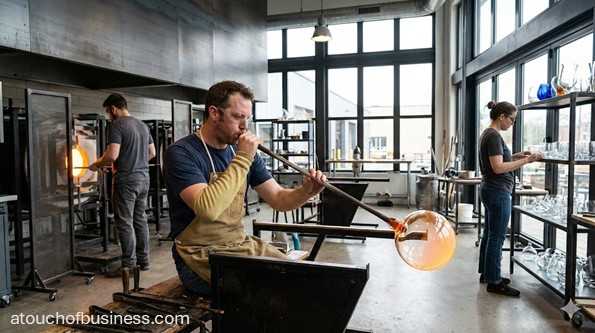
This business is built around hot glass, controlled heat, and controlled cooling. A typical studio melts glass in a furnace, shapes it on the end of a blowpipe, and then cools it slowly in an annealer so it does not crack from stress.
You may also add cold work. That is cutting, grinding, polishing, or drilling glass after it cools. It can add value, but it adds equipment and dust control needs.
Basic glass terms and studio areas vary by shop. UrbanGlass publishes a plain-language glossary that covers common hot shop and cold shop terms. You can use it as a quick reference when you talk with contractors, landlords, and other studio owners.
How Does A Glassblowing Business Generate Revenue
Most studios earn from a mix of products and services. Your launch plan should pick a primary path and one secondary path. That keeps your build focused.
Common revenue paths include:
- Finished goods sold direct to customers (online, studio pickup, markets, retail partners)
- Custom commissions (colors, sizes, and timelines agreed up front)
- Classes and workshops (beginner experiences or multi-session training)
- Live demonstrations (public events or private bookings)
- Studio access models (memberships or rented time for trained users)
Products And Services You Can Launch With
Your first offerings should match your skill level and your equipment. Start with shapes and sizes you can repeat. If you plan to teach, your class format should match what you can safely supervise.
Examples of sellable products:
- Drinkware, tumblers, and simple cups
- Vases, bowls, ornaments, and paperweights
- Small sculptural pieces and seasonal items
- Lighting parts such as pendants or shades (when you can produce safely and consistently)
- Awards and recognition pieces (customized)
Examples of services:
- Custom commissions for homes, gifts, and display pieces
- Private lessons and beginner workshops
- Group events and demonstrations (often tied to venue rules and contracts)
Who Your Customers Usually Are
Your best customers depend on your location and your offer. A studio in a tourist area can lean into demos and gift items. A studio near design firms may sell more custom décor and lighting.
Common customer groups include:
- Local shoppers looking for gifts and home décor
- Tourists who want an experience and a keepsake
- Galleries and retail shops that carry handmade goods
- Interior designers sourcing custom pieces
- Organizations ordering awards or hosting events
Pros And Cons To Know Before You Start
This business can be rewarding, but the launch has real complexity. You are building a high-heat workspace that must be safe and allowed in your location.
Pros to understand:
- Multiple ways to launch (products, classes, demos, commissions)
- Strong differentiation when your work is visible and local
- Clear skill growth over time if you train consistently
Cons to plan for:
- High heat exposure and burn risk, especially in a hot shop environment
- Build-out complexity (ventilation, electrical service, fuel systems, inspections)
- Breakage risk if cooling schedules are rushed or handling is careless
- Cold work can create dust that needs controls and safe cleanup methods
- Approval pathways can differ across cities and counties
Skills You Need Before You Commit
You do not need to be a master to start. But you do need safe fundamentals and a realistic plan for what you can produce or teach.
Skills that matter at launch include:
- Hot glass forming basics and tool control
- Safe movement and positioning in a hot shop
- Understanding annealing time and cooling schedules
- Cold work basics if you plan to cut, grind, polish, or drill
- Basic equipment awareness (temperature control, safe startup and shutdown habits)
- Teaching and supervision skills if you offer classes
If you do not have all the skills, you can learn them. You can also hire or partner for the areas you do not want to own. The goal is safe work and consistent output, not ego.
Day-To-Day Work Reality
This is a hands-on studio business. Your days are shaped by heat-up time, forming time, and cooling time. You also have setup and cleanup that matters for safety.
Typical daily activities include:
- Pre-open safety checks and workstation setup
- Staging tools and preparing molds or forms
- Production sessions at the bench and reheating as needed
- Loading the annealer and tracking when pieces can be handled
- Cold work on cooled pieces (if you offer it)
- Quality checks, packing, and order prep
- Cleanup using methods that reduce dust exposure in cold work areas
A Day In The Life Of A Studio Owner
Morning often starts with safety and setup. You check air movement, confirm equipment status, and set up tools so you are not scrambling once hot work begins.
Midday is usually when you do your hottest work. You shape pieces, reheat, and move work into the annealer so it cools on schedule.
Later in the day, you may do cold work on older pieces, pack orders, prep for a class, or reset the space for the next session. Your best days feel smooth because you planned the flow in advance.
Red Flags To Catch Early
Most startup problems show up before you sign a lease or buy equipment. If you ignore them, you pay for them later.
Watch for these red flags:
- A location that cannot explain how your use fits zoning and building rules
- A landlord who will not allow ventilation changes, ducting, or utility upgrades you may need
- Unclear electrical capacity or unclear upgrade costs before you commit
- No clear plan for safe cooling time and customer delivery timelines
- Cold work plans that ignore dust controls and safe cleanup methods
- Any attempt to skip permits, inspections, or required reviews to “save time”
Step 1: Choose Your Launch Model And Time Commitment
Start by picking a launch model that matches your budget and your skill level. You can start small by renting studio time and selling work. You can also go bigger by building your own hot shop, but that usually raises the cost and approval complexity.
Decide if this will be full time or part time. Your answer affects training time, production pace, and how quickly you can build consistent output.
Most first-time owners have three realistic launch structures:
- Solo start by renting studio time and keeping overhead low
- Partners who split skills and funding (clear roles and written agreements)
- Investor-backed build-out when you are building a larger studio space with higher fixed costs
Also decide how you will staff. You can do most tasks yourself at the start and hire later. If you plan to teach or host groups, you may need paid help sooner for safety and supervision.
If you want guidance on when to bring in help, use: how and when to hire.
Step 2: Validate Demand And Profit Potential
Do not guess demand. Prove it. A glass studio can attract attention, but attention does not always turn into paid orders.
Run simple pre-launch tests:
- Collect email sign-ups for classes or studio updates
- Offer a limited pre-order for a small product line you can repeat
- Test a beginner class through a partner venue or art center before you build your own space
Then test profit potential. You are not only checking if sales can cover materials. You are checking if the business can cover fixed costs and still pay the owner.
If you want a clear way to think about demand, use: supply and demand.
Step 3: Decide Where You Can Operate
Location is not just about customer convenience. It is also about what the building can legally and safely support.
If you will teach, host events, or sell on-site, you need a location that customers can reach easily. You also need a space that can support ventilation, electrical service, and safe movement around hot equipment.
Start your location search with a simple checklist. Then confirm details with your city or county before you sign anything.
If you want a planning framework for choosing a spot, use: business location planning.
Step 4: Build Your Essentials List And Collect Price Quotes
Your startup costs are driven by scale. Renting studio time is one path. Building a hot shop in your own space is another path with much higher fixed costs.
List every essential item you need to open safely. Then collect real price quotes. Do not rely on guesses, because utility upgrades and ventilation work can change your total fast.
If you want a structured way to build your estimate, use: estimating startup costs.
Here is a detailed essentials list to start your planning. Your final list will depend on what you make and whether you teach.
Hot shop core equipment:
- Glass melting furnace
- Reheating furnace
- Annealer (annealing kiln)
- Work bench or forming bench
- Marver or shaping table surface
- Pipe warmer for preheating tools
- Heat-safe tool staging surfaces and racks
Hot shop hand tools:
- Blowpipes
- Pontil rods
- Jacks
- Pliers and tweezers
- Shears (hot glass cutting types as needed)
- Paddles
- Wood blocks for shaping (used with water)
- Molds for repeatable shapes (material depends on your work)
Annealing and kiln accessories:
- Temperature controller components as required by your equipment
- Kiln shelves and posts (when used)
- Kiln-safe trays and loading tools as needed
Cold work equipment (if you will finish pieces):
- Diamond wet saw
- Wet grinder or belt grinder suitable for glass
- Polishing wheels and pads
- Lap grinder or flat grinding surface system
- Diamond hand pads for edge finishing
- Drilling setup for glass (only if your products require holes)
- Water supply or recirculation setup for wet processes
Ventilation and air handling:
- Local exhaust ventilation as designed for your layout
- Make-up air system to balance exhausted air
- Ducting and exterior termination designed to meet local code
- Fans or air movement equipment to reduce heat exposure risk
Utilities and infrastructure:
- Electrical service sized for furnaces, kilns, and cold work tools
- Dedicated circuits and panels as required
- Fuel supply infrastructure when using fuel-fired equipment (varies by studio)
- Compressed air equipment if your tools need it
Safety and emergency essentials:
- Eye and face protection suited to your hazards
- Heat-resistant gloves, sleeves, and aprons based on tasks
- First aid supplies appropriate for burns and cuts
- Fire extinguishers as required by the local fire authority
- Clear exit pathways and posted emergency procedures
- Cleanup tools suited to reduce dust exposure in cold work areas
Materials and packaging:
- Glass materials compatible with your studio system
- Color materials used in your process
- Release agents used for molds or kiln work when applicable
- Protective packaging for breakable items (boxes, foam, dividers)
Step 5: Choose Your Legal Structure And Register The Business
Many small businesses start as a sole proprietorship. As the business grows, owners often form a limited liability company for added liability protection and clearer structure.
Your choice depends on risk, partners, and how you plan to grow. A studio with public classes, high-value equipment, and a leased space may push you toward a structure that separates the owner from the business more clearly.
Start with the basics:
- Choose a structure and register with your state’s Secretary of State or business filing office
- Apply for an Employer Identification Number with the Internal Revenue Service when you need one
- Register for sales and use tax with your state revenue agency if you sell taxable goods
- Set up employer accounts if you hire employees
If you want a practical overview of the registration path, use: how to register a business.
Varies By Jurisdiction
Licensing, permits, and approvals depend on where you operate. Do not rely on a generic checklist from another city. Verify locally before you sign a lease or install equipment.
Use this local verification checklist:
- State Secretary of State: search “business entity registration” and “name availability search”
- State revenue agency: search “sales tax permit” and “withholding account registration”
- City or county licensing portal: search “business license application”
- City or county planning and zoning: search “zoning verification” and “home occupation rules”
- Building department: search “building permit,” “electrical permit,” and “mechanical permit”
- Fire department or fire marshal: search “fire inspection” and “permit requirements”
Ask these quick questions when you call or email:
- Is a high-heat studio allowed at this address under zoning rules?
- What permits and inspections are required for ventilation, electrical work, and fuel systems?
- What approvals are required before the public can enter for classes or demonstrations?
Step 6: Confirm Licenses, Permits, And Inspection Timing
Your goal is to understand what must happen before opening day. You are not trying to memorize every rule. You are trying to confirm the correct local path and build it into your timeline.
The United States Small Business Administration explains that permits and licenses can be federal, state, and local. Use their guidance to frame your research, then confirm details with your city and state.
Include these common categories in your checks:
- General business license or tax registration (city or county)
- Zoning approval and any home-based rules (if applicable)
- Building permits for build-out changes
- Electrical, mechanical, and fuel-related permits when equipment requires it
- Fire inspection requirements, especially with public classes and certain hazards
Step 7: Write Your Plan And Set Up Your Financial Foundation
Write a business plan even if you are not seeking funding today. It forces you to define your offer, your costs, your launch schedule, and your sales plan.
Keep it simple. Your plan should answer what you will sell, who will buy, how you will reach them, what you must spend to open, and what you need to earn to stay open.
If you want a simple guide to the structure, use: how to write a business plan.
Next, build your financial setup. Open business accounts at a financial institution. Set up bookkeeping so you can keep transactions separate from day one.
If you expect you will need funding, prepare early. Gather quotes for build-out work and equipment, and learn what lenders expect. This guide can help you frame that process: how to get a business loan.
Step 8: Choose A Name And Secure Your Online Presence
Your name must be usable and available. Check availability with your state and confirm you can get a matching domain name.
Start with this guide for a structured approach: selecting a business name.
Then secure the basics:
- Domain name
- Social profiles that match your name
- A simple website with your offer, location, hours, and booking path if you teach
If you need a clear starting point for the website build, use: developing a business website.
Step 9: Set Pricing And Line Up Suppliers
Pricing is part math and part positioning. Your price must cover materials, consumables, overhead, breakage risk, and your time.
Use a structured approach so you are not guessing. This guide can help: pricing your products and services.
Then line up suppliers for what you need to open. Supplier reliability matters because material consistency affects outcomes. Start with basic supply needs and expand only after you prove demand.
Step 10: Get Insurance And Risk Controls In Place
Do not treat insurance as an afterthought. Many landlords, venues, and event partners will require proof of coverage before you can operate in their space.
Start with general liability. Then review business-relevant coverages based on your setup, such as property and equipment coverage. If you teach classes or host events, ask your insurance provider about the risks tied to instruction and public attendance.
If you want a plain overview of business coverage types, use: business insurance.
Step 11: Build Basic Brand Assets
You do not need a large brand package to open. You do need consistent basics that make you look legitimate and make it easy for customers to find you.
Start with a simple set of assets:
- Logo and basic color and type choices
- Business cards for local networking
- Signage if you have a public-facing location
- A simple corporate identity set if you are dealing with venues, galleries, or trade partners
Use these guides as needed:
Step 12: Set Up The Space And Get Ready To Open
If you are renting time in an existing studio, your setup is simpler. You still need a safe workflow, supplier accounts, product packaging, and a clear way to accept payment.
If you are building your own space, your setup includes layout planning, utility work, ventilation work, permits, and inspections. This is where many first-time owners get delayed. Plan for it early.
Physical setup basics to plan:
- Hot shop layout that allows safe movement and clear exit paths
- Annealing area with safe loading access
- Cold work zone separated from hot work when possible
- Storage for materials, finished pieces, and packaging
- Office basics for invoicing, records, and scheduling
Pre-launch readiness items that reduce stress:
- Basic contracts for commissions and event bookings when you offer them
- Invoicing and payment tools so you can accept payment cleanly
- Product photos and a simple catalog page
- Clear pickup and shipping timelines that match cooling time realities
Marketing does not need to be complicated. You need a clear offer, clear photos, and a way for people to find you. If you have a public location, this guide can help you plan local traffic: how to get customers through the door.
If you plan an opening event, keep it simple and safe. Use this guide for ideas: grand opening ideas.
Use this pre-opening checklist before you announce a date:
- Confirm all required registrations are complete (state and local as applicable)
- Confirm permits and inspections are finished for the work you completed
- Confirm your insurance coverage is active and meets landlord or venue requirements
- Confirm your essentials and safety gear are on site and ready
- Confirm your pricing and packaging are ready for your first sales
- Confirm your website and booking path work end to end
- Schedule your marketing kickoff and opening announcement
If you want a reminder of common early pitfalls to avoid, use: avoid these mistakes when starting a small business.
If you want to build a small group of advisors to keep you grounded, use: building a team of professional advisors.
Recap And Next Action
This business can start small or go big. You can begin by renting studio time and selling a focused product line. Or you can build your own space, which raises the need for funding, approvals, and a longer setup timeline.
Your next action is simple. Pick your launch model, run a demand test, and price out your essentials with real quotes. Then you will know what kind of startup you are actually choosing.
Is This The Right Fit For You?
This suits you if you like hands-on work, you can train consistently, and you can respect safety without shortcuts. It also helps if you enjoy teaching or public demos, because those can support early revenue when product output is still growing.
The key realities are heat, time, approvals, and cost. If you are not ready for uncertain income and slower timelines, you will feel pressure fast.
Self-check: Can you commit to training, secure the funds to start and operate, and build a safe setup that your local offices will approve? If yes, your next move is to talk to two non-competing owners and schedule your first demand test.
101 Practical Tips for Your Glassblowing Business
Here you’ll find practical tips to help you think clearly and make better moves in your business.
Use what fits your stage, and skip what doesn’t.
Save this page so you can return when a new problem shows up.
Apply one tip, give it time to work, then come back for the next.
What to Do Before Starting
1. Decide your launch path first: products, classes, demonstrations, commissions, or a mix. Your equipment, space, and approvals depend on this choice.
2. Write a “minimum viable studio” plan on paper before you shop for equipment. Include the hot area, the cooling area, and any cutting and polishing area you plan to use.
3. Treat location approval like a gate, not a detail. Confirm zoning and building requirements before you sign a lease or spend on build-out.
4. Bring a simple floor plan to your local building office early. Ask what permits and inspections apply to ventilation, electrical work, and fuel systems in that building.
5. If you plan to teach, decide your maximum class size now. Your staffing, insurance, and safety controls should match that number.
6. Build a launch timeline around cooling time. If your pieces require slow cooling, your customer pickup and shipping promises must match that reality.
7. Test demand before you commit to a permanent space. Run a waitlist for classes or a small pre-order for a limited product line.
8. Validate profit potential, not just interest. Estimate whether sales can cover fixed costs and still pay you a realistic owner draw.
9. Talk to studio owners who are not your direct competitors. Choose a different city or region so you are only learning, not competing.
10. Ask those owners what surprised them about permits, inspections, and build-out. Then ask what they would do differently before opening.
11. Decide if you can start solo or if you need a partner. A partner can reduce risk when you need both capital and specialized skill.
12. If you expect a high-cost build-out, plan for funding early. Lenders and investors will want clear quotes, a timeline, and a realistic sales plan.
13. Pick a legal structure that matches your risk. Many owners start as sole proprietors, then form a limited liability company later as they grow and want added structure.
14. Set up a simple paperwork system from day one. Keep a folder for leases, permits, inspections, insurance documents, and equipment manuals.
15. Create a safety checklist you can follow every session. Include clear walkways, exit access, ventilation on, and protective gear ready.
16. Decide what you will outsource before you start. Use licensed contractors for electrical, gas piping, and major ventilation work.
17. Price out your essentials using real quotes, not guesses. Your totals will change fast based on the scale of your space and equipment.
18. Write a plain business plan even if you are not seeking funding. It forces you to define your offer, costs, timeline, and sales channels.
What Successful Glassblowing Business Owners Do
19. They keep a production log for repeatable results. Record glass type, color choices, forming notes, and cooling schedule by product.
20. They build their schedule around constraints, not wishes. Cooling time, class time, and finishing time set the pace.
21. They standardize a small set of “signature items” early. Repetition improves quality and reduces scrap.
22. They treat photos as a core asset, not an afterthought. Set up a small photo area and document finished work consistently.
23. They define quality standards in writing. Decide what is sellable, what becomes a second, and what gets recycled.
24. They create clear product descriptions that match reality. The description should reduce confusion before a customer asks questions.
25. They protect their time with simple boundaries. Set open studio hours, class hours, and commission intake windows.
26. They keep the workspace organized around safety. Tools have homes, walkways stay clear, and hot zones stay controlled.
27. They track the real cost of breakage and rework. This helps them set pricing that survives normal losses.
28. They build relationships with a small set of reliable suppliers. Consistent materials support consistent results.
Running the Business (Operations, Staffing, SOPs)
29. Create written steps for your most repeated tasks. A simple standard operating procedure reduces errors when you are tired or rushed.
30. Build a daily opening checklist and a daily closing checklist. Consistency prevents “I forgot” problems with high-heat equipment.
31. Separate your hot work area from your cutting and polishing area when possible. Different hazards require different controls.
32. Make cleanup a scheduled task, not a vague goal. Dust and debris control protects you, your staff, and your customers.
33. Use a booking system if you teach classes. It should handle capacity, payments, waivers, and automated reminders.
34. Require waivers for classes and demonstrations. Use an attorney-reviewed version if you are hosting the public.
35. Train every assistant on emergency actions before they help you. Everyone should know exits, shutoff points, and how to respond to burns and cuts.
36. Decide your supervision rule for new students. New students should never be left alone with hot equipment.
37. Keep a written equipment maintenance plan. Include inspection frequency, cleaning needs, and who is qualified to service each system.
38. Use a simple inventory method for finished goods. You need to know what you have, where it is, and what is ready to sell.
39. Standardize packaging for your top items. A consistent pack-out reduces breakage and speeds fulfillment.
40. Create care instructions for customers and include them with every sale. Clear care guidance reduces complaints and returns.
41. Set a clear process for custom orders. Require written approvals for design, color, size, and delivery date before work starts.
42. Use deposits for commissions to reduce cancellations. Put the deposit terms in writing so there is no confusion later.
43. Keep your bookkeeping current from the first week. If you fall behind early, it becomes a stress multiplier later.
44. Keep business and personal transactions separate. It protects your records and makes tax time cleaner.
45. If you hire, document duties and training expectations. This reduces inconsistency and keeps safety standards stable.
46. Do a monthly “systems review” meeting with yourself. Decide what to keep, what to simplify, and what to stop doing.
What to Know About the Industry (Rules, Seasons, Supply, Risks)
47. Assume local rules vary, even within the same state. Always confirm zoning, permits, and inspections with your city or county offices.
48. High-heat studios often trigger building, mechanical, and fire reviews. Ask early what approvals are required before you can open to the public.
49. Plan for heat exposure risks in the workspace. Use heat stress guidance and build breaks, hydration, and air movement into your workflow.
50. Use protective eyewear and face protection when your tasks create hazards. If you have employees, follow workplace safety requirements for eye and face protection.
51. Cutting and polishing can create airborne dust in some situations. If you employ staff, understand when respirable crystalline silica rules apply and use engineering controls when needed.
52. Compressed gas cylinders require safe handling and storage. If you use them, follow workplace safety rules and check local fire authority requirements.
53. If you ship materials or chemicals, verify if they are regulated for transport. Use the manufacturer’s Safety Data Sheet to confirm transport classification.
54. Know your waste responsibilities before you scale. If you generate hazardous waste, you may have federal and state requirements based on what you generate.
55. Build a seasonal plan if you rely on tourist traffic or events. Your slow season is when you refine products, improve systems, and plan the next sales push.
56. Expect supply disruptions and price swings in materials and fuel. Keep at least one backup supplier option for critical materials.
Marketing (Local, Digital, Offers, Community)
57. Start with one primary offer that is easy to understand. Confusing offers make people hesitate, and hesitation reduces conversions.
58. Use clear photos that show size and scale. Include a hand-held image or a common object nearby so customers understand dimensions.
59. Build a simple “how it’s made” story that you can repeat. People remember process and craftsmanship, and that supports premium pricing.
60. If you teach, market the outcome and the experience. Explain what the student will make and what support they receive during the session.
61. Publish your class schedule at least four weeks out. A visible calendar helps people plan and reduces last-minute cancellations.
62. Use local partnerships to build trust faster. Work with galleries, art centers, tourism groups, and event venues that already have audiences.
63. Offer limited releases for signature items. Scarcity works best when it is honest and tied to production capacity.
64. Create a simple email list and use it consistently. Email performs well for class launches, limited releases, and event announcements.
65. Use short videos to show heat, shaping, and finishing. A ten-second process clip can communicate value faster than a paragraph.
66. Build social proof the right way. Ask happy customers for a review right after a successful pickup or class.
67. Use events strategically, not constantly. Pick events that match your audience and your ability to transport and display safely.
68. Track what actually leads to sales. Keep a simple note on where customers first heard about you and review it monthly.
Dealing with Customers (Trust, Education, Retention)
69. Set expectations about timing early. Explain that many pieces cannot be picked up the same day because controlled cooling takes time.
70. Use plain language when you explain what customers are buying. Explain why hand-made items can have small variations.
71. Give customers a simple care card. Include cleaning guidance and what to avoid for the specific item type.
72. For commissions, confirm details in writing before you start. Color, size, budget range, and delivery timing should be agreed on in advance.
73. Use a “no surprises” rule for custom work. If something changes, update the customer before you proceed.
74. Explain your shipping method clearly if you ship fragile items. The customer should know packing standards, carrier choice, and what happens if damage occurs.
75. For classes, describe safety rules upfront. People behave better when expectations are clear before they arrive.
76. Build repeat business with a simple follow-up. Send a short message after pickup or class with care instructions and a request for feedback.
77. Keep a customer preference note for repeat clients. Record favorite colors, styles, and past purchases to personalize future recommendations.
Customer Service (Policies, Guarantees, Feedback)
78. Publish your return policy in plain language. Handmade goods need clear rules on returns, exchanges, and seconds.
79. Use a written policy for shipping damage claims. Define what proof you need, the timeframe for reporting, and how you resolve the issue.
80. Set a clear class cancellation policy. Include deadlines, rescheduling rules, and what happens with no-shows.
81. Use deposits for custom work and put terms in writing. This reduces last-minute cancellations and protects your schedule.
82. Create a simple complaint-handling script. A calm, consistent response protects your reputation and reduces emotional decisions.
83. Track the top five reasons customers complain or ask for help. Fix the root cause with better instructions, better packaging, or clearer listings.
84. Ask for feedback in a structured way. Use the same three questions so you can spot patterns over time.
Sustainability (Waste, Sourcing, Long-Term)
85. Track scrap and breakage and categorize why it happened. You can reduce waste faster when you know if the cause is process, cooling, or handling.
86. Reuse and recycle glass when it is safe for your process. Use consistent sorting so you do not contaminate batches with incompatible glass.
87. Choose packaging that protects without excess bulk. Right-sized boxes and padding reduce waste and shipping costs.
88. Create a safe storage plan for chemicals and materials. Keep Safety Data Sheets accessible and store materials according to manufacturer guidance.
89. Plan for energy reality. High-heat equipment consumes significant energy, so build energy costs into pricing and product selection.
Staying Informed (Trends, Sources, Cadence)
90. Check local permitting and inspection updates yearly. Cities and counties change processes, fees, and requirements over time.
91. Review workplace safety guidance when you add staff or new processes. New tools and materials can create new hazards.
92. Follow a small set of trusted industry sources. Avoid chasing every trend and focus on what affects your customers and your production capacity.
Adapting to Change (Seasonality, Shocks, Competition, Tech)
93. Build a slow-season plan before the slow season arrives. Use it for product development, better photos, and improved systems.
94. Create a contingency plan for equipment downtime. Know who services your equipment and how you will communicate delays to customers.
95. Diversify revenue streams on purpose. A mix of products and classes can reduce risk when one channel slows down.
96. Watch competitors without copying them. Learn what customers respond to, then improve your own offer in your own style.
97. Stress-test your pricing once a year. If energy, materials, or labor costs rise, adjust pricing rather than quietly absorbing losses.
What Not to Do
98. Do not sign a lease without confirming the approval path for your use. If the building cannot support ventilation or required inspections, you can get stuck.
99. Do not promise same-day pickup for items that need controlled cooling. Missed promises create refunds, complaints, and reputation damage.
100. Do not teach classes without a clear safety plan and supervision standards. A single preventable incident can shut you down and increase insurance risk.
101. Do not set prices based on what “feels fair.” Price based on real costs, realistic time, and the normal loss rate from breakage and rework.
Tip:
Pick five tips that match your biggest current risk: approvals, safety, demand, pricing, or systems.
Do those five well for 30 days, then come back and add five more.
FAQs
Question: Do I need my own studio space to start a glassblowing business?
Answer: Not always. You can start by producing work or teaching through an existing studio if they offer rental time or instructor arrangements.
This can reduce build-out and permitting needs while you prove demand and pricing.
Question: What is the minimum equipment I need to launch?
Answer: At a minimum, hot work needs a melting furnace, a reheating furnace, and an annealer for controlled cooling. Your tool set also needs core hand tools like blowpipes, pontil rods, and shaping tools.
Question: What permits do I need to install a furnace, reheating furnace, and annealer?
Answer: It depends on your city and county, but you should expect building-related permits for installation and utility work. Ask your building department what permits apply to electrical, mechanical, and fuel systems at your address.
Question: How do I check if my location is allowed for a hot shop?
Answer: Start with your local planning and zoning office to confirm the use is allowed at that address. Then confirm with the building department and fire authority what approvals are required before the public can enter.
Question: Do I need to register the business before I sign a lease?
Answer: You can shop for space first, but you should understand the registration steps before you commit to long-term costs. Your location and business structure affect how you register and which accounts you must set up.
Question: Do I need an Employer Identification Number if I’m starting alone?
Answer: An Employer Identification Number is free from the Internal Revenue Service and can be useful for banking and tax accounts. Review the Internal Revenue Service guidance and confirm what your bank and state agencies require for your setup.
Question: Do I need to collect sales tax on my glass products?
Answer: Sales tax rules vary by state and sometimes by local area. Check your state revenue agency to confirm if your products are taxable and how to register before your first sale.
Question: Do I need a general business license to open?
Answer: Many cities or counties require a local business license or tax registration, and rules vary by location. Use your local licensing portal or city clerk’s office to confirm what applies to your address and business activity.
Question: What insurance should I have before I open or teach classes?
Answer: General liability coverage is a common baseline for studios, especially when the public enters your space. If you teach, host events, or lease a space, you may face coverage requirements in your contract.
Question: What safety requirements should I plan for if I hire employees?
Answer: If you have employees, you must follow workplace safety rules that apply to your hazards. For example, employers must ensure appropriate eye and face protection when workers face hazards like molten material or injurious light.
Question: Do I need special rules for compressed gas cylinders?
Answer: If you use compressed gas cylinders, you need safe handling, storage, and inspection practices. OSHA’s compressed gases standard also points employers to Department of Transportation hazardous materials rules for certain inspection and transport requirements.
Question: What should I know about dust risks from cutting and polishing?
Answer: Cold work can create dust, and exposure controls may be needed depending on your materials and methods. If you have employees and respirable crystalline silica exposure is possible, OSHA’s silica standard for general industry may apply.
Question: What is the biggest hidden startup cost category?
Answer: Build-out and utilities are often the biggest swing items because they depend on the building and your equipment. Get written quotes for ventilation, electrical work, and fuel-related work before you commit.
Question: How do I choose suppliers for glass and color materials?
Answer: Start with suppliers that provide consistent materials and clear Safety Data Sheets for what you buy. Keep your material system consistent so you can repeat results and reduce defects.
Question: How do I set up pricing in the beginning?
Answer: Base pricing on your real costs, your time, and your expected loss rate from breakage and rework. If your prices cannot cover fixed costs and still pay the owner, adjust the offer or the production plan before you scale.
Question: How do I plan production around annealing time?
Answer: Plan your calendar around your annealer schedule because many hot-glass items need slow cooling and are not ready the same day. Set internal deadlines that match your cooling cycle so you do not overpromise timelines.
Question: What systems should I put in place in the first month of running?
Answer: Set up a daily opening and closing checklist, a simple production log, and a basic inventory system for finished goods. These systems reduce safety risk and help you repeat quality.
Question: When should I hire help or add instructors?
Answer: Add help when safety, output, or class supervision breaks down with your current capacity. If you teach, plan staffing so students are supervised at all times around hot equipment.
Question: What marketing should I do first for a local studio?
Answer: Start with clear photos, a simple website or listing, and a consistent schedule for products or classes. Build local partnerships with venues, galleries, and community groups that already reach your target audience.
Question: What weekly numbers should I track to run the business well?
Answer: Track cash on hand, sales by channel, and your breakage or rework rate. If you teach, also track class fill rate and no-show rate so you can adjust your schedule and staffing.
Question: How do I manage heat risk for myself and staff?
Answer: Use a heat safety plan with hydration, breaks, and gradual acclimatization for people new to hot conditions. If heat stress is a hazard, use NIOSH workplace recommendations and adjust workload and recovery time.
Question: What are common compliance mistakes new studio owners make?
Answer: Skipping local verification for permits and occupancy approvals is a common problem that can delay opening. Another is adding new hazards like gas cylinders or chemical processes without updating safety controls and documentation.
Question: When do hazardous waste rules apply to my studio?
Answer: They apply if you generate hazardous waste, and requirements can depend on what you generate and how much you generate in a month. Start with the federal generator overview, then confirm state requirements with your environmental agency.
Question: How do I know if something I ship is regulated as hazardous material?
Answer: Start by locating the product’s Safety Data Sheet and checking its transportation section for hazard classification. If it is regulated, Department of Transportation rules determine packaging, labeling, and shipping paper steps.
Related Articles
- Start an Art Restoration Service
- Digital Art Business Startup Checklist
- How to Start a Picture Framing Business the Right Way
- How to Start and Run a Craft Store
Sources:
- CDC: Workplace Recommendations
- Washington State Department of Health: Glassworking
- EPA: Hazardous Waste Generator Regula
- cmog.org: Make Own Glass
- IRS: Get employer identification
- Occupational Safety and Health Administration: Heat Overview Working, Compressed gases general, Eye face protection, Respirable crystalline silica, Silica Crystalline Occupational, Oxygen-fuel gas welding
- U.S. Small Business Administration: Apply licenses permits, Register business
- U.S. Department of Transportation: Check Box Hazmat
- UrbanGlass: Glossary Terms