Gazebo Building Business Overview
A gazebo building business creates outdoor structures people use for shade, seating, and gatherings. You may build from scratch, install a kit, or do a mix of both.
Most startups begin as a mobile, owner-run service. You can work out of a garage or small storage space and travel to the customer’s property.
This is not usually a large-scale startup with investors and a big staff on day one. You can begin solo, then add help when your schedule fills up and the work demands it.
How Does a Gazebo Building Business Generate Revenue
You get paid for building and installing outdoor structures. Some jobs are custom builds, and some are kit installs.
Your price usually includes labor, materials (if you supply them), and any approved add-ons the customer wants.
- Custom gazebo builds (design, materials, build, install)
- Kit installation (customer-supplied or contractor-supplied kits)
- Installation-only services (labor and assembly only)
- Foundation work tied to the gazebo (posts and footings, pier systems, or slab work when appropriate)
- Repairs and rebuilds (rot repair, roof replacement, structural reinforcement)
Products And Services You Can Offer
You can keep your offers simple at the start. The goal is to sell what you can deliver safely, legally, and consistently.
Start with a narrow set of builds, then expand as your skill and equipment grow.
- Standard-size gazebos (repeatable sizes and styles)
- Custom builds (size, roof style, railings, benches, flooring)
- Screened gazebos (when compatible with the design and parts)
- Kit sourcing and install (help the customer choose a kit and handle delivery and assembly)
- Site preparation tied to the structure (layout, leveling steps, minor grading when allowed and within your scope)
- Finish work (stain, paint, seal, and weather protection as offered)
Who Your Customers Usually Are
Most customers are homeowners. They want an outdoor structure that looks good, feels solid, and fits their space.
You may also work with property managers or contractors who need a reliable installer for a project.
- Homeowners improving a backyard
- Property managers upgrading shared outdoor spaces
- Event venues adding a permanent outdoor structure (rules and site requirements vary)
- General contractors looking for specialty installation support
Pros And Cons To Know Up Front
This kind of business can be straightforward when your scope is clear. But the work happens outdoors and rules change by location.
If you like hands-on building and you enjoy visible results, this may feel rewarding. If you want predictable indoor work, it may not.
- Pros: Clear deliverables, repeatable builds, strong local demand in many areas, portfolio-friendly work
- Cons: Weather delays, site surprises, permit requirements vary, physically demanding tasks, transporting long materials
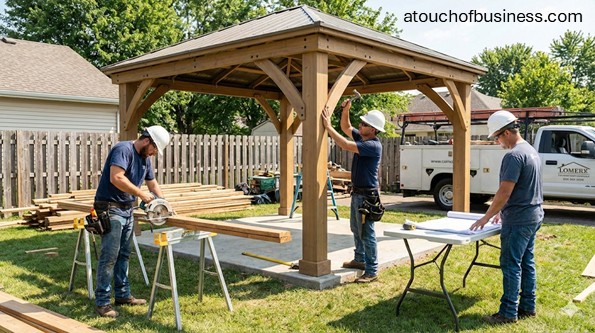
What Your Workdays Look Like
This section helps you picture the reality before you commit. If you don’t like the sound of this, that’s useful information.
Most days start with loading tools and materials, then working on-site with layout, digging, framing, and roofing.
- Site visits and measurements
- Permitting and inspection coordination (when required)
- Material pickup or delivery coordination
- Layout, excavation, and foundation work
- Framing, roof build, and finishing
- Cleanup, photos, and customer walkthrough
A typical “day in the life” might include a morning on a jobsite, a midday supply run, and an evening updating quotes, paperwork, and next-day prep.
Red Flags To Watch For Early
Most early problems come from unclear scope, rushed estimates, or ignoring local rules. You can avoid many headaches by slowing down before you say “yes.”
Watch for these warning signs before you accept a job.
- Customer wants you to “skip permits” or promises “it’s fine” without proof
- Site access is tight (no path for materials, steep slopes, fragile landscaping)
- Customer expects electrical or other trade work that requires separate licensing in your area
- Underground utilities are unknown and the customer pushes you to dig anyway
- The project is really a larger deck or addition disguised as “just a gazebo”
- The customer refuses a written scope and insists on verbal agreements
Is This The Right Fit For You?
Before you build anything, decide if owning and operating a business is right for you. Then decide if a gazebo building business is the right fit for you.
Start here: business startup considerations. It helps you see what you’re really signing up for.
Next, be honest about passion. Passion doesn’t replace skill, but it helps you persist and solve problems when challenges hit. Without it, many people look for an exit instead of solutions.
If you need a reminder of why passion matters, read why passion supports persistence.
Now ask yourself the question you can’t dodge: “Are you moving toward something or running away from something?”
If you’re starting only to escape a job or a financial bind, that may not sustain motivation once the hard days show up.
Also consider the reality of responsibility and readiness. Income can be uncertain, hours can be long, and the tasks can be tough. Vacations often get harder to take, and the responsibility sits on you.
Is your family or support system on board? And do you have the skills—or can you learn them—and can you secure funds to start and operate?
If you want to see what this kind of work can look like behind the scenes, use this business inside look to help you picture the day-to-day.
One more smart move: speak with owners in the same business, but only when they are not direct competitors. Talk to owners you will not be competing against, like someone in a different city or region.
Here are a few questions worth asking.
- “What surprised you most after your first five paid jobs?”
- “Which type of gazebo work was easiest to sell and deliver early?”
- “What local rule or permit issue did you wish you understood sooner?”
Step: Choose Your Build Focus And Boundaries
“Gazebo building” can mean many things. Your first job is to choose what you will offer and what you will not offer.
This protects you from taking work you can’t deliver safely, legally, or on schedule.
- Custom builds vs kit installs vs both
- Freestanding gazebo only, or also pergola-style structures
- Foundation types you will handle (posts and footings, pier systems, slab work when appropriate)
- Finish work you will offer (stain, paint, sealing)
- Work you will refer out (for example, electrical work that requires a licensed trade in many places)
Step: Decide How You Will Run The Business Day One
Will you run this solo, with a partner, or with outside funding? Many gazebo builders start solo and keep overhead low.
You also need to decide if this is full-time or part-time. Part-time can work if you can schedule jobs, store materials, and handle customer communication reliably.
- If you start solo, plan for occasional help on lift days and roof work
- If you bring in a partner, define roles and decision rights early
- If you consider investors, be ready for shared control and formal reporting
- Plan hiring in phases using guidance on when to hire
You can do most tasks yourself at first and hire later. That’s common. Just make sure you’re not promising timelines you can’t meet.
Step: Verify Demand And Confirm Profit Potential
You don’t want to build a business that stays busy but doesn’t pay you. So verify demand and confirm you can price jobs to cover expenses and pay the owner.
Start by learning how your local area supports this service. Use neighborhood demand, property types, and local competitors as signals.
- Search for local contractors offering gazebos, pergolas, and outdoor structures
- Check how long they’ve been active and what they showcase
- Look for patterns in what customers ask for (sizes, roof styles, kits)
- Study the basics of supply and demand so your pricing isn’t guesswork
Then run simple profit checks. Build sample estimates using local material pricing and realistic labor time. If the math doesn’t work, adjust your offers or your target customer before you launch.
Step: Choose Your Service Area And Work Base
This business is usually mobile, so you may not need a storefront. But you still need a work base for tools, materials, and staging.
Your service area also matters. Driving too far can turn a good job into a time drain.
- Pick a service radius you can support without losing your week to travel
- Decide where you’ll store lumber, fasteners, and large tools
- Check local rules if you plan to operate from home
- Use business location considerations to think through access, zoning, and convenience
Step: List Essentials And Build Your Startup Cost Range
Now build a detailed essentials list. You don’t need exact totals yet, but you do need a real picture of what you must have to start.
Get pricing estimates for the items you need. Your startup cost total depends on your scale, your tool choices, and whether you’re starting with kit installs or full custom builds.
Use startup cost estimating guidance to stay organized.
- Vehicle And Transport: pickup truck or cargo van, utility trailer, ratchet straps, tarps, dolly or hand truck
- Measuring And Layout: tape measures, chalk line, framing square, levels or laser level, stakes and string line
- Excavation And Foundation: post hole digger or auger, shovels, digging bar, wheelbarrow, concrete mixing tools, finishing tools, form boards and stakes
- Cutting And Framing Tools: circular saw, miter saw, reciprocating saw, jigsaw, sawhorses, clamps, hammers, pry bars
- Drilling And Fastening: drill and driver set, impact driver, bits, exterior-rated fasteners, structural screws, connector fasteners as required
- Roof And Access: ladders, work platforms, roofing tools, exterior sealants
- Finishing: sanders, brushes and rollers, stain or paint tools, masking supplies
- Safety: eye and hearing protection, gloves, first-aid kit, fire extinguisher, fall protection equipment when required
- Office Basics: phone or tablet for photos, estimating templates, contract templates, secure document storage
If you’re missing skills or tools, you can learn them over time or bring in help for the parts you don’t want to handle. The key is to plan it before you staert.
Step: Pick Suppliers And Confirm Material Standards
Suppliers matter more than most new owners think. You need consistent material quality and reliable availability.
Start building relationships with local lumber yards and specialty suppliers before your first job.
- Choose primary and backup suppliers for lumber, hardware, concrete, and roofing
- Standardize outdoor-rated fasteners and connectors appropriate for your climate
- Confirm how you’ll handle deliveries to customer sites
Step: Set Pricing And Build A Simple Estimating System
Pricing is where many new owners get stuck. You don’t need a complex formula, but you do need a repeatable way to estimate time, materials, and risk.
Use pricing guidance for products and services to help you build a method that fits your work.
- Create a site-visit checklist (slope, drainage, access, overhead lines, setbacks)
- Write a scope template that includes exclusions and assumptions
- Decide how you handle change requests before the job starts
- Choose how you will accept payment and document each transaction
Step: Write A Business Plan And Build Your Financial Setup
A business plan helps you think clearly, even if you’re not seeking funding. It’s a way to define your offer, your customer, your pricing, and your startup needs.
You can use a guide to writing a business plan to keep it practical.
Then handle your financial setup. Open accounts at a financial institution so business activity is tracked cleanly from the start.
- Separate personal and business activity so you can keep transactions separate
- Set up basic recordkeeping for quotes, invoices, and receipts
- If you want funding, review how business loans work before you apply
Step: Handle Business Registration And Tax Accounts
This step is about making the business official. Your structure and your location decide what you must file.
Many small businesses start as a sole proprietorship and later form a limited liability company as they grow. That can add liability protection and a clearer structure, but you should confirm what fits your situation.
Use this business registration guide to understand the typical path, then verify the exact requirements with your state and local offices.
- Choose a structure (sole proprietorship, partnership, corporation, or limited liability company)
- Register with your state if required for your structure
- Apply for an Employer identification number through the Internal Revenue Service when you need one
- Register for state tax accounts that apply to your sales and hiring plans
Step: Verify Contractor Licensing, Permits, And Local Rules
Construction rules can change by state, county, and city. Your job is to confirm what applies before you sell work that triggers permits or licensing.
This is also where you confirm who will pull building permits for each project, when permits are required, and what inspections may apply.
- Check your state contractor licensing board or contractor registration office for your scope
- Check city or county building department guidance for accessory structures
- Confirm zoning and home-occupation rules if you run the business from home
- Confirm whether right-of-way permits apply if you stage materials on public space
Step: Build Your Safety And Site-Prep Process
Your startup systems should include safety steps, not just tools and paperwork. This is where you decide how you work at height, how you protect yourself, and how you protect the customer’s property.
If you dig for posts and footings, make “call 811 before you dig” part of your standard process. You can start with the Pipeline and Hazardous Materials Safety Administration safe digging guidance.
- Use safe digging guidance from PHMSA and follow your state rules for timing and markings
- If you will have employees, review Occupational Safety and Health Administration fall protection rules before assigning roof tasks
- Document your basic safety rules for ladders, saws, nailers, and excavation
Step: Choose Insurance Coverage And Risk Protections
Insurance is a key startup decision. Many customers, property managers, and venues will ask for proof of general liability coverage before they hire you.
You may also need coverage for tools, trailer, and equipment depending on how you store and transport your gear.
Use business insurance guidance to understand common coverage types, then confirm terms with a qualified insurance professional.
- General liability coverage
- Tools and equipment coverage (if needed for your setup)
- Commercial auto coverage (if your vehicle use requires it)
- Contract requirements (some clients require specific limits or additional insured language)
Step: Choose A Business Name And Claim Your Online Presence
Your name needs to be usable and available. Check state naming rules, then check domain availability and basic social handles.
If you need help, use a business name selection guide to make a clear choice.
- Shortlist names that fit your service and location
- Check availability with your state’s business registry tools
- Claim a domain and matching social handles
- Plan a simple site using website development basics
Step: Create Basic Brand Assets You Can Use Immediately
You don’t need fancy branding to start, but you do need basics that look consistent. That helps customers trust you.
Start with the assets you will actually use in the first month.
- Logo and basic style choices (colors and fonts)
- Business cards using business card guidance
- Simple estimate and invoice templates
- Signage rules if you use vehicle or jobsite signage, using business sign considerations
- A cohesive look using corporate identity basics
Step: Prepare Contracts, Payments, And Proof Materials
Before you launch, create your job paperwork. This protects both you and the customer, and it helps you stay consistent.
Also build proof materials. People want to see what you can do before they commit.
- Written scope template with exclusions and change rules
- Photo checklist for before, during, and after documentation
- Payment process and invoicing method so you can accept payment smoothly
- Basic portfolio folder (sample builds, mock projects, or manufacturer-approved kit visuals)
If you want to avoid common early mistakes, review common startup mistakes to avoid and build protections into your process.
Step: Plan Your Launch And How You Will Get Customers
You don’t need a grand event, but you do need a launch plan. Decide how people will find you and what proof you will show them.
Think simple: local search visibility, clear photos, and a quote process that feels easy for the customer.
- Set up a basic website page with services, service area, and contact method
- Build a simple follow-up system for leads and quotes
- Collect photos and testimonials as soon as you have permission
- If you want a launch-style push, use grand opening ideas as a structure for a kickoff week
Step: Run A Pre-Opening Checklist Before You Take Your First Job
This is your final check before you schedule paid work. You’re making sure you can deliver what you promise.
Keep it simple and practical.
- Confirm registration, tax accounts, and any required local licensing are complete
- Confirm your essentials and safety gear are ready and working
- Confirm supplier accounts and ordering methods
- Confirm your contracts, invoicing, and payment process work end-to-end
- Confirm your launch marketing is active and your contact methods work
If you want expert support without guessing, consider building a small support team using a team of professional advisors.
Varies by Jurisdiction
Gazebo projects often touch building permits, zoning rules, and contractor licensing rules. Those are not universal. Your safest move is to verify locally before you quote a job that could trigger a permit or inspection.
Use this checklist to confirm what applies where you will work.
- Entity formation and name rules: Check your state Secretary of State business portal
- Tax registration: Check your state Department of Revenue or taxation agency for sales and employer accounts
- Contractor licensing: Check your state contractor licensing board or contractor registration office
- General business license: Check your city or county business licensing portal
- Zoning and home-based rules: Check city or county planning and zoning for home occupation rules
- Building permits and inspections: Check the city or county building department for accessory structure permit guidance
When you call or email an office, keep it focused. Ask questions like these.
- “Does this type of gazebo installation require a building permit in your jurisdiction?”
- “If a permit is required, who is allowed to pull it: the owner, a licensed contractor, or either?”
- “Are there specific setback or height rules for accessory structures I should review?”
101 Tips to Consider for a Gazebo Building Business
These tips pull together practical ideas for planning, building, and improving a gazebo building business.
Use what fits your situation, and ignore anything that doesn’t.
Bookmark this page so you can come back when you need a next step.
For steady progress, pick one tip, act on it, and return when you’re ready for another.
What to Do Before Starting
1. Decide if you will build custom gazebos, install kits, or do both—your tools, timeline, and risk look very different for each.
2. Write a simple “yes list” and “no list” for job types so you don’t accept work you can’t deliver safely or legally.
3. Pick a starter service area you can reach without losing half your day to driving.
4. Create a site-visit checklist before you take calls—access path, slope, drainage, overhead lines, and where materials will be staged.
5. Build three sample estimates using real local material prices and realistic build time so you can see if the numbers work.
6. Decide what you will supply versus what the customer supplies, and make it clear in writing every time.
7. Choose two suppliers for each major category (lumber, hardware, roofing, concrete) so a shortage doesn’t stall your first jobs.
8. Put together a basic tool-and-gear list for your first 90 days and price it out so you know what “minimum to start” really means.
9. Set aside a dry, secure storage plan for lumber and fasteners—wet materials can warp, rust, or fail early.
10. Draft a standard scope of work template that spells out what is included, what is excluded, and how changes are handled.
11. Create a photo process for every job—before, during, and after—so you can build proof of quality fast.
12. Decide how you will accept payment, when deposits are due, and what happens if a customer pauses the project.
13. Build a basic scheduling rule, like “no more than two active jobs at once” until your workflow is stable.
14. Practice on a small structure or a mock build so you learn your weak spots before you’re on a customer’s property.
15. Set up a simple system for quotes, invoices, receipts, and permits so nothing gets lost when you get busy.
What to Know About the Industry (Rules, Seasons, Supply, Risks)
16. Assume local permit rules vary by city and county, even inside the same state—verify before you quote.
17. Plan for weather delays because outdoor builds stop for heavy rain, high winds, and extreme heat.
18. Treat every site as unique—soil type, slope, and drainage can change how you handle footings and long-term stability.
19. Learn your area’s frost-depth expectations for foundations, because it affects how deep footings may need to go.
20. Make “call 811 before you dig” a non-negotiable rule for any post-hole or footing work.
21. Expect customers to underestimate how much space a gazebo needs—bring a tape measure and mark corners on-site.
22. Know that wind uplift can matter even for small structures—anchoring is not optional in many locations and conditions.
23. Treat wood moisture and decay risk seriously—keep wood dry, allow airflow, and avoid trapping water at joints.
24. Standardize corrosion-resistant fasteners and connectors for outdoor exposure, especially near salt air or treated lumber.
25. Read multiple kit manuals before you sell kit installs—some kits require special tools, extra helpers, or unusual foundations.
26. Expect seasonal demand spikes when homeowners plan outdoor projects—prepare your scheduling and supplier relationships early.
27. Track lead times for key materials like roofing, specialty hardware, and screened panels so you don’t promise dates you can’t meet.
28. Assume the customer cares about looks and longevity—details like straight lines, clean cuts, and tight fastener patterns get noticed.
29. If a job includes significant clearing, grading, or excavation, learn when larger-site stormwater rules can apply.
30. Keep a consistent “minimum build standard” for framing, bracing, and anchoring so quality doesn’t depend on mood or weather.
Legal & Compliance (Location-Aware)
31. Choose a business structure that fits your risk and goals—many owners start as a sole proprietorship and form a limited liability company later as they grow.
32. Confirm contractor licensing or registration rules in your state if you will build structures for pay—requirements vary widely.
33. Register your business name properly if you plan to operate under a name different from your legal name or entity name.
34. Get an Employer identification number from the Internal Revenue Service when you need it for banking, hiring, or tax administration.
35. Set up state tax accounts that apply to your plan, including sales and use tax and employer withholding if you hire.
36. Check whether your city or county requires a general business license, even if you work from home.
37. Verify zoning and home-occupation rules if you will store lumber, park a trailer, or run loud tools at a residence.
38. Confirm building permit triggers for accessory structures in each service area, including setback rules and height limits.
39. Ask the local building department who can pull the permit—the property owner, a licensed contractor, or either—then follow that rule.
40. If you stage materials or block sidewalks or lanes, check if a right-of-way or street-use permit is required.
41. If you lease a shop or yard, verify whether a Certificate of Occupancy or inspection approval is required for that use.
42. If you will have employees, review construction fall protection requirements before assigning roof or ladder tasks.
43. Get general liability coverage early because many customers and property managers require proof before work begins.
44. Match your insurance to your setup—tools, trailer, and commercial auto can matter as much as liability.
45. Keep written records of permits, inspections, and approvals for each job so you can prove compliance if questions arise later.
Running the Business (Operations, Staffing, SOPs)
46. Create a standard site-visit workflow: measure, check access, confirm utilities, take photos, and document risks before you price.
47. Use a written pre-start checklist for every job so you don’t forget concrete forms, anchors, or the right fasteners.
48. Build a “materials verification” step before leaving the supplier—wrong hardware can waste an entire day.
49. Plan for manpower on lift days—roof assemblies and large beams are safer with enough hands.
50. Write a simple daily job plan: goals for the day, tools needed, safety points, and the next inspection milestone if one applies.
51. Keep a dedicated tool loadout for gazebo work so you don’t rebuild your truck or trailer from scratch each morning.
52. Set up a clean cutting and assembly area on-site to avoid tripping hazards and reduce damaged materials.
53. Use temporary bracing correctly during framing—many failures happen before the structure is fully tied together.
54. Keep fasteners organized by type and length so you don’t “make do” with the wrong hardware under time pressure.
55. Document every change request in writing with cost and timeline impact before you proceed.
56. Use a clear “stop work” rule if weather turns unsafe—wind and wet surfaces make ladders and roofing dangerous fast.
57. If you subcontract any part, verify what they will do, what they won’t do, and who owns the timeline for that phase.
58. Build a simple quality check at the end of each day: plumb posts, level beams, square corners, and secure connectors.
59. Standardize your hardware and connector brands where possible so you can stock fewer parts and reduce mistakes.
60. Keep lumber protected from rain during transport and storage so it doesn’t twist before installation.
61. Build a basic training plan for helpers: ladder safety, tool safety, material handling, and clean jobsite habits.
62. Use a consistent cleanup standard—customers remember a clean site as much as they remember the gazebo.
63. Save job photos and notes in a dedicated folder per project so you can answer warranty and permit questions later.
Marketing (Local, Digital, Offers, Community)
64. Make your offer easy to understand: “custom build,” “kit install,” and “install only” should be clear at a glance.
65. Use before-and-after photos and short captions that explain the problem you solved, not just what you built.
66. Create three starter packages with clear boundaries so customers can choose without redesigning the project on the phone.
67. Build a simple website that shows your service area, examples of work, and a straightforward way to request a quote.
68. Use local search basics: consistent business name, consistent service area wording, and real project photos tied to your region.
69. Ask for reviews right after a successful walkthrough, while the customer is still excited about the result.
70. Build relationships with landscapers, deck builders, and patio contractors who may want a reliable gazebo partner.
71. Keep a small set of printed photos or a digital portfolio ready for in-person estimates so customers can see options fast.
72. Offer a paid site assessment for complex properties to filter out time-wasters and protect your schedule.
73. Use seasonal messaging that matches real customer timing—spring planning, summer installs, fall upgrades.
74. Track which lead sources bring the best jobs so you can focus on what produces profitable work.
75. Keep your quote turnaround time consistent—slow quotes often mean lost jobs.
76. Use jobsite signage only when it’s allowed and respectful of the neighborhood—your work itself should be the main advertising.
77. Keep a short “what to expect” handout you can email after the first call so customers understand timing, permits, and site prep.
Dealing with Customers (Trust, Education, Retention)
78. Start every project with a clear scope conversation so the customer knows what you are building and what you are not building.
79. Explain permit responsibility in plain language and confirm it in writing so there’s no confusion later.
80. Walk the property with the customer and point out site risks like slope and drainage so your foundation plan makes sense to them.
81. Use simple visual markers—stakes and string lines—to confirm layout and prevent “that’s not where I pictured it” disputes.
82. Set expectations for noise, deliveries, and jobsite access so the customer can plan around your workdays.
83. Confirm material choices early and document them—changes late in the process can cause delays and extra cost.
84. Teach customers how small design choices affect durability, like roof overhang, water runoff, and airflow under flooring.
85. Avoid vague promises like “we’ll figure it out later”—if a detail matters, decide it before work starts.
86. Use progress updates at predictable times, such as end-of-day, so customers don’t feel the need to chase you.
87. End the job with a walkthrough checklist so the customer can see what was completed and what to watch for as the structure settles.
Customer Service (Policies, Guarantees, Feedback)
88. Put your warranty terms in writing and keep them specific—what is covered, what isn’t, and how a customer reports an issue.
89. Use a punch-list process for small fixes so issues don’t turn into frustration or bad reviews.
90. Store key job details for service calls: foundation type, fasteners used, stain or paint used, and roof materials.
91. Build a clear policy for weather delays so the customer understands how scheduling works when conditions change.
92. If a customer is unhappy, ask for the exact outcome they want and compare it to the written scope before reacting.
93. After completion, send a short follow-up message in a few weeks to catch small problems early and protect your reputation.
Sustainability (Waste, Sourcing, Long-Term)
94. Plan your cut list before you start cutting so you reduce scrap and avoid unnecessary supplier runs.
95. Protect lawns and plant beds during staging and mixing so you don’t leave the property worse than you found it.
96. Choose durable materials and outdoor-rated hardware so the structure lasts longer and needs fewer repairs.
What Not to Do
97. Don’t start digging until utilities are marked—this is a safety rule, not a suggestion.
98. Don’t quote from photos alone on complex sites—visit, measure, and document conditions first.
99. Don’t underprice to win jobs if it leaves you unable to cover materials, labor, and overhead—cheap jobs can sink a new business.
100. Don’t accept “permit-free” claims from customers without verifying locally—rules can change by street, not just by city.
101. Don’t rely on verbal agreements—use written scope, written changes, and written approvals to protect both sides.
If you take anything from this list, let it be this: clear scope, verified local rules, and repeatable build standards will protect you early.
Start small, document everything, and let each finished gazebo become proof you can build the next one even better.
FAQs
Question: Do I need a contractor license to build gazebos in my state?
Answer: It depends on the state and what you build, because contractor licensing and registration rules vary widely. Check your state contractor licensing board before you advertise or sign contracts.
Question: When does a gazebo project need a building permit?
Answer: Permit rules are local, and they often depend on size, height, location on the lot, and how it is anchored. Ask the city or county building department before you quote work that involves foundations, posts, or electrical add-ons.
Question: Who pulls the permit—the homeowner or the contractor?
Answer: That depends on the local building department and whether a licensed contractor is required to pull permits. Decide this before the job starts and put it in your written scope.
Question: Do I need an Employer identification number to start?
Answer: You may need one for banking, hiring, or certain tax accounts, even if you do not plan to hire right away. The Internal Revenue Service issues Employer identification numbers directly.
Question: Should I start as a sole proprietor or form a limited liability company?
Answer: Many small businesses start as sole proprietorships and form a limited liability company later as risk and revenue grow. Your best choice depends on liability exposure, taxes, and how you plan to operate.
Question: Do I need a general business license if I work from home and travel to job sites?
Answer: Many cities and counties require a general business license even for home-based businesses. Verify requirements with your city or county business licensing office.
Question: What insurance should I have before taking my first job?
Answer: General liability coverage is a common baseline, and many customers or property managers expect proof before work begins. You may also need coverage for tools, trailers, and business vehicle use depending on your setup.
Question: What equipment do I need to start if I focus on kit installs first?
Answer: Plan for core measuring, cutting, fastening, ladder, and safety gear, plus the ability to stage and move heavy parts. Read the kit manual before accepting the job, because some kits require specific tools and extra helpers.
Question: Do I need to call 811 before digging post holes or footings?
Answer: Yes, you should treat this as a standard step for any digging. Calling 811 helps locate underground utilities and reduces the chance of a serious incident.
Question: How do I handle stormwater rules if site work gets bigger than expected?
Answer: Federal stormwater permitting can apply when construction disturbs one acre or more, or is part of a larger common plan that reaches that threshold. If a job expands into major clearing, grading, or excavation, verify requirements before work continues.
Question: How do I set up pricing for custom builds versus kit installs?
Answer: Separate labor, materials, equipment time, and risk, because kit installs and custom builds have very different uncertainty. Build pricing templates from real past job times and update them as you learn.
Question: What should be in my contract or scope before I accept a deposit?
Answer: Include the exact build description, what is excluded, permit responsibility, schedule assumptions, and how changes are approved. Keep a clear rule that change requests must be written and priced before you proceed.
Question: How do I find reliable suppliers for outdoor-grade materials?
Answer: Start with local lumber yards and hardware suppliers that can consistently provide exterior-rated fasteners and connectors. Keep a backup supplier for key materials so delays do not stop your schedule.
Question: What safety rules should I enforce for ladders and roof work?
Answer: Require ladder inspection, stable setup, and safe climbing practices on every job. If you have employees, review construction fall protection rules before assigning elevated work.
Question: How do I keep projects on schedule when weather changes?
Answer: Build weather buffers into your scheduling and communicate them upfront. Set a stop-work rule for unsafe conditions, then reschedule based on the next safe window.
Question: When should I hire a helper, and what should they do first?
Answer: Hire help when lift days and roof work create safety risk or slow your timeline. Start helpers on staging, material handling, cleanup, and basic assembly while you keep control of layout and critical connections.
Question: What should I track to know if each job is actually profitable?
Answer: Track labor hours, material cost, change-order dollars, and rework time for every job. Compare estimated versus actual so your next quotes get more accurate.
Question: How do I avoid scope creep and change-order fights?
Answer: Use a written scope with exclusions, and confirm layout on-site before you start building. Require written approval for changes with cost and schedule impact spelled out.
Question: What marketing should a new gazebo builder focus on first?
Answer: Start with proof: clear photos, a simple portfolio, and a fast quote process. Focus on local visibility and partnerships with related trades that already serve your target neighborhoods.
Question: What are the most common mistakes new gazebo builders make?
Answer: Common issues include quoting without a site visit, ignoring local permit rules, and underestimating labor time on foundations and roofs. Another frequent issue is using the wrong outdoor-rated fasteners or leaving wood exposed to moisture during staging.
Related Articles
- Deck Building Service Startup Overview: Steps and Permits
- Step-By-Step to Starting a Carpentry Business in the U.S.
- Starting a Home Renovation Business: Beginner’s Guide
- How to Start a Landscaping Business: Tips and Startup Steps
- How to Start a Landscape Design Business | Complete Guide
- How to Start a Masonry Company: Complete Beginner’s Guide
Sources:
- Internal Revenue Service: Get EIN, EIN overview
- U.S. Small Business Administration: Register your business, Licenses and permits, Business insurance
- Occupational Safety and Health Administration: Fall protection standard
- Environmental Protection Agency: Stormwater construction rules, Construction permit questions
- Pipeline and Hazardous Materials Safety Administration: Call 811 before digging, Stakeholder communications
- United States Census Bureau: Industry classification system
- American Wood Council: Deck construction guide
- USDA Forest Products Laboratory: Wood decay and prevention
- Centers for Disease Control and Prevention: Ladder safety steps