
What to Expect From This Guide to Starting an Embroidery Business
This guide walks readers through the key decisions and practical steps involved in starting a shop-based embroidery business, from evaluating fit and local demand to testing production systems before opening. The highlights below show selected areas, while the article provides fuller planning detail.
Inside the guide, you will find:
- Startup roadmap: Follow 14 ordered steps covering niche selection, demand validation, registration, shop setup, pricing, systems, and pre-opening tests.
- Industry interviews: Compare firsthand experiences involving equipment choices, specialization, customer acquisition, production challenges, pricing, and shop operations.
- Startup FAQs: Review answers about experience, digitizing, garment sourcing, pricing models, permits, operating capital, and machine capacity.
- Business fit: Consider production demands, income uncertainty, shop ownership responsibilities, entry paths, and warning signs before making major commitments.
- Financial planning: Examine fixed costs, break-even production, minimum orders, funding, pricing structure, and the need for operating reserves.
- Equipment and workflow: Plan commercial machines, digitizing software, supplies, layout, sourcing, order intake, payments, and job tracking.
- Opening safeguards: Check local requirements, insurance, intellectual property policies, supplier accounts, deposits, testing, and production controls before accepting orders.
Continue into the guide to assess whether the shop model and production responsibilities match your resources and goals.
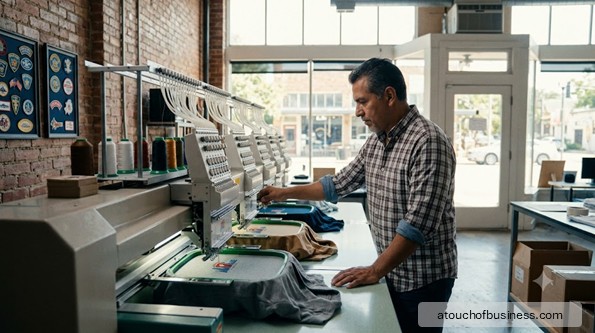
Running an embroidery business means stitching custom designs onto garments, hats, bags, and accessories — converting client logos, text, or artwork into professional-grade embroidered products on commercial embroidery machines in a dedicated shop.
In a workshop-based model, you set up production equipment in a commercial space, accept orders from local businesses, organizations, and individuals, and produce finished embroidered goods on-site.
Customers bring their brand identity to you. You handle everything from digitizing the design to the final stitch-out and delivery.
The quality of your output, your turnaround time, and your ability to communicate clearly with clients are what drive repeat business and referrals.
If you’re thinking about the startup steps for an embroidery business, they run in a specific sequence — and skipping early decisions tends to create expensive problems later.
Is This the Right Business for You?
Before you look at machines or lease space, think honestly about fit.
Running an embroidery shop requires you to be both a production operator and a business owner.
You’ll take client orders, digitize designs or outsource that work, load and run machines, finish and package goods, troubleshoot quality problems, and handle invoicing — often on the same day.
Do you enjoy detailed, repetitive production work? Can you stay focused during long machine runs?
The work demands patience and close attention. A thread break or hoop misalignment mid-run on a 50-piece order means catching the error before it multiplies across every garment.
Can your household absorb a gap in income while you build your client base?
A shop-based embroidery business carries real fixed costs — lease, equipment, utilities — before the first order arrives. Plan for that runway honestly before you sign anything.
Talk to people who run embroidery shops before you commit. Seek out owners in different markets or niches so you’re not speaking with direct competitors.
Ask what surprised them, how long it took to land steady clients, and what they would do differently. That firsthand insight is worth more than any general guide.
Also think through your entry path. Starting from scratch versus buying an existing embroidery shop are very different commitments.
An existing shop may come with equipment, client relationships, and a lease already in place — but requires careful review of equipment condition, client contracts, and why the owner is selling.
Franchise options exist in the embroidery and branded apparel space. A franchise may offer training, supplier relationships, and a proven system, but comes with fees and operating requirements.
Weigh that against the control and lower cost of an independent startup.
Red Flags Before You Start
Some warning signs are worth confronting before you spend anything significant.
The local market is already well-served: If several established embroidery shops and print shops with embroidery capabilities are already operating in your area, entering without a clear differentiator — faster turnaround, a specific niche, superior garment sourcing — makes client acquisition much harder.
Online competition is fierce: Large online embroidery providers offer low per-piece pricing at high volume and can ship anywhere. A local shop competes on speed, personal service, and the ability to handle garment sourcing and fulfillment directly — not on price alone.
The commercial machine investment is significant: Commercial multi-needle embroidery machines represent a major capital commitment before a single order is placed. If you can’t fund the equipment without overextending your finances, consider whether a phased entry is more realistic.
Underestimating digitizing: Digitizing — converting a client’s logo or artwork into a machine-readable stitch file — is a skill that takes time to develop. Poor digitizing produces poor embroidery, regardless of machine quality.
If you can’t digitize competently at launch, you’ll need to outsource it, which adds cost and turnaround time to every new design.
Intellectual property risks: Clients will sometimes ask you to embroider copyrighted images, licensed characters, or trademarked logos they don’t own. Producing those items for resale exposes you to trademark and copyright infringement risk. You need clear policies before you open.
Thin margins on small orders: Small, one-off orders — two hats, five shirts — take nearly as much setup time as larger runs but generate far less revenue. Without a minimum order policy or setup fee structure, small jobs can consume more time than they’re worth.
Equipment downtime has direct revenue impact: A commercial machine that breaks down mid-week means jobs stack up. Without a service relationship or backup capacity, downtime affects delivery commitments and client trust.
Step 1: Decide What Kind of Embroidery Shop You’re Running
The first real decision shapes everything that follows: what will your shop specialize in, and who will your primary customers be?
A shop-based embroidery operation can serve a wide range of customers, but the most successful startups tend to focus early.
Common customer categories to consider:
- Local businesses needing branded uniforms, polo shirts, and workwear with company logos
- Sports teams and schools ordering embroidered jerseys, caps, and spirit wear
- Organizations, churches, and clubs needing matching apparel for members or events
- Restaurants, hotels, and hospitality businesses requiring staff uniforms
- Individuals ordering personalized gifts, monograms, or custom pieces
- Promotional product buyers needing embroidered items for corporate events and giveaways
Your niche affects your machine selection, your pricing structure, your garment sourcing relationships, and how you present the shop to potential clients.
A shop focused on corporate and B2B clients needs consistent turnaround, professional order management, and the capacity to handle repeat reorders.
A shop targeting individuals and custom orders relies more on design variety, personalization, and portfolio strength.
Choosing a niche at launch doesn’t lock you in permanently — but it helps you avoid trying to serve everyone while standing out to no one.
Step 2: Validate Demand in Your Market
Before committing to equipment or a lease, confirm there’s enough local demand to support a new shop.
Research existing embroidery providers in your area — standalone shops, print shops that also offer embroidery, and promotional product companies.
Identify what they offer, how they price, and whether their turnaround times leave room for a competitor to stand out.
Gaps worth looking for include:
- Slow turnaround from existing providers
- Limited garment selection
- Weak service for small businesses or local organizations
- No shops handling full garment sourcing and finishing in-house
Talk to potential clients before you open. Ask local business owners, sports coaches, school administrators, and event organizers whether they use embroidery services, where they go, and what they wish were different.
The answers tell you far more than any market research report.
Also check whether the local customer base is large enough to sustain your target revenue. A market with only a handful of small businesses and no active sports leagues or schools will generate much less embroidery demand than a larger suburban area with active organizations.
Step 3: Assess Profit Potential Before Major Commitments
This is a step many new owners skip — and they pay for it later.
An embroidery shop’s revenue model is typically built on per-piece pricing based on stitch count, flat-rate pricing by item type, or a combination.
Before you can break even, you need to cover your fixed costs every month — lease, equipment payments or depreciation, utilities, insurance, thread and stabilizer stock, and your own compensation.
Work out that number honestly.
Then ask: at your target pricing, how many shirts, hats, or jackets do you need to produce and sell each month to hit that number?
Small one-off orders are low-revenue relative to setup time. Larger corporate and organizational orders spread that setup cost across more pieces and improve your effective hourly return.
Plan operating capital to cover several months of fixed costs before the shop reaches consistent order volume.
Running out of cash while waiting for the client base to develop is one of the primary reasons new embroidery shops close early.
For guidance on estimating what your shop can realistically earn, review how to estimate profitability for a new business.
Step 4: Choose Your Legal Structure and Register the Business
This is a foundational setup step — get it right before anything else is signed or paid.
Most new embroidery shop owners choose between a sole proprietorship and a limited liability company (LLC). An LLC separates personal assets from business liabilities, which matters when you’re handling client garments, operating commercial equipment, and entering lease agreements.
Review LLC versus sole proprietorship options to understand what fits your situation.
Register the business with your state’s Secretary of State office. If you operate under a trade name different from your legal name, file a DBA (Doing Business As). See how to register a DBA for the process in your state.
Apply for an Employer Identification Number (EIN) from the IRS at IRS.gov. You’ll need it for banking, taxes, and payroll if you hire help. Get your business tax ID before opening a bank account.
Open a dedicated business bank account before any revenue moves through the shop. Keeping business and personal finances separate from day one simplifies taxes, protects your legal structure, and keeps records clean.
See how to open a business bank account for the steps.
Step 5: Handle Licenses, Permits, and Tax Registration
Compliance requirements for an embroidery shop vary by location, but several apply broadly.
Federal:
- EIN from the IRS — required for banking, payroll, and most tax filings
- If you hire employees: federal payroll tax withholding, Social Security, Medicare, and FUTA (Federal Unemployment Tax Act) employer obligations apply
- Copyright and trademark awareness: digitizing and producing embroidered items with copyrighted designs, trademarked logos, or licensed characters without authorization creates legal exposure. Get client requests in writing. When a client’s own business logo is involved, they bear responsibility for owning the rights. Avoid producing branded entertainment characters, professional sports logos, or similar licensed intellectual property for resale.
State (Varies by U.S. jurisdiction):
- Business entity registration with the Secretary of State
- Seller’s permit or sales tax permit — an embroidery shop typically sells tangible goods (finished embroidered apparel and accessories), which are generally taxable. A seller’s permit also lets you purchase blank garments and supplies wholesale without paying sales tax. Check your state’s department of revenue for exact requirements.
- Resale certificate — allows tax-exempt wholesale purchasing of blanks and materials intended for resale; apply through your state tax authority
- If you hire employees: state employer registration for unemployment insurance and workers’ compensation — check with your state’s department of labor
- Some states have garment or apparel registration requirements for businesses involved in apparel production; verify with your state’s department of labor or consumer protection agency
City and County (Varies by U.S. jurisdiction):
- General business license — most cities and counties require one; check with your city or county clerk
- Zoning verification — confirm your chosen commercial space is zoned for light industrial or commercial production use before signing a lease
- Building permit — required if you renovate or build out a new space
- Fire inspection certificate — some jurisdictions require this for commercial production spaces; check with the local fire department
- Certificate of occupancy — required in many jurisdictions for newly occupied or renovated commercial spaces; verify with your local building department
- Signage permit — required in many jurisdictions before installing exterior signs; check with the local planning or zoning office
Owner applicability questions to ask:
- Does your state require a garment or apparel registration for businesses involved in decorating and selling apparel?
- Is the space you’re considering zoned for commercial production or light industrial use?
- What is the sales tax treatment of embroidery services and finished goods in your state — and does it differ when you supply the garment versus embroidering a customer-supplied item?
Step 6: Choose and Secure Your Shop Space
The tradeoff here is between cost and capacity — and it affects your ability to take on larger orders from day one.
A workshop-based embroidery shop needs enough space to house the embroidery machine comfortably, with clearance around it for hooping, loading, and unloading garments.
You also need space for a computer workstation, thread and stabilizer storage, blank garment inventory, finishing and packaging, and client drop-off and pickup.
What to look for in a commercial space:
- Zoning compatible with light commercial or light industrial production — verify before signing
- Adequate electrical service — commercial embroidery machines require a dedicated circuit; confirm the amperage requirement for your specific machine before committing to a space
- Good ventilation and lighting — machine operation produces lint and heat; both ventilation and lighting matter for quality and operator comfort
- Sufficient square footage for machine footprint, production workflow, storage, and a customer-facing area if clients will visit
- Loading access for receiving garment shipments and shipping finished orders
Decide whether customers will visit the shop for order pickup or whether you’ll handle delivery and shipping. A customer-facing counter or display area requires additional space and a more finished presentation.
Negotiate the lease carefully. Confirm zoning, the electrical setup, and any required permits before signing. If a build-out is required, clarify who pays and how it affects your startup timeline.
Step 7: Choose Your Equipment and Plan the Shop Layout
This is where most of your startup capital goes — and the decision has a direct impact on capacity, turnaround time, and the types of orders you can accept.
The commercial embroidery machine decision:
Commercial multi-needle machines — typically with 10 to 16 needles per head — allow you to pre-load multiple thread colors and run complex designs without constant thread changes. That capability is essential for production volume on business and corporate orders.
Single-head machines serve smaller shops and custom order operations well. Multi-head machines allow you to stitch identical designs on two or more garments simultaneously, which dramatically improves output for large orders.
When selecting a machine, consider not just specs but the manufacturer’s support, training resources, parts availability, and service network in your region.
A machine is a long-term relationship — align with a brand that can support you when something goes wrong.
Digitizing software:
You need digitizing software to convert client logos and artwork into machine-readable stitch files. Major options include Hatch (by Wilcom), Wilcom EmbroideryStudio, Chroma (by Ricoma), and others.
Hatch offers tiered pricing and is widely used by small shops. Wilcom’s commercial-grade EmbroideryStudio targets high-volume professional operations.
Choose software compatible with your machine’s file formats and supported by training resources you can actually use.
Alternatively, you can outsource digitizing on a per-design basis at launch and learn the software over time. Many new shops start this way, particularly when the owner’s strength is production rather than design.
Essential additional equipment and supplies:
- Embroidery hoops in multiple sizes — for flats, caps, and different garment types
- Thread — commercial-grade polyester thread (Isacord, Madeira, and similar brands) in a core color range
- Stabilizers — tear-away for stable woven fabrics, cut-away for stretchy knits, water-soluble for delicate materials
- Prewound bobbins matched to your machine format
- Heat press (optional) — useful for applying patches or backing materials
- Trimming scissors and finishing tools
- Computer workstation compatible with your digitizing software
- Garment storage and organization system
- Order tracking and job management system
- Packaging materials — bags, boxes, tissue, and labels
Plan your shop layout before equipment arrives. Position the machine for clear access on all sides.
Create a natural flow from garment receiving to hooping to machine to finishing to packaging — bottlenecks in any stage slow the whole operation.
Step 8: Set Up Garment and Supply Sourcing
Your access to quality blank garments at competitive wholesale prices is a core operational advantage — or a weakness that limits your offer.
Most embroidery shops supply garments to clients rather than embroidering customer-supplied items. Controlling the garment allows you to ensure quality, guarantee consistent sizing, prevent substrate problems that cause production issues, and capture margin on the blank.
Open wholesale accounts with blank apparel distributors. Major wholesale platforms carry brands including Gildan, Bella+Canvas, Port Authority, Yupoong, and others across shirts, polos, hats, jackets, bags, and more.
Research distributor minimums, lead times, and return policies before committing.
Also set up accounts with thread and stabilizer suppliers. Buying in larger quantities reduces per-unit cost and ensures you don’t run short during a large production run.
For specialty garments — workwear, performance fabrics, or premium pieces — identify category-specific suppliers separately from your standard blank stock.
Step 9: Set Your Pricing Structure
The pricing decision determines whether your shop can cover its costs and pay you — so work through this before you take your first order.
Two primary pricing models are common in the embroidery industry.
Per-stitch pricing: You charge a set amount per 1,000 stitches, which reflects the actual production time and thread cost of each design. This model is transparent for complex or variable designs. You add garment cost on top, typically at a markup over your wholesale price.
Flat-rate pricing: You charge a fixed rate per item type — one price for a polo with a standard logo placement, another for a cap, another for a jacket. This simplifies quoting for clients and works well when your production is predictable and consistent.
Many shops combine both: flat rates for standard items, stitch-count pricing for complex or oversized designs.
Also plan for:
- A digitizing setup fee for new designs — charged once per design, typically waived on reorders
- Minimum order charges or minimum job values to protect against low-revenue small runs
- Volume discount tiers for larger orders — per-piece cost drops as quantity rises
- Rush order surcharges for accelerated turnaround
Work out your pricing from your actual costs — machine payments or depreciation, lease, utilities, thread and stabilizer per piece, garment wholesale cost, and your target hourly return on production time.
Review pricing your products and services for a broader framework.
Step 10: Obtain Insurance
An embroidery shop carries several distinct risk exposures that standard personal insurance doesn’t cover.
Insurance to consider:
- General liability insurance: Covers bodily injury and third-party property damage on your premises — if a client slips in your shop or their property is damaged during production
- Business property insurance: Covers your commercial embroidery machines, computers, thread inventory, and client garments in your care against theft, fire, or damage — particularly important given the value of commercial equipment and the fact that you hold customer-owned garments during production
- Professional liability / product liability insurance: Covers claims that your finished embroidery work damaged a client’s garment or failed to meet agreed specifications
- Workers’ compensation insurance: Required by law in most states when you have employees; verify the requirement with your state’s department of labor
- Commercial auto insurance: Required if you use a vehicle for business deliveries or pickups
Many small shop owners start with a business owner’s policy (BOP), which bundles general liability and business property coverage.
Ask your insurer specifically about coverage for customer-supplied goods in your care and for equipment breakdown.
See business insurance for a broader overview of coverage types.
Step 11: Build Your Client Brief and Delivery Process
This is where the creative services dimension of your business takes shape — and where many new shops create problems by skipping it.
Every order needs a clear intake process before production begins. That means collecting the design file or artwork, confirming placement, agreeing on garment style and color, setting a delivery deadline, and getting approval on a stitch-out proof before running the full order.
A repeatable order process should include:
- Order form or intake sheet capturing design specifications, garment details, quantity, placement, and deadline
- Design approval step — always produce and share a proof or sample stitch-out before running a full order, especially for new designs
- Deposit requirement before production begins — protects you from material costs if a client cancels; a 50% deposit on custom orders is common practice
- Clear revision and change policy — specify how many revisions are included and what triggers an additional charge
- Delivery and pickup terms — confirm whether jobs are picked up, shipped, or delivered, and who bears shipping cost
- Garment damage policy — specify what happens if a garment is damaged during production, particularly for customer-supplied garments
Scope creep — a client who changes the design after you’ve digitized it, or adds items to an order mid-production — is a common and costly problem.
Clear written agreements before production starts protect both the client and your production schedule.
Step 12: Set Up Payments and Business Systems
You need payment infrastructure in place before the first order is invoiced.
Set up the ability to accept credit cards, debit cards, and digital payments. Most clients — particularly corporate and organizational buyers — expect to pay by card or bank transfer, not cash.
Research payment processors for rates and transaction fees that fit your expected order volume.
Set up a basic accounting system to track revenue, cost of goods, operating expenses, and tax obligations from day one.
Embroidery involves both product sales (taxable in most states) and service components, which may be treated differently depending on your state’s sales tax rules.
Clarify the taxability of your specific transactions with your state’s department of revenue or a tax professional before you invoice your first customer.
Set up a simple order management or job tracking system — even a structured spreadsheet — to track jobs, deadlines, deposit status, and delivery. As order volume grows, informal tracking creates missed deadlines and billing errors.
Step 13: Build a Portfolio and Establish Your Identity Before Opening
Clients choosing an embroidery shop want to see proof of quality before placing an order.
Before you open, produce sample pieces that represent the types of work you intend to offer — a clean left-chest logo on a polo, an embroidered cap, a monogram on a bag. These samples become your portfolio.
Photograph your samples with clear, well-lit images. Poor photography makes quality work look mediocre.
Invest time in photographing finished pieces accurately — these images will be the first thing prospective clients evaluate.
Establish a business name, basic identity, and contact presence before opening — a domain, an email address, and a way for local clients to find and reach you.
Build a simple portfolio or gallery to accompany your business name. See brand identity materials for the core elements to have in place at launch.
Also think through how you’ll reach your first clients. The most direct path at launch is personal outreach — visiting local businesses, attending community events, and contacting sports leagues, schools, and organizations directly with samples in hand.
Your first clients are almost always built through direct relationships, not passive discovery.
Step 14: Complete Pre-Opening Setup and Test the Shop
Before you take a paying order, run the full production process from intake to delivery — with real garments and real designs.
Test each machine setting, stabilizer combination, and garment type you plan to offer. A hat requires a different hoop and setup than a polo or a fleece jacket.
Know your machine’s behavior on each substrate before a client’s order is on the line.
Confirm every system works: the intake form, the digitizing workflow, the proof approval process, the payment system, the packaging routine, and the order tracking.
Gaps that feel minor before opening become real problems when you’re juggling five active jobs.
Also confirm all permits are issued, your insurance is bound, your supplier accounts are active, and your wholesale pricing is verified before the doors open.
Business Plan
Your business plan for an embroidery shop is less about vision and more about answering financial and operational questions before you spend anything significant.
Start with the service offering. What will you produce, for whom, and at what minimum order level? A clear answer shapes every other decision.
Work through your fixed costs — lease, equipment, utilities, insurance, software subscriptions, and your own compensation requirements. That total sets your break-even production target: how many pieces per month, at your target pricing, do you need to cover those costs?
Stitch-count economics favor larger orders. A 12-piece corporate shirt run is far more efficient — and more profitable per hour of production time — than 12 separate one-piece custom orders.
Plan your minimum order structure accordingly.
Map out your funding. Commercial machines are significant capital investments. If you’re financing equipment, factor the monthly payment into your fixed costs.
Personal savings, equipment financing, and small business loans are all common funding paths — but understand the obligation each creates before signing.
Review how to get a business loan for an overview.
Plan operating capital separately from startup equipment costs. The months between opening and reaching consistent client volume are when shops run out of money.
That reserve needs to be in place before you open, not borrowed from equipment budget after the fact.
For a full planning framework, see how to write a business plan.
Opening-Day Red Flags
These are the setup problems that cause real damage on day one — or in the first week.
Electrical circuit not confirmed: A commercial embroidery machine requires a dedicated circuit with specific amperage. If you haven’t verified and tested this before opening, a machine that won’t run properly is your first client interaction.
No proof approval process in place: Running a full order without client approval of the digitized design or a sample stitch-out is one of the most common and costly mistakes. If the design is wrong on piece one, it’s wrong on all 50.
Supplier accounts not set up: Discovering a garment is out of stock after a client order is confirmed — and having no backup supplier relationship in place — means explaining delays before you’ve built any trust.
No deposit system: Taking an order and ordering garments before collecting a deposit means you absorb the cost if the client cancels or doesn’t respond when the order is ready.
Thread and stabilizer stock is too thin: Running out of a specific thread color mid-run on a large order causes delays. Start with a core color inventory that covers your expected order types, not just a minimum sample quantity.
Machine not fully tested across all garment types: Caps, knits, woven shirts, and bags all require different hooping, stabilizer, and tension settings. If you haven’t tested each before opening, the first order on an unfamiliar substrate becomes a learning experience at the client’s expense.
Copyright policy not communicated: If a client walks in on day one with a licensed character or a pro sports logo and you don’t have a clear policy, you’re improvising a legally sensitive decision under pressure.
Frequently Asked Questions
Do I need embroidery experience before opening a shop?
Formal training is not required, but you need real operating competency before you take paying orders.
Practice on multiple fabric types, learn your digitizing software, and understand your machine’s tension, timing, and threading — through manufacturer training, online courses, industry seminars, or hands-on practice.
Should I learn to digitize or outsource it?
Both are viable paths at startup. Outsourcing digitizing to a professional service lets you focus on production while you learn the shop side.
Owning the software gives you the ability to adjust designs on the fly, turn around client changes quickly, and capture the digitizing fee revenue yourself. Many shop owners start by outsourcing and develop in-house digitizing capability over time.
Should I require customers to bring their own garments or supply the garments myself?
Supplying garments yourself gives you better control over production quality, consistent substrate behavior, and an additional margin source. Customer-supplied garments create risk — damage liability, fabric incompatibility, and sizing inconsistencies.
Many experienced shop owners prefer to source garments themselves and build that markup into the pricing structure.
What are the two main pricing models for embroidery?
Per-stitch pricing charges by the number of stitches in the design — typically per 1,000 stitches — and reflects actual production complexity.
Flat-rate pricing charges a fixed amount per item type regardless of stitch variation, which is simpler for clients to understand and works well for standard items. Many shops use a combination depending on the job.
Can I embroider any logo a client brings me?
Not without restriction. If a client brings their own original business logo, they bear the rights — get the request in writing.
If a client asks you to produce items with trademarked logos, licensed sports team insignia, or copyrighted characters, producing those for resale or commercial use without authorization exposes you to intellectual property liability.
Establish a clear policy on what designs you will and won’t accept, and enforce it before production begins.
What permits and licenses do I typically need?
Requirements vary by location, but most embroidery shops need a business entity registration, an EIN, a seller’s permit or sales tax registration, a general business license from the city or county, and zoning clearance for the commercial space.
Verify current requirements with your state’s secretary of state, department of revenue, and local city or county clerk before opening.
How much operating capital should I plan for?
Plan enough to cover all fixed costs — lease, equipment payments, utilities, insurance, and your own minimum living expenses — for several months before assuming consistent client revenue will support the shop. Counting on immediate full capacity is a planning mistake that ends many new shops early.
When is a multi-head machine worth considering?
A single-head machine handles most startup operations well. A multi-head setup — two or more simultaneous stitching heads — makes sense when you’re regularly receiving large-volume corporate or organizational orders where stitching the same design on multiple garments at once meaningfully reduces production time. That volume typically comes after the client base is established, not before.
What Embroidery Business Owners Learned From Experience
These interviews share practical lessons from embroidery business owners and industry professionals. They discuss equipment, customer acquisition, service positioning, production challenges, pricing systems, and business growth.
Readers can use these experiences to compare business models, anticipate common problems, and make better decisions about equipment, services, customers, and operating systems before getting started.
How to Start an Embroidery Business With Forrest Wedmore
This interview-based guide explains how Forrest Wedmore entered the custom apparel industry and developed an embroidery and printing shop. It covers equipment, specialization, customer markets, staffing, and profit margins.
It is useful for understanding the major startup decisions and why specializing can be more effective than competing mainly on price.
Embroiderer Spotlight: Linda Russell
Linda Russell discusses turning embroidery from a hobby into a part-time business. She explains how referrals, social media, a specialized niche, and equipment capacity affected her progress.
Her experience helps prospective owners see how demand can develop gradually and why equipment choices should account for possible increases in production.
Meet Hao Quach of Ginkgo Embroidery
Hao Quach describes learning machine embroidery through trial and error while handling accounting, marketing, customer service, and production. The interview also covers custom orders, small batches, and mobile embroidery.
It provides a realistic picture of the technical learning curve and shows how a distinctive style or service format can help an embroidery business stand apart.
Meet Desiree Contreras of Chopped Up Cherries Embroidery
Desiree Contreras shares how she built an embroidery business with very limited funds. She discusses referrals, customer relationships, financial pressure, service expansion, and operating her own shop.
Her story helps readers understand the persistence and customer service required when starting with limited resources and few established clients.
Threads and Ink With Diana Okeefe
Diana Okeefe discusses moving from her parents’ company to running her own embroidery, screen-printing, and promotional-products business. She also explains building a team and operating the company with her husband.
The conversation is useful for readers considering a family-operated shop, in-house production, or a business serving companies, teams, and organizations.
Related Articles
- How To Start a Screen Printing Business
- How To Start a T-Shirt Business
- How To Start a Vinyl Decal Business
- How To Start a Mug Printing Business
- How To Start a Label Printing Company
- How To Start a Promotional Products Business
Sources:
- Graphics Pro: Start Embroidery Business
- Jim.com: Start Embroidery From Scratch
- Dr. DTG: Single vs Multi-Head Machines
- The Embroidery Warehouse: Charge for Embroidery, Embroidery Machine for Business
- Embroidery Money: Embroidery Legal Requirements, Commercial Machine Permit
- SBA.gov: Apply for Licenses and Permits
- SanMar: Wholesale Apparel Bags Caps
- S&S Activewear: Wholesale Blank Apparel
- Digitizing USA: Basic Embroidery Material List
- EZ Stitch Digitizing: DST File Embroidery Guide
- Vision Punch: Embroidery File Formats
- MaggieFrames: Commercial Embroidery Machines, Profitable Embroidery Pricing
- Impressions Magazine: Decorated Apparel Profitability
- Inksoft: Why Shops Offer Embroidery
- Stay Sharp Apparel: Embroidery Order Turnaround
- Helmsman Stitch Co.: Custom Embroidery Timeline
- YoPrint: Printing Licenses and Permits
- ZoningPoint: Light Industrial Property Zoning
- Avalara: State Resale Certificate Guide
- Avvo: Brand Logo Embroidery Legal
- Insureon: Intellectual Property Insurance
- Arklavo: Embroidery Cost Estimator
- Corebridge: Embroidery Management Software