
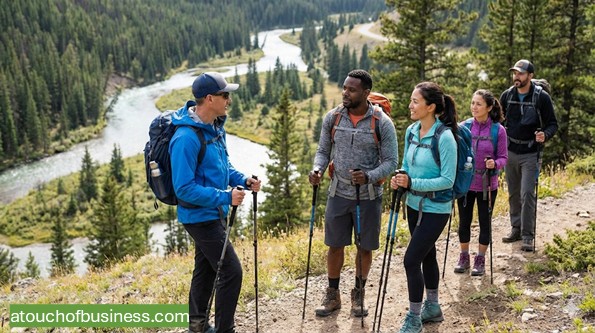
What to Expect From This Guide to Starting a Hiking Tour Business
This guide walks you through the key decisions and practical steps involved in starting a guided hiking business. The bullets below highlight selected areas, not everything covered.
Inside the guide, you will find:
- Startup steps: A numbered path from testing demand and choosing routes through costs, insurance, permits, and a final pre-opening check.
- First-hand insights: Learn from hiking tour owners about demand, permits, funding, guides, and lessons from running their own companies.
- Startup FAQs: Find answers on permits when fees only cover costs, guide licensing, adding guides under a permit, and part-time operation.
- Daily reality: See what a typical day involves, including the parts owners often enjoy and the parts they find hard.
- Land permits: Learn why guiding for pay on public land often needs written approval and how to check requirements route by route.
- Financial planning: Work through cost items, pricing, break-even logic, and operating cash for slow months.
- Risks and warnings: Review red flags before you commit and again before opening day, including insurance, safety, and transportation rules.
Start by asking whether leading paid hikes fits your life, because that answer shapes every decision that follows.
What Is a Hiking Tour Business?
A hiking tour business is a paid, guided outdoor experience in which you lead people on planned hikes.
You also handle the details that keep each trip safe, legal, and organized.
Most revenue comes from three models:
- A per-person price for a scheduled public hike
- A flat rate for a private group
- Contracts with organizations for guided outings
Some owners add extras such as a shuttle, pre-arranged snacks, or loaner gear.
Check that your permits, insurance, and local rules allow each extra before you offer it.
Your product is the experience. The simplest first offer is a short hike on a known trail.
Set a clear start time, end time, and group size for that first hike.
Many owners then build a small set of offerings they can deliver consistently:
- Intro hikes for beginners
- Family-friendly hikes
- Sunrise or sunset hikes (where allowed and safe)
- Local nature interpretation hikes
- Private group hikes for birthdays, reunions, or small teams
- Day trip packages that bundle a hike with transportation (only where the transportation rules allow it)
Who Books Guided Hikes?
Visitors who want a local guide book many hikes. So do beginners and locals who want a planned outing without doing the research.
Common customer types include:
- Tourists who want a “must-see” trail with a guide
- Beginners who want a low-pressure first hike
- Families who want a paced, kid-friendly outing
- Small groups who want a private experience
- Organizations planning team activities
Is a Hiking Tour Business a Good Fit for You?
A hiking tour business fits when you enjoy leading groups, accept responsibility for guests’ safety, and can handle permits and paperwork.
This business may not suit you if you dislike paperwork, changing plans, or unpredictable income.
Before you plan routes or price gear, review these business start-up considerations.
Then ask two questions. Does owning a business suit you, and does guiding hikes suit you?
Passion helps when weather changes, permits take longer than expected, or a guest arrives unprepared.
That drive keeps you solving problems instead of quitting. For a gut-check, read why passion supports persistence.
Ask a question that cuts through fantasy: are you moving toward something or running away from something?
If you’re starting mainly to escape a job or financial stress, slow down.
This path can mean uncertain income, long hours, hard tasks, fewer vacations, and total responsibility.
You also need practical support. Think through family buy-in, the skills you have, and what you must learn.
Decide how your household will cover living expenses during the startup period.
Confirm you have funding to start and to keep operating until bookings grow.
How much income uncertainty can your household accept, and what will you do if the plan doesn’t work?
For a deeper reality check, use the Business Inside Look framework to see what ownership looks like.
Think about who will book your first hikes and why they would choose you over alternatives.
Talk only with owners you will not compete against.
Prepare your questions first. Each owner’s path differs, but their experience is worth hearing.
These questions usually bring real answers:
- “What delayed your opening more than you expected—permits, insurance, paperwork, or something else?”
- “What do guests show up without that creates safety or customer issues?”
- “If you started over, what would you do first to confirm demand and pricing?”
This business can be simpler to open than a storefront, but you carry real responsibility for people outdoors.
Advantages to weigh:
- You can start small
- Scheduling is flexible
- Location-based demand can be strong in travel areas
- Trip formats are repeatable
- You need little or no permanent facility
Trade-offs to weigh:
- Permit and land access can be complex
- Weather and seasonality affect scheduling
- Liability exposure is higher
- Guest fitness and preparation vary
- Transportation rules can apply if you shuttle guests
Red Flags Before You Start
Five warning signs should make you pause, verify, or change your plan before you spend money.
- Limited permit access: Some forests offer only short-term temporary permits, and priority permits can be scarce. Ask each managing office what is available before you commit funds.
- Unverified land access: You can’t say who manages a route, or you hope permits won’t matter. Pause until you have an answer for every route.
- Liability without coverage: Guiding guests outdoors exposes you to injury claims, and some permit offices require proof of liability insurance before approval. Confirm coverage is available before you buy gear.
- Uneven income: Weather, closures, and seasons can cut bookings. Test your numbers against slow months before you leave a steady job.
- Single-route dependence: A plan built on one route or one access point fails if rules or conditions change. Identify backup options first.
If a warning sign applies, verify it, reduce the risk, or change your model before you continue.
A Day in the Life of Running a Hiking Tour Business
A typical day mixes guiding guests on the trail with route planning, guest messages, and paperwork.
Owners describe email, scheduling, and record-keeping as a regular part of the day, not an afterthought.
On trail days, you check weather and conditions, meet guests, and lead the hike.
If you employ guides, you also assign trips and train guides on each route.
Between trips, you plan routes and talking points, answer guest and land-manager emails, and keep records.
Weekends are often the busiest days, and tour guides may work evenings and holidays.
Seasons shape the schedule too. Peak travel periods fill trips, and slower seasons leave more time for planning and desk tasks.
What owners often enjoy:
- Helping people experience the outdoors in a way that feels meaningful
- Designing their own tours and routes
- Flexibility in how they schedule guiding and desk time
What owners often find hard:
- Carrying responsibility for guests’ safety on every trip
- Changing plans when weather or closures affect a route
- Handling paperwork, accounting, and messages alongside guiding
- Training and managing guides
- Busy weekends and slow seasons
Does a day split between the trail and the computer fit the life you want?
Step 1: Define Your First Tour and Its Boundaries
Start with one tour defined by hike length, difficulty, group size, and the kind of guest you serve best.
“Guided hikes” can mean many things, so a tight first offer keeps permits, pricing, and training manageable.
Then write clear boundaries, including age limits, fitness expectations, and weather rules.
Some owners perfect one route first and test it with friends and family before adding more tours.
Step 2: Test Demand With Trial Hikes and Local Conversations
Demand means people will book your hike at a price that covers your costs and still pays you.
Interest in hiking alone does not prove that.
Test demand in three ways:
- Search similar offerings in your region, compare what they include, and note when they run trips.
- Talk with visitor center staff, hotel concierges, and owners of non-competing tour companies.
- Run a few trial hikes with friends, local groups, or an events platform, and ask for feedback.
Trial hikes also show how comfortable you are leading a group.
If guests pay or you advertise a hike, permit rules may already apply on public land, so confirm requirements first.
For a simple framework, review how supply and demand affects pricing.
Identify your likely booking channels, such as direct bookings, lodging referrals, visitor bureaus, or travel platforms. Each channel changes your margins and workload.
Step 3: Choose Your Routes and Find Out Who Manages the Land
List the exact trails, meeting points, and parking areas you plan to use, then identify who manages each one.
A route can cross several jurisdictions, and each can require its own approval.
Managers may be federal, state, county, city, or private.
Contact each managing office and ask whether paid guiding is allowed on your routes.
Get each answer in writing, or confirm it through the agency’s official guidance.
Ask each office these questions:
- “Does a guided hike for pay require a permit on these trails or in this area?”
- “Are there group size, seasonal, or route limits for commercial groups?”
- “Do you require proof of insurance as a condition of approval?”
Ask how long approval takes, because the slowest approval sets your earliest opening date.
On private land, get written permission from the landowner and confirm any conditions.
Line up at least one backup route or access point in case rules or conditions change.
Step 4: Choose Your Staffing Plan and Business Model
Decide whether you will guide solo, with partners, or with investors, because that choice affects registration, taxes, risk, and decisions.
Many owners guide trips themselves at first and add part-time guides later.
In many areas, you can start alone with a few focused routes, a small group size, and a clean permit and insurance plan.
Staffing needs grow with multiple daily trips, many land units, multi-day experiences, or transportation at scale.
Training a guide on each route and its safety plan takes time, so build that time into your timeline.
If you hire, learn the basics of staffing and compliance, and consider professional help. A helpful starting point is how and when to hire.
Step 5: Decide Whether You Will Transport Guests
If guests meet you at the trailhead, transportation rules stay simple. A shuttle can add vehicle, insurance, and passenger carrier rules.
Two factors decide whether federal commercial passenger carrier rules apply: whether you operate across state lines and whether you receive compensation.
The Federal Motor Carrier Safety Administration (FMCSA) treats a total package price as indirect payment. Its examples include outdoor recreation operators that transport patrons.
For-hire passenger carriers in interstate commerce generally must register for operating authority and file proof of required insurance.
A USDOT number and federal safety rules can also apply, depending on vehicle weight and passenger capacity.
Some states require registration for vehicles used entirely within the state. Check your state’s motor carrier or transportation agency.
If another company provides your shuttle, some land managers require prior written approval.
FMCSA explains the triggers on its Do I Need a USDOT Number? page and in its Passenger Carrier Guidance Fact Sheet.
FMCSA also outlines insurance filing requirements tied to operating authority.
Verify the transportation rules before you advertise a shuttle as part of your offer.
Step 6: Build Your Safety Plan and Guide Skills
Write a safety plan for each route before you sell anything, because guests are paying for leadership, not just a walk.
You also need the skills to lead a group outdoors, keep people together, and adjust when conditions change.
Your written plan should cover:
- Guest screening for fitness, mobility concerns, and understanding of distance and elevation change
- Turnaround points and weather stop rules for each route
- A maximum group size that you and the land manager both accept
- First aid response, evacuation, and communication that works on your route
Apply screening criteria evenly to every guest. Forest Service permit holders must also follow civil rights requirements, so ask each land manager about accessibility rules.
Build weather rules into the plan.
The National Weather Service recommends that organizers of outdoor activities have a lightning safety plan and follow it without exception.
Plan for heat, ticks in wooded areas, and fire restrictions that can change trail access.
If you employ guides, OSHA’s guidance for employers covers water, rest, and shade during outdoor heat.
Forest Service outfitting applications ask for current CPR and First Aid certifications for guides.
The same applications request Wilderness First Responder cards, other applicable certifications, and an operating plan covering client safety, evacuation, and resource protection.
Get first aid and CPR training before your first paid trip, and require it from any guide you add.
Use established references to build your standard. The National Park Service summarizes the Ten Essentials and the Leave No Trace Seven Principles.
Step 7: Build Your Equipment List
Start with what you need to guide the trip, communicate, and handle common problems. Then add items that make the experience consistent and professional.
Adjust this list for terrain, group size, and whether you provide loaner gear.
If you provide loaner gear, put the policy in writing and set a routine to inspect and clean items between uses.
- Safety and First Aid
- First aid kit sized for group use
- Emergency blanket or bivy sacks
- Tourniquet (when trained to use it)
- Disposable gloves
- CPR face shield
- Whistle
- Headlamp with spare batteries
- Fire starter (for emergency use where allowed)
- Navigation and Communication
- Compass
- GPS device or reliable navigation tool
- Fully charged mobile phone with offline route access
- Portable power bank
- Two-way radios (if needed for terrain or group management)
- Emergency locator device (when appropriate for remoteness)
- Guest Comfort and Extras
- Loaner daypacks (optional)
- Loaner water containers (optional)
- Extra layers in common sizes (optional)
- Sun protection supplies (optional)
- Insect protection supplies (optional)
- Guide Gear
- Weather-appropriate clothing and footwear
- Trekking poles (optional)
- Rain protection
- Food and water for the guide, plus extra for delays
- Note cards for briefings and emergency details
- Group Management Tools
- Guest sign-in sheet (paper backup)
- Waiver copies or digital waiver access
- Small trash bags for pack-out
- Hand sanitizer
- Administration and Business Setup
- Dedicated business phone number (optional but common)
- Laptop or tablet for bookings and records
- Printer or scanner access for permit paperwork (home or local service)
- Document storage system (digital with backups)
- Transportation (Only If You Provide It)
- Vehicle with appropriate seating and safety equipment
- Vehicle safety kit
- Cleaning supplies for the passenger area
- Signage for guest pickup (where allowed)
Step 8: List Startup Costs and Recurring Expenses
List everything you must pay before opening and everything you must pay to keep running through the first months.
Build the list from quotes and published fee schedules, not guesses. The Small Business Administration’s startup cost guide helps you organize categories.
Cost items to price out include:
- Land-use costs, which can include application fees, cost-recovery fees, use fees, and in some cases a share of gross revenue
- First aid, CPR, and wilderness medicine training
- Equipment and your field kit from Step 7
- Insurance premiums
- Business registration, licenses, and name costs
- Booking system and payment processing fees
- Attorney review of waivers and contracts, plus accounting setup
- Vehicle costs, if you transport guests
- Printing and signage, where allowed
Your most accurate estimate comes from listing everything you need and pricing it locally.
Scale changes everything. A solo, local offer can be lean, but transportation, multiple guides, or multiple jurisdictions expand the list fast.
Step 9: Set Prices and Check Your Break-Even Logic
Your price must cover permits, insurance, gear, booking fees, and your time, not just the hours on the trail.
Define what each price includes, what guests must bring, and how a private trip differs from a public one.
Compare local competitors, but build your price from your own costs. For a structured method, use pricing your products and services.
Break-even means your guests’ payments cover your fixed costs after you subtract variable costs.
Gather these numbers before you calculate:
- Fixed costs you pay even when nothing books, such as insurance, annual permit fees, software, and training
- Variable costs per guest or per trip, such as extra guides, snacks, supplies, and booking fees
- Your price per guest or per private group
- Realistic group sizes and how many trips you can run each month
Spread per-trip costs across guests using your typical group size.
Then divide your fixed costs by the amount each guest contributes after variable costs.
The result is the number of guests you need each month to break even.
The Small Business Administration explains the formula in its startup cost guide.
Ask whether your plan depends on small public hikes, larger private groups, or organization contracts.
Then test the math against slow months, when weather, closed trails, and off-season demand can cut bookings.
If the math fails at realistic group sizes and trip counts, change the model or stop before you spend.
Step 10: Plan Funding and Operating Capital
Decide how you will pay startup costs and how you will keep paying fixed costs while bookings build.
Operating capital is the cash that keeps your fixed costs paid through slow periods.
Plan enough of it to cover your fixed costs through your slowest months, plus your own living expenses.
Funding options to explore include:
- Personal savings for a small, low-cost first tour
- Small business loans, including microloans
- A part-time job or other income while bookings build
- Partners or investors, which also affect your structure
Lenders use your break-even estimate to judge viability, so finish Steps 8 and 9 first.
Read how to get a business loan if borrowing is part of your plan.
Settle your structure in Step 11 before you sign any loan agreement.
Avoid major purchases and commitments until your funding is secured. Free counseling from a Small Business Development Center can help you test your numbers.
Step 11: Choose a Business Structure
Choose your structure before you sign permit applications, insurance policies, or contracts.
Guiding paying guests outdoors creates injury-claim exposure. A sole proprietorship does not separate your personal assets from business debts and claims.
The Small Business Administration says an LLC can suit medium- or higher-risk businesses and owners with significant personal assets.
Some owners still operate as sole proprietors and rely on insurance. Discuss that trade-off with an attorney and a tax professional.
Factors that affect your choice:
- Liability exposure from leading guests
- Assets such as gear and vehicles
- Financing needs
- Contracts with land managers and organizations
- Employees or contract guides
Partners or investors make this decision bigger, so get professional guidance before you form anything.
The Internal Revenue Service summarizes common business structures. For a plain-language comparison, see how to choose a business structure.
Step 12: Register Your Business and Claim Your Name
Check that your name is available in state records, as a domain, and on social media handles, then register under your chosen structure.
The Small Business Administration walks through choosing a business name and registering your business.
For a plain-language overview, review how to register a business.
Varies by U.S. jurisdiction. Some states, counties, and cities require a doing-business-as (DBA) registration if you use a name other than your legal name.
Check your state business filing office and your local government website for the correct process.
Confirm your name before you print anything.
Step 13: Set Up Tax Accounts
Apply for an Employer Identification Number (EIN) directly from the Internal Revenue Service (IRS) if your setup calls for one.
The IRS explains how to get an EIN, and the application is free. Avoid websites that charge a fee.
An EIN is used to hire employees, open a business bank account, and apply for business licenses and permits.
Your structure and hiring plans decide whether you need one.
State tax needs vary. Some owners must register for sales tax, some need employer accounts, and some face industry-specific rules.
Varies by U.S. jurisdiction. Confirm what applies with your state department of revenue or tax agency.
If you hire, ask your state tax or labor agency about withholding, unemployment insurance, and workers’ compensation rules.
Step 14: Open Business Banking and Payments
Open a business account before your first sale so you separate business transactions from personal ones from the start.
Expect to provide your EIN (or Social Security number if you are a sole proprietor), formation documents, and any business license.
Read how to open a business bank account for the full process.
Decide how guests will pay: online checkout, invoices, or both. A booking system can take payments, track trips, and assign guides.
A bookkeeper or accountant can set up clean records from the start, even for a basic setup.
Step 15: Get Insurance Quotes and Put Guest Paperwork in Place
Talk with an insurance professional before you finish permit applications, because land managers ask for proof of coverage before issuing a permit.
Forest Service permits require holders to furnish liability insurance, and the required coverage depends on the risk of the activity.
Insurance rules differ by agency and can change, so confirm requirements directly with each issuing office.
Many guided tour operators carry general liability coverage.
Ask a licensed professional who works with outdoor guides how to cover guided hikes, guests, and any guides you employ.
For an overview of coverage types, start with business insurance.
Have this guest paperwork ready before you take bookings:
- A waiver or acknowledgment of risk form
- Participant expectations
- Cancellation terms
- Late arrival rules
- Minimum age rules and an adult supervision policy if you serve minors
- Weather reschedule rules
Forest Service applications ask you to attach any acknowledgment of risk form you plan to use.
National Park Service policy allows Commercial Use Authorization holders to use exculpatory agreements.
Waiver rules vary by state. Have an attorney review your documents for the state where you operate.
Step 16: Apply for Licenses, Permits, and Land Authorizations
Apply for every permit your routes require, and do not advertise, collect fees, or begin guiding until you have written authorization.
Requirements depend on where you guide and what you do on each trip. The Small Business Administration explains applying for licenses and permits.
Federal land managers use different permit systems:
- National Park Service: A Commercial Use Authorization is required for certain visitor services provided for compensation when a concession contract is not needed. Each park unit has its own process.
- Bureau of Land Management: A Special Recreation Permit may apply. Be ready to describe the activity, location, dates, group size, fees, and safety needs.
- Forest Service: A special use permit is required for outfitting and guiding on National Forest lands. Apply through the district where you will guide.
- Bureau of Reclamation: Federal rules list commercial guiding and outfitting as a use that needs authorization, as shown in 43 CFR 429.3.
Forest Service applications typically request an operating plan, guide certifications, a guide list, a certificate of insurance, and any acknowledgment of risk form.
Keep a separate file for every permit, approval, and land-manager message. Carry proof of authorization on every trip.
Varies by U.S. jurisdiction. Use this checklist so you are not guessing:
- State business registration: State business filing office → search “business entity search” plus your state, then “register a business.”
- State tax registration: Department of revenue or tax agency → search “register for sales tax” plus your state, and “withholding account” if you hire.
- Local license and zoning: City or county business licensing office → search “business license” plus your city or county. Ask about home-based rules and whether a certificate of occupancy applies to any space you use.
- Land permissions: Managing agency office → search “commercial guiding permit” plus the specific land unit name.
Step 17: Line Up Suppliers and Advisors
Line up suppliers for gear, first aid restocks, and printing, plus professionals who can review your paperwork.
If you outsource shuttles, add transportation partners once you have confirmed the rules from Step 5.
A local attorney can review waivers and contracts. An insurance professional can confirm coverage, and an accountant can set up clean records.
A Small Business Development Center can also provide free business counseling.
Step 18: Set Up Your Website and Booking Process
Build a simple website and booking flow so guests can reserve, sign paperwork, and pay before the hike.
Keep the flow unpublished for any tour that needs a permit until your authorization arrives.
Write each tour description with distance, elevation change, terrain, and pace. Send a must-bring gear list when guests book.
Describe difficulty and scenery accurately, since clear expectations prevent complaints.
Basic identity items help guests recognize you. Business cards support referrals, and a corporate identity package keeps visuals consistent.
Use signage only where your permits and land managers allow it. Review business sign considerations first.
Step 19: Plan How Your First Customers Will Find You
Name your likely first customers, the problem your hike solves for them, and where you will reach them when you open.
Options for reaching your first guests include:
- Lodging front desks and concierges
- Visitor centers and local tourism organizations
- Outdoor retailers and non-competing tour operators
- Guests and groups from your trial hikes
- Organizations planning team outings
Pick a few channels you can keep up.
Prepare a simple summary partners can hand to guests, and share it only after authorization arrives for any route that needs a permit.
Step 20: Run a Pre-Opening Check
Confirm your approvals, gear, guest communication, and ability to deliver the trip you promised before your first paid hike.
Work through three passes: permits and paperwork, safety and gear, and customer-facing materials.
Run at least two full practice trips on your exact routes, using your real briefing, timing, and gear checks.
Treat them as dress rehearsals, not casual hikes.
Also test these items:
- Your booking flow from inquiry to reservation, waiver, and payment confirmation
- A real payment transaction
- Communication devices on the route, not in your driveway
- Guide training and certifications on file, if you are staffed
Set a clear start date, a booking process, and a schedule you can deliver consistently.
Business Plan
Your business plan connects your tour concept, costs, funding, and break-even numbers into one practical decision document.
A plan is not paperwork for someone else. It shows whether your offer makes sense before you commit money.
Keep it practical and cover these points:
- Your first tour offer and target customers
- How bookings happen
- Your pricing logic
- Your permit plan and timeline
- Your insurance and risk plan
- Startup costs, funding, and operating capital
- Your break-even estimate and slow-month test
Connect those points. If break-even requires more guests or trips than your permits, routes, or seasons allow, change the model.
Draft the plan as you work through the steps, then use it as your final go or no-go check before you open.
If you want a guided structure, use how to write a business plan.
Opening-Day Red Flags
Delay opening if any of these warning signs are still true on your planned start date.
- You lack written authorization for a route you plan to guide.
- Your certificate of insurance is not on file where a permit office requires it.
- Your offer includes transportation, but you have not verified passenger carrier rules.
- You plan to guide beginners without a guest screening method.
- Your prices come from competitors only, not from your costs and time.
- You depend on one route or access point with no backup.
Frequently Asked Questions
Do I still need a permit if I only charge enough to cover my costs?
Often yes. A fee that only covers your expenses can still trigger permit rules on public land.
The Forest Service applies its outfitting and guiding permit rules to individuals, companies, and nonprofit groups that charge participation fees.
The Bureau of Land Management asks whether you charge a fee or pay anyone to lead. A yes to either may mean a permit.
Ask the local office before you charge.
Do I need a license or certification to lead paid hikes?
It depends on where you guide. Some states license outfitters and guides, and land managers may ask to see those licenses.
Ask your state licensing or wildlife agency whether guided hikes are covered. Then ask each land manager what it requires.
Can I bring on guides or contractors under my permit?
Sometimes, but your permit terms decide.
Some Forest Service permits require every guide to be your employee.
Other permits allow contracted guides only with prior written approval. The contractor must be covered by your liability insurance and hold any required state license.
Some forests also require a permit amendment to add a named guide, so ask before you schedule one.
Can I run a hiking tour business part time while keeping my job?
Yes. Part-time work is common for tour guides, and some owners keep another job while they build their tour company.
Weekends are often the busiest days, so check whether your job schedule allows them.
Hear From Hiking Tour Owners
Jennifer Gruhn of Asheville Hiking Tours on the Tourpreneur Podcast
Jennifer Gruhn owns Asheville Hiking Tours. The episode covers demand testing, funding, federal permitting, recruiting guides, and lessons learned.
You hear how a working hiking tour owner handled permits, money, and staffing decisions while starting out.
Alexandra Kenin of Urban Hiker SF on Starter Story
Alexandra Kenin founded Urban Hiker SF, which leads city hiking tours. Her interview covers route design, insurance, booking tools, guide training, and seasonal swings.
You see how a solo owner built and tested routes, chose a structure after consulting a lawyer, and added guides over time.
The Founder of Blue Ridge Hiking Company on Business Lessons From the Trail
The founder of Blue Ridge Hiking Company shares nine lessons from running a hiking guide company, written in her own words.
You get a candid look at liability, costs, desk time, and managing guides.
Related Articles
- Starting a Tour Guide Business
- Start a Campground Business
- Start a RV Park
- Start a Canoe and Kayak Rental Business
- How to Start a Rock Climbing Gym
- Start a Travel Agency
- Start a Backpack Manufacturing Business
- How to Start a Bike Rental Business
- Start a Beach Gear Rental Business
- Starting a Boat Rental Business
Sources:
- Bureau of Land Management: Special Recreation Permits
- CDC: Prevent Mosquito Tick Bites
- U.S. Census Bureau: North American Industry NAICS
- FMCSA: Need USDOT Number, Insurance Filing Requirements, Passenger Carrier Guidance
- eCFR: 43 CFR 429.3 Uses
- Internal Revenue Service: Business Structures, Get employer ID number
- Leave No Trace: Seven Principles
- U.S. National Park Service: Commercial Use Authorizations, Ten Essentials, Leave No Trace Principles
- OSHA: Heat Water Rest Shade
- American Red Cross: Adult First Aid CPR AED
- U.S. Small Business Administration: Business Startup Guide, Calculate Startup Costs
- Forest Service: Outfitters and Guides, Outfitters Guides Special Permits, Bitterroot Outfitter Permits, Special Use Event Permits, Commercial Outfitting Guiding, Special Use Insurance, Outfitting Guiding Services, Outfitting Guiding Application, Operating Plan Template
- National Weather Service: Lightning Safety Sports
- U.S. Bureau of Labor Statistics: Tour and Travel Guides
- Tourpreneur: Asheville Hiking Tours Episode
- Starter Story: Urban Hiker SF Interview
- Asheville Hiking Tours: Start Outdoor Tour Company
- Blue Ridge Hiking Co.: Business Lessons Trail