Planning a Water Refilling Business With More Clarity
Overview of a Water Refilling Business
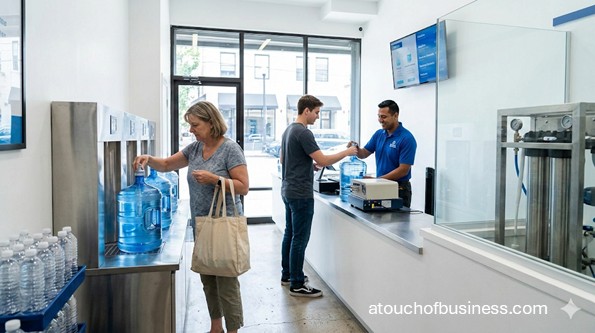
A water refilling business is a storefront where people bring in empty containers and leave with drinking water ready for home or office use. In most cases, the shop starts with an approved water source and then treats it through equipment such as sediment filters, carbon filters, reverse osmosis, ultraviolet light, or ozone.
In Plain Terms: In some states, a retail water facility is a commercial refill shop where vended water is sold and placed into customer containers or into containers sold or given to customers at the store.
This is a food and beverage business, even though it looks simpler than a restaurant or cafe. Your customers still care about taste, cleanliness, consistency, speed, and trust. The water has to be safe, the refill area has to stay clean, and the shop has to feel orderly from the front counter to the treatment room.
A storefront water refilling business usually sells refilled water, new containers, caps, pumps, and small dispensing accessories. Some operators later add delivery routes or water vending machines. Some also want to fill and seal containers for sale. That last step matters because a refill-only store is not always regulated the same way as a bottled-water plant.
In Plain Terms: Reverse osmosis is a treatment step that pushes water through a membrane to reduce dissolved solids.
The main customers are nearby households, apartment residents, and small offices that want reusable jug service without a full delivery contract. They are often looking for water that tastes better, smells better, or fits a routine they already follow.
There are good reasons to like this business. Repeat customers can be strong. The offer is easy to explain. The shop can stay focused. Still, the work is more regulated than many first-time owners expect. You need the right location, the right treatment setup, written records, and approvals in place before you open.
Is A Water Refilling Business Right For You?
First, ask whether owning any business fits you. Then ask whether a water refilling business fits you. Those are not the same question.
A water refilling shop can suit you if you like routine, retail hours, sanitation, equipment checks, and steady local customer service. You need patience with build-out details, comfort with records, and enough discipline to follow the same cleaning and testing habits every day.
It may be a poor fit if you want fast cash, low oversight, or a business you can run casually. This kind of shop depends on plumbing, treatment equipment, local approvals, and customer trust. If one part fails, the whole opening can stall.
Passion still matters. If you want a deeper look at that side of the decision, read how passion affects your business. Passion will not replace compliance, but it will help you stay steady through permit calls, vendor delays, and long setup days.
Motivation matters too. “Are you moving toward something or running away from something?” Do not start a water refilling business only because you hate your job, feel pressed by money, or want the status of owning a storefront. Those reasons can push you into a lease before you are ready.
You also need a reality check. A refill shop is not just selling water. You are managing water treatment, customer flow, sanitation, receiving supplies, storage of containers, payment, cleanup, and reorder timing. Before you commit, spend time with points to consider before starting your business.
Talk to owners, but only talk to owners you will not compete against. Pick people in another city, region, or market area. That keeps the conversation more open and more useful. A good place to start is inside advice from real business owners.
- What surprised you most about getting a water refill shop ready to open?
- Which approval or inspection caused the biggest delay?
- How much of your week goes to cleaning, records, and equipment checks?
- Would you still choose a storefront water refilling business if you were starting again?
- What part of the business is easy to underestimate before launch?
Step 1: Define Your Water Model
First, get clear on what your water refilling business will actually do. A simple storefront refill model is the cleanest place to start. Customers bring containers in, the shop dispenses treated water, and the customer pays at the counter.
That sounds simple, but one decision changes everything: will you only refill containers, or will you also fill and seal containers for sale? In some states, those are treated as different categories. A refill shop may fall under a retail water program, while sealed bottled water can trigger bottled-water processing rules.
Do not assume you can add sealed packaging later without another approval path. Ask the state health, agriculture, or food-safety office how they classify your exact model before you sign the lease or order equipment.
In Plain Terms: Purified water is a regulated bottled-water description, and some states also regulate that claim for refill shops. If you use that claim, your treatment process and records must support it.
At this stage, define your offer list. Keep it simple:
- Refilled drinking water or purified water, if allowed by your setup and records
- New jugs and smaller containers
- Caps, pumps, stands, and related accessories
- Optional container rinse or sanitation service, if your local rules allow that setup
Simple wins here. A water refilling business becomes harder to launch when the offer list gets too wide too early.
Step 2: Validate Demand And Study Your Customers
Next, test the location and the demand around it. A water refilling business depends on repeat traffic, visibility, and convenience. People need to notice the shop, park easily, carry containers in and out, and feel that the process is quick.
Look at apartment density, family neighborhoods, nearby offices, and competitor distance. A poor location can hurt even if your water tastes great. In a storefront model, visibility and ease of access matter as much as treatment quality.
Watch how customers would move through the space. In a good refill shop, the flow feels obvious. People enter with empty containers, move to the refill area, pay without crowding, and leave without bumping into new stock or waiting too long.
Talk to people who fit the likely customer base. Ask what they buy now, how often they refill, what container sizes they use, and what frustrates them about current options. In a water refilling business, taste, trust, cleanliness, and speed usually matter more than fancy branding.
Then look at the competitors closely:
- Do they focus on refill service, vending, or delivery?
- Do they sell accessories and containers well?
- Is the shop clean and easy to use?
- Are customers waiting too long?
- Is the location easy to enter and exit?
Your market test should tell you whether the area wants a refill shop, not whether you hope it does.
Step 3: Build The Name, Brand, And Digital Footprint
Then lock down the basics people will see first. A water refilling business does not need a complicated brand, but it does need a clean and trustworthy one.
Choose a name that fits the service and is easy to say, spell, and search. Check that the business name is available with your state filing office. Then check domain availability and social handles before you print signs, business cards, or jug labels.
For a storefront water refilling business, your brand assets should stay practical:
- Business name
- Logo
- Storefront sign design
- Hours and contact details
- Simple treatment-process description
- Price board
- Google Business Profile details
- Social profiles that match the business name
Keep the look clean. Your customers are not looking for drama. They want the shop to feel safe, clear, and easy to trust.
This is also the right time to shape your early marketing plan. For a water refilling business, opening marketing usually works best when it stays local and direct. Focus on your storefront sign, local listings, neighborhood awareness, simple handouts, and a clear online profile that shows what you sell, where you are, and when you open.
Step 4: Set Up The Business And Banking
Now turn the idea into a legal business. In most cases, that means choosing a business structure, registering the business with the state, filing a DBA if needed, and getting an employer identification number.
Open the business bank account before you start taking deposits from customers or paying vendors. That part matters more than many first-time owners think. A separate account helps with taxes, vendor payments, card processing, and cleaner records from the first day.
For a storefront water refilling business, your payment setup should be ready before opening:
- Point-of-sale system
- Card processing
- Receipt printing
- Cash drawer if you will take cash
- Refund and return rules
- Basic daily closeout routine
If you plan to hire right away, ask the state labor and tax agencies what employer accounts must be active before payroll starts. This is one of those small setup steps that becomes a bigger problem when it is left too late.
Step 5: Confirm The Rules Before You Build
This step carries more weight in a water refilling business than in many other small retail concepts. You are selling drinking water, and that brings in food-safety and public-health concerns.
First, ask the state agency that handles this activity how your storefront will be classified. Depending on the state, the business may fall under a retail water facility program, a bottled-water program, a water vending category, or a broader food establishment path. Your local health department may also have a role in plan review, sanitation, and opening inspection.
Get the classification in writing if you can. A wrong assumption here can lead to the wrong build-out, the wrong equipment, or the wrong application package.
Keep the local-rule check practical:
- Ask the city or county if a general business license is required
- Ask planning and zoning if the site is approved for this use
- Ask building and plumbing if permits are needed for treatment equipment, drains, and fixtures
- Ask whether a certificate of occupancy is needed before opening
- Ask the local water utility or plumbing authority about backflow protection
- Ask the tax office whether refill water, containers, and accessories are taxed the same way
In Plain Terms: Backflow prevention is a plumbing device that helps stop water from moving the wrong way into the supply line.
If you are not sure which office handles what, start with the city or county business licensing office, the local planning department, and the state health or food-safety office.
Step 6: Choose The Storefront And Check The Space
A water refilling business lives or dies by the location and the layout. The space has to support both the customer side and the water side.
Look for a site with easy parking, strong visibility, room for exterior signage, and a simple path for customers carrying heavy jugs. Inside, the shop should make sense the moment someone walks in.
Next, check the utility side. A refill store depends on water supply, plumbing capacity, drainage, power for treatment equipment, space for storage tanks, room for filter changes, and a safe place for cleaning supplies. If the site fights the business, you will pay for it during build-out.
In a storefront water refilling business, the back room matters just as much as the front counter. You need enough room for treatment equipment, access for service calls, and storage for new containers, filters, sanitizers, and retail accessories.
Before you commit to the lease, confirm these points:
- Water feed and drain options
- Electrical capacity for the treatment system
- Landlord approval for plumbing work and signs
- Room for customer flow without crowding
- Receiving space for deliveries
- Clean storage away from the refill area
Opening before the space is truly ready can create expensive rework. In a regulated storefront, that is not a small problem.
Step 7: Design The Water Flow And Physical Setup
Now build the shop around the actual workflow. A water refilling business is easier to run when the movement of water, containers, people, and payment all make sense.
Start with the water path. The source water comes in. It moves through the treatment stages. It goes into storage if your system uses that step. Then it moves to dispensing. Every part of that path should be easy to inspect, clean, and service.
The front-of-house flow matters too. Customers should know where to place containers, where refill happens, where accessories are displayed, and where they pay. The cleaner the layout, the faster the service feels.
Think through the full food and beverage style flow of this business:
- Sourcing and water entry
- Treatment and storage
- Container receiving
- Refill service
- Checkout
- Cleanup and sanitation
- Recordkeeping
- Reordering filters, parts, and supplies
In a water refilling business, poor layout creates crowding, slow service, sanitation headaches, and harder inspections. A good layout supports both compliance and customer comfort.
Step 8: Buy The Right Equipment And Set Up Vendors
Then move into equipment. This is where many first-time owners either overspend or buy the wrong setup for their model.
A basic storefront water refilling business often needs equipment in several groups:
- Water connection parts and backflow protection
- Sediment and carbon filtration
- Reverse osmosis or other treatment stages that match your water claim
- Ultraviolet light or ozone for final disinfection
- Closed storage tank and pump
- Food-contact piping and dispensing hardware
- Container rinse or sanitation tools if your approved setup includes them
- Meters, logs, and testing tools
- Point-of-sale equipment
- Shelving for jugs, pumps, stands, and accessories
- Cleaning and janitorial supplies
Do not shop by headline price alone. Ask vendors about replacement parts, service response time, warranty terms, startup support, and lead times for filters, membranes, lamps, and specialty items. A water refilling business can lose sales fast when a critical part is down and the vendor cannot respond.
You also need outside vendors ready before launch:
- Treatment equipment supplier
- Licensed plumber
- Electrician if build-out requires it
- Certified lab for required testing
- Container and accessory supplier
- Sign company
- Cleaning and sanitation supplier
Ask each vendor what documents they can provide for inspection files. That small question can save time later.
Step 9: Plan Costs, Funding, And Pricing
First, build your cost plan around the real opening tasks, not a guess pulled from another business type. A water refilling business has cost drivers that are easy to miss, especially if the space needs plumbing work or treatment upgrades.
Your opening budget will usually include the lease deposit, initial rent, build-out, plumbing, electrical work, treatment equipment, tanks, pumps, initial testing, permits, licenses, signs, point-of-sale setup, insurance, opening inventory, and reserve cash for slow early weeks.
Cost ranges are hard to state cleanly for this business because local rent, space condition, treatment design, and permit paths change the total so much. It is safer to build a line-by-line estimate than to trust a single broad number.
Next, think about funding. Common paths include your own cash, a bank loan, Small Business Administration-backed lending through a lender, equipment financing, or a line of credit. Match the funding type to the asset. Long-life equipment and build-out are different from short-term supply needs.
Then set pricing with care. A water refilling business often prices by gallon, by container size, or by refill package. Containers and accessories are usually priced separately. Before you decide, know what actually affects the number:
- Filter and membrane replacement
- Utility use
- Lab testing
- Labor
- Card processing fees
- Local competition
- Downtime risk
- Tax treatment
Do not copy a competitor price until you understand your own finished-water cost and your own service model.
Step 10: Set Up Insurance, Records, And Compliance Systems
In a regulated water refilling business, records are part of the opening process, not something to think about later. You need a way to store permits, test results, sanitation logs, service records, corrective actions, and vendor paperwork.
Set up your record system before the first inspection. Paper binders, digital folders, or both can work. The important thing is that the documents are complete and easy to find.
Insurance belongs here too. Some coverage is legally required only when certain triggers apply, such as workers’ compensation when you have employees. Other coverage is commonly recommended for a storefront water refilling business:
- General liability or a business owner’s policy
- Property coverage
- Equipment breakdown coverage
- Business interruption coverage
- Commercial auto if you add a business vehicle
- Cyber protection if you use card payments and customer systems
Then set up the compliance habits that support opening:
- Maintenance logs
- Sanitation logs
- Testing schedule
- Corrective-action notes
- Supplier contact list
- Opening and closing checklists
A water refilling business feels easier to manage when the records are built into the routine from day one.
Step 11: Hire And Train For The Storefront Experience
If you will have staff, hire for reliability and cleanliness as much as customer service. In a water refilling business, a friendly worker who ignores sanitation steps is not a good fit.
Your training should match the real job. Show staff how customers move through the store, how the refill area stays clean, how payment works, and what to do when equipment needs attention.
For a storefront model, early training should cover:
- Customer greeting and checkout flow
- Container handling rules
- Cleaning schedule
- What to do if the system is down
- What claims staff can and cannot make about the water
- When to call the owner or vendor
Keep hours realistic at launch. A longer schedule looks good on paper, but it creates more staffing pressure and can expose weak routines before the team is ready.
Step 12: Test Everything Before You Open
Then run the shop like it is already open. A water refilling business should not have its first real test on opening day.
Run treated water through the full system. Complete required lab work. Confirm that your logs are in place. Test the point-of-sale system. Check the refill area for drips, splashes, crowding, and customer confusion. Look at the sign placement from the street and from the parking area.
This is also the time to test your opening marketing. Make sure your online listing is live, your hours are correct, your phone is answered, and your digital profiles show the location, products, and opening details clearly.
If local approvals are still pending, wait. Opening before final sign-off can delay the launch, trigger more cost, and create avoidable rework. In a regulated storefront, patience is cheaper than reopening a build-out problem.
What Early Days Look Like
Once the water refilling business opens, the first days are usually practical and repetitive. That is normal. The owner is watching the system, the team, and the customers all at once.
A pre-launch or early-launch day often looks like this:
- Check the refill system and the store before opening
- Review any water test or service notes
- Receive jugs, caps, pumps, filters, or cleaning supplies
- Help customers and watch where they hesitate
- Restock the front area
- Handle payment issues and receipts
- Clean and sanitize the refill area
- Update logs and place reorders
If you hate routine checks, cleanup, and detail work, a water refilling business can wear on you fast. If you like order, visible results, and local repeat customers, it can be satisfying.
Red Flags Before You Open
A few warning signs show up again and again in this kind of business.
- Signing a lease before the regulator confirms how the business is classified
- Using words like purified in signs or ads before your setup supports that claim
- Ignoring backflow, drains, or plumbing review until late in build-out
- Buying equipment without service support nearby
- Picking a low-visibility storefront because the rent looks cheap
- Trying to sell too many extras before the refill process is smooth
- Opening without enough replacement filters, sanitizer, or spare parts
- Relying on vague verbal answers instead of written approvals or written vendor terms
A water refilling business has a narrow promise. Clean water. Smooth service. Trust. Anything that weakens that promise is a serious warning sign.
Pre-Opening Checklist
Before your water refilling business opens, the basics should be fully in place. This is the last review before you unlock the door.
-
- Business structure chosen and filed
- DBA filed if needed
- Employer identification number obtained
- Business bank account open
- Tax registration complete where required
- Store use approved by zoning or planning
- Business license filed if the city or county requires it
- Water business classification confirmed with the right agency
- Building, plumbing, and related permits completed if triggered
- Certificate of occupancy issued if required
- Backflow protection installed and approved where needed
- Treatment equipment installed and tested
- Storage tank, pump, and dispensing points ready
- Required testing arranged and completed
- Sanitation and maintenance logs prepared
- Supplier accounts active
- Opening stock of containers, accessories, filters, and cleaning supplies on hand
- Point-of-sale system live and tested
- Insurance active for opening day
- Signage installed with any required sign permit handled first
- Team trained on service flow, cleaning, and customer questions
- Digital listings live with correct hours and contact details
- Soft opening plan ready to test the shop before a bigger launch push
27 Startup Tips for Your Water Refilling Business
Starting a water refilling business takes more than buying filters and renting a storefront.
You need the right business model, the right approvals, the right space, and a setup that supports clean water, clean records, and smooth customer flow from day one.
These tips walk through the full startup path so you can spot problems early, make better decisions, and get your shop ready to open.
Before You Commit
1. Make sure you want the real work that comes with a water refilling business. You will be dealing with sanitation, equipment checks, records, vendor calls, and local approvals, not just selling water to walk-in customers.
2. Be honest about why you want this business. If you are only trying to escape a job or chase quick income, you may rush into a lease before you understand the space, the rules, or the real setup costs.
3. Talk to owners outside your market area before you commit. Ask what delayed their opening, what they underestimated, and whether they would still choose a refill-only storefront instead of another water model.
4. Decide whether this business fits your lifestyle before you spend money. A storefront water refilling business can mean fixed hours, heavy container handling, repeated cleaning tasks, and constant attention to the condition of the refill area.
Demand And Profit Validation
5. Validate demand in the exact area where you want to open. A water refilling business depends on local habits, nearby housing density, easy access, and whether people already refill containers as part of their routine.
6. Study competitors by business model, not just by price. A refill shop, a water vending setup, and a delivery business may serve the same need in different ways, and that changes what customers expect from your storefront.
7. Watch how customers move through competing locations. If people struggle with parking, crowd around the refill station, or wait too long to pay, those are clues about what your future shop should avoid.
8. Separate demand for refills from demand for extras. New containers, pumps, and stands can help early sales, but do not assume accessory sales will carry a weak refill business.
Business Model And Scale Decisions
9. Define your opening model before you sign anything. A refill-only storefront is not always regulated the same way as a business that fills and seals containers for sale, so that one choice can change your approval path.
10. Start with a narrower offer list than you think you need. Refilled water, a few container sizes, and a small group of accessories are easier to launch well than a wide setup that creates clutter, confusion, and extra inventory.
11. Choose your water claims carefully. If you plan to describe the product as purified water, your treatment process, testing, and records need to support that claim before it shows up on signs or price boards.
12. Do not add delivery routes or vending machines during the first setup unless you have already confirmed the added rules and costs. A simple storefront is easier to approve, easier to build, and easier to test before opening.
Legal And Compliance Setup
13. Ask the right agency how your business is classified before you build the space. Depending on the state and local setup, your shop may be treated as a retail water facility, a bottled-water operation, a water vending business, or part of a broader food establishment system.
14. Confirm zoning and use approval before you commit to the location. A cheap storefront is a bad deal if the city or county will not allow your water refilling business in that space.
15. Check whether you need building, plumbing, fire, health, or sign approvals before opening. A water refilling business often involves water line work, backflow protection, equipment installation, and customer-facing signs, and each piece can trigger a separate local review.
16. Find out early whether a certificate of occupancy is required for the space. If that final approval is missing, your opening date can slip even when the treatment system is already installed.
17. Register the business and tax accounts before you begin taking deposits or paying vendors. That usually means your legal entity, any assumed name filing, your employer identification number, and any state tax registration that applies to your sales.
Budget, Funding, And Financial Setup
18. Build your startup budget by category instead of relying on a rough guess. Include rent deposits, plumbing, electrical work, treatment equipment, lab testing, permits, signs, insurance, point-of-sale setup, initial inventory, and reserve cash for opening delays.
19. Get quotes for the space work before you finalize your numbers. In a water refilling business, build-out costs can rise fast if the location needs drain work, added power, or changes to support storage tanks and treatment equipment.
20. Match the funding type to the need. Equipment financing may fit treatment systems, while working capital is better for early inventory, small repairs, testing, and the gap between build-out and opening.
21. Open your business bank account and payment system before launch week. You want card processing, receipts, refunds, and daily cash handling ready before the first customer walks in with a container.
Location, Build-Out, And Equipment
22. Choose a storefront that supports both visibility and utility needs. You need more than foot traffic; you need water access, proper drains, enough power, room for service calls, and space for customers carrying heavy jugs.
23. Design the shop around the full flow of the business. Your layout should make sourcing, treatment, storage, refill service, payment, cleanup, and reordering feel natural instead of forcing staff and customers into each other’s path.
24. Buy equipment based on service support, not just purchase price. Filters, membranes, ultraviolet light components, pumps, and treatment parts need replacement schedules and local service options, or one breakdown can stop your opening.
Suppliers, Contracts, And Pre-Opening Setup
25. Lock in your key vendors before the final countdown. You should know who handles treatment equipment, replacement parts, certified lab work, containers, sanitizers, plumbing support, and signs, along with their lead times and warranty terms.
26. Prepare your documents and logs before inspection day. Keep source-water information, test results, maintenance records, sanitation logs, vendor contacts, and any approval paperwork together so you are not scrambling when an inspector asks for them.
Branding And Final Pre-Opening Checks
27. Test the full customer experience before you announce the opening. Confirm the storefront sign is visible, the refill station works cleanly, the point-of-sale system processes payments, the hours are posted online, and staff know what they can and cannot say about the water.
A water refilling business can look simple from the outside, but the opening stage depends on clear decisions and clean execution.
If you validate demand, confirm the rules early, and build the shop around the real refill workflow, you give yourself a much better chance of opening on time and opening with confidence.
FAQs
Question: What kind of water business am I really starting if I open a refill shop?
Answer: Most new owners start with a storefront refill model where customers bring containers and fill them on site. That is not always regulated the same way as a business that fills and seals bottles for sale.
Question: Do I need to decide between refill-only and sealed bottled water before I open?
Answer: Yes. That choice can change your permits, equipment, records, testing, and inspection path.
Question: What legal setup should I finish before I spend money on build-out?
Answer: Start with your business structure, business name filing, and Employer Identification Number. Then confirm your state tax setup and local business license needs before opening.
Question: Which permits matter most for a water refilling business?
Answer: The big ones are usually use approval for the location, any building or plumbing permits, and the water-related approval from the state or local regulator. Rules vary by state and city, so confirm the exact classification of your shop before you sign a lease.
Question: Do I need health department approval for a water refill store?
Answer: In many places, yes, or there is another public health or food-safety agency involved. A refill shop may be reviewed as a retail water facility, a food-related business, or another regulated water operation.
Question: How do I know if a location will work for this business?
Answer: Check zoning first, then look at water supply, drainage, power, visibility, parking, and room for customers carrying heavy jugs. A cheap storefront can become expensive if the plumbing or use approval does not fit the business.
Question: What equipment do I need to open a water refilling business?
Answer: Most shops need treatment equipment, storage, dispensing hardware, backflow protection, pumps, and basic testing tools. You also need front-of-house items like a point-of-sale system, shelving, and space for containers and accessories.
Question: Can I use words like purified water in my signs and price board?
Answer: Only if your treatment process and records support that claim. Water descriptions are regulated, so do not print them until you confirm what your setup allows.
Question: How should I estimate startup costs for a water refilling business?
Answer: Build the budget by category instead of using a rough total. Include rent deposits, plumbing, electrical work, treatment equipment, testing, permits, signs, insurance, opening inventory, and reserve cash.
Question: How do owners usually set prices before opening?
Answer: Many shops price by gallon or by container size, then price containers and accessories separately. Set prices only after you understand your treatment costs, supply costs, local competition, and tax treatment.
Question: What insurance should I have before I open?
Answer: Workers’ compensation may be required if you have employees. Many owners also carry general liability, property coverage, equipment breakdown coverage, and business interruption protection.
Question: What are the biggest startup mistakes in this business?
Answer: Common problems include signing a lease before confirming the rules, buying the wrong equipment, using unsupported water claims, and opening without enough records or testing in place. Another big one is choosing a low-visibility storefront that is hard for customers to use.
Question: What does the daily workflow look like right after opening?
Answer: Early days usually center on system checks, cleaning, refills, payment handling, restocking, and recordkeeping. The owner often moves between the refill area, the front counter, vendor calls, and end-of-day logs.
Question: Should I hire staff before I open or try to do everything myself?
Answer: That depends on your hours, budget, and store layout. If you hire early, train people on sanitation, container handling, equipment alerts, and what they can say about the water.
Question: What early systems or tech should be ready before launch?
Answer: Have your point-of-sale system, card processing, receipts, refund process, and record storage ready before the first day. You also need a simple way to track testing, maintenance, sanitation, and vendor contacts.
Question: How should I market a water refilling business before opening?
Answer: Keep the launch local and simple. Focus on the storefront sign, your online business profile, basic social pages, and clear opening details that tell people what the shop does and where it is.
Question: What should I watch in the first month for cash flow?
Answer: Watch repair risk, supply reorders, utility bills, card fees, and slower-than-expected customer traffic. The first month can feel tight if you open without enough reserve cash for delays or equipment issues.
Question: What basic policies should I decide before opening day?
Answer: Set simple rules for refunds, sanitation steps, equipment shutdowns, opening and closing checks, and who can speak to inspectors or service vendors. Clear basic policies reduce confusion during the busiest early days.
Learn From People Already In The Water Business
One of the best ways to think more clearly before opening a water refilling business is to learn from people who have already built water stores, water brands, or related water ventures.
Their advice can help you spot problems sooner, ask better questions, and make stronger decisions about your setup, location, marketing, and day-to-day launch plan.
- WC&P Online — Healthy Living Promoted at Water Lady
- SDVoyager — Meet Steve Woo Of Fresh Alka Water In Mission Valley
- Entrepreneur — How The Founder Of Flow’s Vision For A Mindful Bottled Water Company Attracted Supporters Like Gwyneth Paltrow
- Acast — Founder Stories: How The Founder Of FIJI Water Changed His Life With David Gilmour
- How We Made It In Africa — Bottled-Water Company Reveals Secrets To Franchising Success
- Everest Ice & Water Systems — Greg Sando Owner Case Study
Related Articles
- How To Start Your Key Decisions Before Starting a Bottled Water Business
- How To Start a Vending Machine Business
- Start a Bubble Tea Shop from the Ground Up
- Starting a Coffee Roasting Business
- How To Start a Laundromat and Build a Profitable Coin-Op Business
Sources:
- SBA: Choose business structure, Register your business, Federal state tax ID numbers, Licenses permits, Pick business location, Open business bank account, Fund your business, Get business insurance, Hire manage employees
- IRS: Employer identification number
- FDA: Start food business
- ECFR: Processing bottling bottled drinking, Bottled water
- CDPH: Retail water facility license, Retail water facility inspection
- USPTO: Search trademark database