
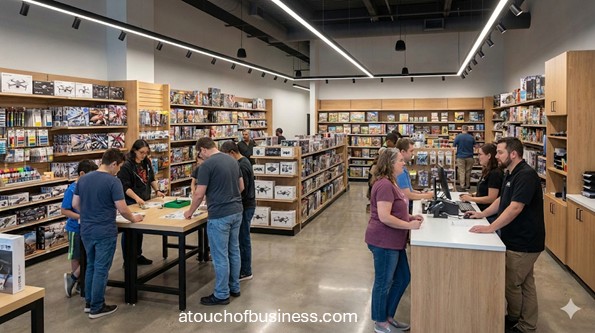
What to Expect From This Guide to Starting a Hobby Store
This guide walks you through the key decisions and practical steps involved in starting a hobby store, from checking your fit to opening day. The highlights below sample what it covers.
Inside the guide, you will find:
- Startup steps: Move from choosing a niche and testing demand through funding, location, permits, suppliers, and pre-opening checks.
- Business fit: Weigh your motivation, household support, and risk tolerance, plus the red flags to review before you commit.
- Inventory and equipment: Plan your opening inventory, fixtures, and checkout setup, including the security and shipping items that suit your niche.
- Financial planning: See how startup costs, break-even logic, funding, and operating capital fit together before you sign a lease.
- Local requirements: Learn which license, tax, zoning, occupancy, and product safety items to verify with the agencies covering your address.
- Industry interviews: Hear hobby and game retailers discuss their stores, inventory decisions, and lessons through linked podcast and video interviews.
- Common questions: Find answers on resale products, children’s product rules, insurance, card payments, and hiring.
Start with the overview below, then decide whether a hobby store fits your goals, budget, and daily routine.
Startup Checklist for a Hobby Store: Gear, Tax, Risk
As a hobby store owner, you sell project-based products people want, plus the supplies they need to finish those projects.
You can start small with a tight niche and a single location. Or you can start online and add a storefront when demand is clear.
Most beginners choose a small retail setup they can run with limited help.
Running a large store with deep inventory across many categories ties up more cash in stock and requires more staff coverage.
The steps below adapt the broader startup steps to hobby retail, from fit checks to the final pre-opening review.
Is a Hobby Store a Good Fit for You?
A hobby store fits you when you can carry inventory risk, handle routine retail tasks, and stay committed through slow months.
Ask two questions: does business ownership suit you, and does a hobby store match your interests and strengths?
Passion matters when a shipment is late, a product line is discontinued, or you must redo a whole order.
Passion keeps you working the problem instead of walking away.
Ask yourself one direct question: are you moving toward something or running away from something?
If you are mainly escaping a job or a financial bind, the first rough month can shake you hard.
Be honest about your responsibilities: lease payments, tax filings, safety basics, and customer trust.
If you share a household budget, you need your family’s support and patience.
Plan how you will cover personal living expenses while the store builds sales.
Income can be uneven, and a store can fail. Decide how much financial risk you can accept before you commit.
Owning a hobby store is fun, but the business is still retail.
Your biggest initial challenge is buying suitable inventory without tying up cash in slow sellers.
Weigh these pros and cons before you sign anything:
- Pros: repeat customers in many categories; strong community potential; clear upsell paths through consumables and add-ons; seasonal gift spikes
- Cons: cash tied up in inventory; risk of dead stock; supplier restrictions in some product lines; theft risk; product safety and recall exposure on resale
Ask who your first customers will be and why they would choose your store over big-box and online options.
Talk with owners of the same type of business, but only outside your competitive area.
Use the business inside look approach to gather real-world detail without stepping on local toes.
Prepare your questions before each conversation. Each owner’s path differs, but firsthand experience is still useful.
Ask non-competing owners questions like these:
- Which product categories surprised you most in your first six months?
- What inventory mistakes did you make at the start, and what would you change?
- Which licenses, inspections, or landlord requirements slowed down your opening?
Skills You Need or Need Covered
You do not need expertise in every hobby category, but you do need retail basics and discipline with inventory and cash flow.
If you are weak in an area, learn it or pay for professional help.
- Product knowledge in your chosen niche (enough to guide a beginner)
- Basic retail math (gross margin, reorder points, shrink awareness)
- Vendor sourcing and ordering
- Inventory tracking and product organization
- Customer service and conflict handling
- Basic merchandising (clear signs, logical layout, clean displays)
- Online listing and shipping basics (if you sell online)
- Bookkeeping coordination (even if an accountant does the final filing)
What Your Day-to-Day Looks Like
Expect routine retail tasks: receiving shipments, stocking shelves, helping customers, running checkout, and tracking what sold.
Retail is routine, and the routine matters. Events or classes tighten your schedule fast.
- Receive and check shipments, then stock shelves
- Update inventory counts and reorder lists
- Answer product questions and help customers choose items
- Run checkout, handle returns, and resolve issues
- Pack and ship online orders (if applicable)
- Keep displays clean, safe, and organized
- Post new arrivals online and in-store
- Track sales by category to guide the next purchase order
A typical day starts when you unlock the door, check messages, and scan your reorder list.
Before lunch, you juggle shipments, customer questions, and a shopper who needs a last-minute gift.
Later, you review what sold, what did not, and what to reorder.
If you run game nights or classes, closing time may be later than you expect.
Red Flags Before You Start
Slow down or change your plan if any red flag below applies, and verify the details in writing before you commit.
Catch these issues before you sign anything, while you still have leverage.
- Lease terms you do not fully understand or cannot afford if sales start slow
- No clear supplier path for your core categories
- An inventory plan that is “a little of everything” with no niche focus
- Assuming events or tournaments are automatic, without checking occupancy rules
- Relying on resale or trade-ins without a product safety and recall check process
- A cash plan that ignores how much inventory you must buy before opening
- No plan for theft risk and high-value item control
Step 1: Choose a Clear Niche and Customer Type
Pick one lane you want to own, because “everything for everyone” spreads inventory thin and disappoints customers.
Then decide who you serve first: beginners, collectors, serious hobbyists, families, or game groups.
Your inventory and location both depend on the customer type you pick.
Most customers fall into a few patterns:
- Parents and relatives shopping for gifts and beginner kits
- Adults with long-running hobbies who want quality supplies
- Collectors who value condition, authenticity, and availability
- Game groups that need a reliable local place for product and play space
- Students and educators looking for hands-on learning kits
Many hobby categories bring repeat purchases, but only when you stock the follow-up items customers need.
Step 2: Decide the Operating Model and Staffing Timing
Choose your ownership setup: solo, partners, or investors. Most beginners start small and add complexity only when sales support it.
Next, choose a business model, because your model changes startup costs, staffing needs, and location requirements.
Common models include:
- Small storefront retail (core inventory plus add-on items)
- Online-first store (ship orders; optional local pickup later)
- Hybrid store (retail, online, and in-store pickup)
- Niche specialist (one category done deeply, like tabletop games or remote control)
- Community-focused shop (retail plus a dedicated play or class space, if rules allow)
- Consignment or resale add-on (only with a safety and intake process)
Pick your first model, then plan a path to expand if demand supports it.
Decide staffing timing too: can you run the store alone at first, or do you need coverage from day one?
Consider open hours, shipments, and customer help when you decide.
Step 3: Validate Demand, Profit Potential, and Break-Even
Validate demand before you commit capital by checking direct competitors, big-box alternatives, and fast-shipping online options.
Do not assume demand because you love the hobby.
Look for proof of steady interest in what local customers already search for and buy.
Understanding how supply and demand affect sales is a good starting point for local research.
Demand alone does not make a store profitable, so test whether your sales can cover your costs.
Start with fixed costs: rent, payroll, insurance, utilities, and loan payments.
Next, estimate gross margin for each category, since margins differ between games, models, collectibles, and accessories.
Divide your monthly fixed costs by your gross margin percentage to find the monthly sales you need to break even.
Use your own local prices and costs, not another store’s numbers.
Small consumables can steady sales, while collectibles and other higher-value items bring fewer, larger sales.
Then ask whether your area, hours, and product mix can realistically reach that sales volume.
Test a slow month too. Can you cover costs when sales dip after a seasonal gift spike?
Step 4: Build a Realistic Inventory Plan
Decide your core items, your add-ons, and your impulse items at the register, because inventory is your biggest pre-opening decision.
Pick categories that make sense together, so you carry core items plus the supporting items customers forget until they need them.
Your mix depends on your niche, supplier access, and local demand.
Categories to consider:
- Model kits and supplies (plastic models, paints, adhesives, tools)
- Remote control and drones (vehicles, parts, batteries, chargers, radios)
- Board games and tabletop games (boxed games, role-playing games, miniatures, terrain)
- Trading card games (sealed product, singles if you choose, sleeves, deck boxes)
- Arts and crafts (yarn, beads, paper crafts, basic tools)
- Collectibles (figures, licensed items, display cases)
- Educational kits (science kits, robotics kits, building sets)
- Consumables and add-ons (glue, paint, blades, sandpaper, brushes, spray sealant)
- Gift cards (if you plan to offer them)
Keep your first purchase order tight. Expanding a winning category is easier than digging out of a pile of slow sellers.
Build that order from a must-carry list, and hold nice-to-carry items until sales show demand.
Set an opening assortment count for each category so you do not overbuy in one.
Place add-ons beside the core product, such as paints next to model kits or sleeves next to trading cards.
Set these category rules before you buy stock:
- Trading cards: set clear rules for sealed product, singles, and grading claims you can verify
- Model kits: stock the tools and adhesives that go with your core lines, or customers may buy the kit elsewhere
- Remote control items: label battery chemistry and connector types to reduce returns and safety issues
- Used items: carry them only with a written inspection routine and a recall screening step
Keep services simple and tied to your product mix. If you offer events or classes, confirm local rules for occupancy, permits, and insurance.
Services that often pair with your products:
- Beginner workshops (painting basics, model building basics)
- Game nights and tournaments (if space and local rules allow)
- Special orders (customer requests for items you do not stock)
- Pre-orders and holds (especially for limited releases)
- Consignment or trade-in (only with a clear process and product safety checks)
Step 5: List Equipment and Setup Items
You do not need fancy gear, but you do need a clean, secure retail setup, reliable checkout, and inventory tracking from day one.
Plan basic, better, and best options for each item, then get quotes based on your square footage and inventory volume.
Store fixtures and merchandising:
- Retail shelving (adjustable shelves for boxed products)
- Gondola shelving (optional, for flexible aisles)
- Wall slatwall or gridwall panels with hooks (for accessories)
- Glass display cases (for collectibles or higher-value items)
- Counter and checkout stand
- End-cap displays or feature tables
- Price label holders and shelf tags
- Sign holders and product info stands
- Shopping baskets
Point-of-sale and payments:
- Point-of-sale system (hardware and software)
- Barcode scanner
- Receipt printer (or digital receipt setup)
- Cash drawer (if you accept cash)
- Card reader and payment terminal
- Customer-facing display (optional)
- Label printer (useful for shelf tags and online shipping labels)
Inventory handling and storage:
- Backroom shelving or racks
- Stock bins and totes
- Step stool or ladder (rated for your use)
- Hand truck or dolly
- Box cutter and safety blades
- Measuring tape
- Basic tools for fixture assembly (screwdrivers, drill, level)
Shipping and online order prep (if you sell online):
- Shipping scale
- Shipping boxes and mailers (various sizes)
- Packing tape and tape dispenser
- Void fill (paper, air pillows, or similar)
- Thermal label printer (optional but helpful)
- Work table for packing
Security and loss prevention:
- Locking display cases (if needed for your product mix)
- Security cameras with recording
- Store alarm system (if required by your lease or insurer)
- Lockable backroom storage
- Anti-theft tags or locks (optional based on risk)
Safety, cleaning, and customer comfort:
- Fire extinguisher(s) as required by local code
- First aid kit
- Cleaning supplies (broom, mop, wipes)
- Trash cans and liners
- Basic restroom supplies (if you provide a restroom)
Office basics:
- Computer or laptop
- Internet service and router
- Printer/scanner (optional if you go paper-light)
- Lockable file storage (for business records)
Step 6: Estimate Startup Costs and Operating Capital
Your startup costs depend on square footage, fixtures, and how deep your opening stock is, so list every item and price it locally.
A small online-first opening is much lighter than a full storefront with broad selection.
Get quotes for fixtures, point-of-sale, security, and insurance before you commit.
Startup costs may include:
- Opening inventory across your core, add-on, and impulse items
- Fixtures, shelving, displays, and the checkout counter
- Point-of-sale hardware and software
- Security equipment and locking displays
- Lease deposit and any landlord-required build-out, such as electrical, lighting, and security wiring
- Business registration, license, permit, and inspection fees
- Insurance premiums
- Signage
- Shipping supplies, if you sell online
Your most accurate estimate comes from your own list, priced at local rates.
Operating capital is the cash that keeps the store open while sales grow.
Operating capital covers rent, utilities, insurance, payroll, and reorders until sales cover your costs.
Add your personal living expenses if the store must support your household.
Keep cash in reserve for reordering fast sellers, instead of spending everything on your opening inventory buy.
Step 7: Plan Funding for Inventory, Setup, and Operating Capital
Decide how you will pay for inventory, setup, and operating capital before you sign a lease or place large orders.
Funding can come from savings, a partner contribution, or financing.
Compare each source by what it costs you, what it requires, and what happens if sales start slow.
Match the amount you seek to your priced list of startup costs and operating capital.
If you plan to borrow, learn how lenders view risk in this guide on how to get a business loan.
Step 8: Choose a Name, Domain, and Social Handles
Pick a name you can say out loud, put on a sign, and register without conflict.
Run a trademark search with the USPTO trademark search tools before you commit to the name.
Then secure the matching domain and social handles.
Step 9: Register the Business and Set Up Tax Accounts
Handle legal setup in order: pick your business structure, form the entity if needed, then apply for the tax accounts that match your setup.
Compare a sole proprietorship, limited liability company, partnership, or corporation by risk, taxes, and how you will fund growth.
Confirm the tax impact with a qualified tax professional.
Start with the federal small business guide to registering your business.
If you form a limited liability company or corporation, you file with your state before opening under that name.
Search “business entity search” plus your state name to find your state’s filing office.
Many businesses need an Employer Identification Number (EIN), especially when they form an entity or hire employees.
Apply on the Internal Revenue Service EIN page, where the official application is free.
If your state taxes retail sales, register for a sales tax permit before your first sale.
Search “sales tax permit” plus your state name to find your state revenue agency’s process.
If you hire, some states require employer registrations before the first payday.
Search “employer registration” plus your state name to find the labor or workforce agency.
Step 10: Open a Business Bank Account
Open a separate business bank account so you keep personal and business transactions apart.
The federal guide to opening a business bank account explains what a bank asks you to prepare.
Choose a payment processor that works with your point-of-sale system and online store, so your reports stay consistent.
Keep receipts and invoices organized by month, even if an accountant files your taxes.
Step 11: Pick Your Location and Get Landlord Clarity
If you open a storefront, location is more than foot traffic. It is parking, visibility, nearby complementary stores, and rules that allow retail use.
Confirm zoning, building occupancy rules, and signage restrictions with local offices before you sign a lease.
Ask the landlord and plan the space:
- Who pays for required build-out, including electrical, lighting, and security wiring?
- Does the lease allow the events, classes, or signs you plan?
- Will your highest-volume categories sit where customers see them, not in the back?
- Can the checkout have clear sight lines to key aisles?
- Is there room for a small receiving and storage area, even in a tiny space?
- Does the lighting show colors accurately for paint, miniatures, or art supplies?
- Is there a spot for locked displays and clear pricing on fragile or high-value items?
Test your internet connection and payment terminal in the space before opening day, since weak signal causes failed transactions and long lines.
Step 12: Handle Licenses, Permits, and Accessibility Basics
License and permit requirements depend on your location and what you sell, so no single national list exists.
The federal guide to applying for licenses and permits shows how requirements vary by activity and location.
Rules change by location, and two towns in the same state can treat the same store differently.
Answer these questions to decide which rules apply:
- Are you opening a storefront, starting from home, or starting online only?
- Will you have employees in the first 90 days?
- Will you host events, classes, or tournaments in the space?
Verify these items for your exact address:
- General business license: Many cities or counties require one before you open to the public. Search “business license” plus your city or county name, and ask whether a specialty retail license also applies.
- Assumed name or DBA filing: You need one when you operate under a name that is not your legal or entity name. Follow the SBA overview on choosing and registering a business name, then confirm your local filing office.
- Zoning verification: Retail use must be allowed at your address. Ask the city or county planning or zoning department for a zoning verification.
- Certificate of occupancy: Some spaces need occupancy approval before opening, especially after renovations or a change in use. Ask the building department what triggers it, and ask about assembly limits if you plan events.
- Sign permits: Exterior signs often need approval before installation. Search “sign permit” plus your city name before you order a sign.
If you are open to the public, learn the basics of Title III requirements using ADA.gov guidance for businesses open to the public.
Then confirm how your local building department handles accessibility checks for entrances, restrooms, and service counters.
Step 13: Set Pricing and Build the Checkout Experience
Your pricing has to cover product cost, shipping-in, shrink risk, and overhead.
Use a clear framework so you can explain your prices without guessing.
Make these pricing decisions before opening:
- Set a target gross margin for each category
- Calculate full landed cost, including freight and supplier fees, before you set shelf prices
- Decide how online and in-store prices compare, since mismatched prices cause arguments and returns
- Write a markdown rule for slow inventory so dead stock does not pile up
- Check prices on your key items against local competitors and major online retailers
Set up your point-of-sale system before you open.
Test scanning, tax settings, receipts, refunds, and gift cards if you offer them.
Limit who can issue refunds and overrides, which reduces fraud and accidental losses.
Write these policies before you open:
- Returns, with separate rules for opened items, sealed trading cards, and special orders
- Special orders, including deposit, cancellation rules, and how long you hold an item
- Holds and pre-orders
- Damaged items
Post a visible returns and exchanges sign near checkout to reduce conflict.
Step 14: Secure Suppliers and Put Product Safety Checks in Place
Line up suppliers before you buy stock, because some brands require approval, minimum orders, or specific selling terms.
Get your terms in writing, especially for returns, damaged shipments, and backorders.
Ask each supplier about minimum order quantities, backorder policies, and return windows before your first order.
Use written vendor agreements for large orders or exclusive lines to clarify returns, pricing rules, and sales channels.
Keep supplier invoices organized by vendor for returns, warranty issues, and audits.
If you sell children’s products, check the Consumer Product Safety Commission’s recalls and product safety warnings page.
Selling a recalled product is illegal, so remove affected items from sale immediately.
Keep the compliance paperwork your suppliers send for children’s products.
If you plan resale or trade-ins, start with the CPSC resale and thrift store guidance and the Resellers Guide to Selling Safer Products.
Do not accept used items unless you have a written inspection routine and a recall screening step for that category.
If you ship lithium batteries or battery-powered devices, review the Pipeline and Hazardous Materials Safety Administration’s Lithium Battery Guide for Shippers before you offer them online.
If employees handle paints, solvents, adhesives, or aerosols, review the Occupational Safety and Health Administration’s Hazard Communication guidance and keep Safety Data Sheets.
Step 15: Build Your Basic Brand Assets
You need a clean logo, colors, signage, and consistent contact information, not a big branding project.
Make a simple checklist for your logo, colors, business cards, and sign, then decide what you need for opening.
Step 16: Build Your Website and Proof Pages
Your website should show hours, location, phone number, and what you specialize in, even if you run a small shop.
If you sell online, your website is your checkout lane.
Make sure you can list products, show shipping and returns, and accept payment.
Claim your business listing on major local search platforms before opening, so your hours and phone number are accurate.
Step 17: Plan Your Opening Week and First Customers
Tell people you exist before opening day, and plan a simple opening week that fits your niche.
Name your likely first customers and the reason they would choose your store over online options.
Partner with non-competing groups, such as schools, clubs, or community centers, to host beginner sessions.
Consider a beginner bundle, like a starter paint set with a simple kit, to reduce decision stress for new customers.
Run a soft opening week with limited events to test checkout, inventory, and staffing before a crowd arrives.
Confirm maximum occupancy and fire safety requirements before you advertise any event.
If you run tournaments, publish rules, entry fees, and prize structure before the first event to avoid disputes.
Step 18: Complete the Final Pre-Opening Review
Walk through the whole store before you open and confirm your permits, tax accounts, point-of-sale settings, and safety basics are complete.
Confirm these items before opening day:
- Licenses, permits, and occupancy approvals are in hand
- Tax accounts and payment processing are set up
- Point-of-sale scanning, tax settings, receipts, refunds, and gift cards are tested
- Supplier terms are in writing, and your first orders are received and checked
- Recall checks are done for the categories you sell to children
- Internet and payment terminal work in the space
- Locked displays and security cameras are in place
- The returns sign is posted at checkout
Set a receiving routine: count items, inspect for damage, verify the invoice, and shelve the same day when possible.
Then do one last owner check. Do you know what you will sell on day one, how you will reorder, and how you will handle returns without improvising?
Can you explain your niche, your first inventory buy, and your opening plan in plain words? If not, that is your next task.
Business Plan
Your business plan turns your startup steps, costs, funding, pricing, and break-even checks into one practical plan you can act on.
You do not need a fancy document, but you do need clear answers on niche, pricing, suppliers, startup costs, funding, and your opening plan.
Use this guide on how to write a business plan and focus on the sections that drive real decisions.
Include these items in your plan:
- Your niche, customer types, and operating model
- Your opening inventory plan and supplier terms
- A priced list of equipment and setup items
- Startup costs and the operating capital you will hold in reserve
- Funding sources and what each requires
- Your pricing method and target gross margin by category
- Break-even sales, based on your fixed costs and gross margin
- A slow-month test showing whether you can cover costs
- Your opening timeline, with dates for ordering, fixtures, inspections, and payment setup
Add buffer time to your timeline, because permits, deliveries, and inspections can slip.
If your break-even sales look out of reach for your area, change your model before you spend on inventory or a lease.
Frequently Asked Questions
Do I need to test used or resale products before I sell them?
Usually not, because the Consumer Product Safety Commission does not require resellers to test products.
You still cannot sell recalled products or products that fail federal safety rules, so screen each item for recalls before it reaches the shelf.
Do children’s product rules apply to hobby kits and games?
Sometimes, depending on whether a product is designed or intended primarily for children 12 or younger.
Factors include the manufacturer’s stated use, the packaging and marketing, and whether consumers commonly see the product as a children’s item.
Ask your suppliers whether a product counts as a children’s product, and request a Children’s Product Certificate.
Do I pay sales tax on the inventory I buy for my store?
Often no, because many states let registered sellers buy inventory for resale with a resale certificate.
You usually register for a sales tax permit first, then give the certificate to suppliers when you buy stock for resale.
Use it for inventory you plan to resell, not for fixtures or supplies you use in the store.
Rules and forms vary, so check your state revenue agency and ask each supplier which certificates it accepts.
What insurance should I have in place before opening?
Plan coverage that matches your lease terms and your risk, such as general liability and property coverage.
Ask your landlord and insurer which coverage the lease requires, and get quotes before you sign.
If you have employees, check your state rules for workers’ compensation requirements.
What should I know about card payment security before I accept cards?
Merchants that store, process, or transmit card data have security duties under payment card standards.
The Payment Card Industry Security Standards Council publishes merchant guidance, and you should avoid storing card numbers yourself.
Also avoid writing card numbers down, and turn on two-factor authentication for your email, bank, and point-of-sale accounts.
When should I hire help, and what should that person handle first?
Hire when open hours, receiving, and customer service tasks exceed what you can reliably handle without delays or errors.
Start by delegating repeat tasks like stocking, cleaning, packing online orders, and basic checkout with tight permissions.
Hear From Hobby and Game Store Retailers
These three interviews let you hear how hobby and game retailers describe their stores, inventory, and decisions.
Manaverse Podcast: Trey MacCampbell of Brass Dragon Games
Trey MacCampbell owns Brass Dragon Games, a tabletop game store. He shares what he learned in his first seven months of ownership.
You hear real trade-offs on rent, slow-moving inventory, and learn-to-play events, which helps you test your own plan.
Working Capital: Dee and Mee Hobbies
A local public television program visits Dee and Mee Hobbies, a hobbyist supply store. Its third owner talks about turning the hobby into a career.
Watching a working shop with a large inventory helps you picture daily operations and how owners make a store a destination.
Miniature Wargaming Labs: Your Hobby Place Store Spotlight
A miniature wargaming podcast host interviews Matt from Your Hobby Place. The conversation takes place at the grand opening of the store’s third location.
You hear how a hobby retailer talks about a new location and what visitors find inside, which helps you define your own store concept.
Related Articles
- Start a Comic Book Store
- Start a Board Game Cafe
- How to Start and Run a Craft Store
- Start a Toy Store
- Educational Toy Store Startup Guide
- Start an Anime Store
- How to Start a Dollhouse Business
- Doll Making Business Startup
- How to Start an Art Supply Store
Sources:
- ADA.gov: Businesses Open Public
- Consumer Product Safety Commission: Recalls Product Safety Warnings, Resale Thrift Stores, Resellers Guide Selling Safer
- Federal Trade Commission: Endorsements testimonials guides
- Internal Revenue Service: Employer identification number, Get employer identification
- Occupational Safety and Health Administration: Hazard Communication, Hazard Communication standard
- PCI Security Standards Council: Merchant resources
- Pipeline and Hazardous Materials Safety Administration: Lithium Battery Guide Shippers
- U.S. Census Bureau: NAICS 4511 details
- U.S. Customs and Border Protection: Importing United States
- U.S. Small Business Administration: Register business, Get federal state tax ID, Apply licenses permits, Open business bank account, Get business insurance, Choose business name, Choose business structure
- United States Patent and Trademark Office: Search trademark database
- Washington State Department of Revenue: Approved Exemption Certificates