Setup, Labeling Basics, Equipment, and Launch Checklist
Hammock Production Business Overview
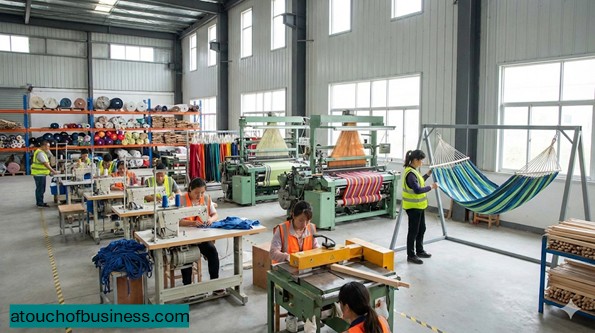
You’re not opening a retail shop first. You’re building a small manufacturing setup that turns fabric, webbing, rope, and hardware into finished hammocks and related gear.
That can start small—sometimes with you and a compact workspace—if local rules allow it. It can also scale into a larger facility later, but you don’t need a factory to launch.
What You’ll Make And Offer Before Launch
Before you spend serious time and funds, decide what you will produce in your first product line. A tight launch lineup is easier to test, label, and repeat.
Common product options include:
- Camping-style gathered-end hammocks (fabric body with end channels or whipped ends)
- Backyard rope or fabric hammocks (often wider and intended for longer lounging)
- Hammock chairs
- Suspension kits (tree straps, whoopie slings, ridgelines) sold with the hammock or separately
- Accessories (storage bags, replacement straps, repair kits)
How This Business Generates Revenue
You generate revenue by selling finished products and add-ons. Your launch channel changes what you must prepare in advance.
Common models at launch include:
- Direct-to-consumer online sales (your site or marketplaces)
- Wholesale to outdoor stores, gift shops, or home and patio retailers
- Private label or contract work for brands that want your production capacity
- Limited local sales (events or a small showroom) if your location and permits support it
Typical Customers
Different hammock styles attract different customers. If you try to serve everyone on day one, you’ll struggle to design, stock, and price correctly.
Common customer groups include:
- Outdoor and camping customers who care about pack size, setup time, and weather resistance
- Backyard and patio customers who care about comfort, look, and size
- Gift shoppers who want simple, well-presented products with clear instructions
- Hospitality buyers (resorts, rentals) who may want consistent bulk orders and replacement parts
Pros And Cons You Should Face Now
This is a product business with real liability exposure. If something fails and someone falls, you own that outcome. So ask yourself if you’re ready to build and document carefully.
Here are realistic upsides and downsides to weigh before you go further.
- Pros: Can start small; repeatable products; clear supplier-based scaling; multiple channels (direct, wholesale, private label)
- Cons: Product safety risk; labeling and claims rules; quality control must be consistent; returns and warranty pressure; inventory ties up funds
Is This The Right Fit For You?
Start with a real check, not a fantasy. You need to decide two things: is owning a business right for you, and is hammock production the right fit for you?
If you haven’t done a basic reality check yet, start here: Points to Consider Before Starting Your Business.
Now get blunt about motivation. Ask yourself this exact question: “Are you moving toward something or running away from something?”
Starting only to escape a job or a financial bind may not sustain motivation when the work gets tedious.
Next is passion. Passion isn’t fluff. It’s what keeps you solving problems when suppliers delay, labeling gets confusing, or prototypes fail.
If you don’t care enough to push through, you’ll look for a way out instead of solutions. Read: How Passion Affects Your Business.
Now the ownership reality check. Are you ready for uncertain income, long hours, difficult tasks, fewer vacations, and full responsibility?
Is your family or support system on board? And do you have (or can you learn) the skill set and secure funds to start and operate?
Finally, get outside your own head. Speak with owners in the same business only when they are not direct competitors.
Say it plainly: only talk to owners you will not be competing against—different city, region, or customer base.
Smart questions to ask:
- “What surprised you most during setup—equipment, workspace rules, or suppliers?”
- “If you could restart, what would you validate before buying tools and materials?”
- “What quality issue caused the most rework early on?”
If you want a clear snapshot of what ownership feels like, use Business Inside Look to ground your expectations.
Step 1: Choose A Launch Business Model And Time Commitment
Decide how you will start: solo, with a partner, or with outside investors. This choice affects risk, control, and how fast you can move.
Also decide if this will be full time or part time. If you’re part time, you must simplify your product line even more.
Most launches start lean with the owner doing design, sourcing, and assembly, then adding help later as orders stabilize. If you plan to hire early, review how and when to hire so you don’t rush into payroll before you’re ready.
Step 2: Validate Demand And Profit Potential Before You Build
Don’t assume demand because you like the product. Confirm people already buy this type of hammock in the channel you want to use.
Then do the hard part: confirm there’s enough profit to pay yourself and cover expenses. If the numbers can’t support you, it’s a hobby with invoices.
To pressure-test demand logic, use supply and demand as a simple framework.
Step 3: Decide What You Will Make First
This is where many first-time owners get scattered. Pick one to three core products, and define them clearly.
Write a basic product specification for each: dimensions, materials, hardware type, and what is included in the package.
If you plan to include stands or frames, decide now whether you will source them or manufacture them. That choice changes equipment, workspace needs, and risk exposure.
Step 4: Research Competitors For Labeling And Product Documentation Patterns
Look at how competing products present fiber content, country of origin, and responsible party identity. Don’t copy text—learn the pattern.
Also review how they present setup guidance and warnings. Your goal is to build documentation that matches your design and reduces confusion.
Step 5: Source Materials And Components With Consistency In Mind
Your early success depends on reliable materials, not just low prices. Set up suppliers for fabric or rope, webbing, thread, labels, packaging, and hardware.
Ask for consistent part numbers or lot identifiers so you can reorder the same items and track changes. If a supplier can’t keep specs stable, your quality will drift.
Step 6: Prototype Your Construction Method And Reinforcement Points
Build prototypes before you commit to bulk purchasing. You’re testing patterns, stitch methods, reinforcement placement, and how the hardware interfaces with the hammock body.
Pay special attention to stress points: the ends, suspension attachment areas, and any seams that take load. Small design changes here can change outcomes.
Step 7: Create A Basic Load Testing Plan And Keep Records
You need a repeatable way to evaluate prototypes and early production. Define how you will test and what “pass” looks like for your own product claims.
Document the test setup, conditions, results, and what you changed after failures. Keep these records with your product files.
Step 8: Plan Your Workspace And Confirm It’s Allowed
You might be able to start from a home workspace, a small leased unit, or a shared industrial space. But you can’t assume it’s allowed just because you have room.
Confirm zoning, home occupation rules, and building requirements before you sign a lease or renovate. If you plan to run cutting tables, industrial sewing machines, or store inventory, your city or county may set limits.
If location decisions feel fuzzy, use business location guidance to think through practical tradeoffs.
Step 9: Write A Simple Business Plan To Stay On Track
You don’t need a fancy plan to start. You need a plan that keeps you from drifting.
Include your product line, target customer, pricing logic, startup essentials, supplier plan, compliance checks, and your launch channel.
If you want a clean structure, follow how to write a business plan.
Step 10: Build Your Startup Essentials List And Price It
List every essential item you need to produce and ship your first batch. Then price each item so you can see what startup really costs.
Your scale drives total startup cost. A small setup can be lean. A facility with multiple machines, staff, and inventory becomes a different business.
For a structured approach, use estimating startup costs to organize your list and decisions.
Step 11: Choose Pricing That Covers Reality
Pricing is not guessing. You need to cover materials, packaging, platform fees, shipping realities, and the time it takes to produce consistently.
If your price doesn’t leave room for returns, defects, and rework, you’ll feel trapped fast.
Use pricing your products and services to build a simple, defensible method.
Step 12: Form The Business And Register For Taxes
Many small businesses start as sole proprietorships and later form a limited liability company as they grow and want more structure. That’s common, but the right choice depends on your situation.
Register through your state and set up the tax accounts you need before you sell. If you need a walkthrough, start with how to register a business.
Step 13: Confirm Labeling And Claims Before You Print Anything
If your product is covered by textile labeling rules, you must plan fiber content disclosure, country of origin, and responsible party identity.
Decide whether you will use your business name or a Registered Identification Number issued by the Federal Trade Commission on the label.
Also decide what you will and will not claim in marketing. If you plan to use “Made in USA” language, confirm your claim meets the Federal Trade Commission standard before you put it on labels or product pages.
Step 14: Set Up Banking And Your Financial Setup
Open business accounts at a financial institution and keep transactions separate. You want clean records from day one.
If you plan to use funding, get clear on what you need and why. Don’t borrow without a plan for repayment.
For borrowing basics, see how to get a business loan.
Step 15: Decide On Insurance And Risk Controls Before You Sell
This is a consumer product that holds a person’s weight. General liability coverage is common, and product liability coverage is often considered for manufactured goods.
Your landlord, vendors, or sales channels may require certain coverages as a condition of doing business. For a starting point, review business insurance.
Step 16: Lock In Your Name, Domain, And Brand Basics
Pick a name you can use consistently across labels, packaging, and online listings. Then grab your domain and social handles.
If you need a structured naming process, follow selecting a business name.
Step 17: Build Your Online Presence And Product Pages
Your product pages must match reality. List materials accurately, show what’s included, and present setup guidance clearly.
If you need a basic roadmap, use an overview of developing a business website.
Step 18: Prepare Documentation And Systems To Accept Payment
Before launch, set up invoicing, order tracking, return handling, and a simple way to manage customer questions. You don’t need complex software to start, but you do need consistency.
If you will sell wholesale, draft basic terms: lead times, minimum orders, and what happens when something arrives damaged.
Step 19: Run A Controlled Pre-Launch Batch
Produce a small batch using your final tools, labels, packaging, and process. This is your real test, not your prototype phase.
Re-test finished units using your load testing approach and keep the results. Fix problems before you scale the batch size.
Step 20: Finish A Pre-Opening Checklist And Launch
Do one last sweep: legal registrations, location approvals, labeling, supplier reliability, and your essentials list. Then confirm you can produce the item the same way repeatedly.
Start with a launch quantity you can control. Consistency matters more than volume at the start.
Varies By Jurisdiction
Registration and location rules change by state, county, and city. Don’t guess and don’t rely on someone else’s checklist from another location.
Use this quick method to verify requirements where you live.
- Entity formation: Check your state’s Secretary of State site. Search: “business entity formation” + your state.
- Assumed name or doing business as name: Check your state Secretary of State or county clerk/recorder. Search: “assumed name” or “DBA” + your location.
- Sales and use tax: Check your state Department of Revenue site. Search: “sales tax registration” + your state.
- City or county business license: Check your local licensing portal. Search: “business license” + your city or county.
- Zoning and home occupation rules: Check your city or county planning department. Search: “home occupation permit” + your city.
- Certificate of Occupancy (CO): If leasing a space, ask the building department. Search: “Certificate of Occupancy” + your city.
Smart questions to ask when you call an office:
- “Is light manufacturing and shipping allowed at this address?”
- “Do you require a general business license for this activity?”
- “If I lease a unit, will the space need a Certificate of Occupancy (CO) for my use?”
Essential Equipment Checklist
Your exact equipment depends on whether you only sew and assemble textile products or also fabricate stands and frames. Many startups begin with textile production only and source hardware from established suppliers.
Below is an essentials-first list. Add items only after your prototypes prove what you truly need.
- Cutting And Measuring
- Large cutting table or stable work surface
- Rotary cutter and spare blades
- Fabric shears
- Cutting mat
- Measuring tape, rulers, and squares
- Fabric marking tools (chalk or washable marker)
- Pattern paper or template material
- Clips or pins suitable for thick layers
- Sewing And Assembly
- Industrial-grade straight stitch sewing machine
- Walking-foot machine or equivalent capability for webbing and layered seams (as needed)
- Assorted machine needles appropriate to material weight
- Thread suited to your fabric and load areas
- Bobbin supply and bobbin winding capability
- Seam ripper and hand needles for finishing
- Binding or edge finishing tools (as needed for your design)
- Work lights for stitching visibility
- Hardware And Components Handling
- Webbing cutter or hot knife for synthetic webbing (to seal ends)
- Heat source for sealing synthetic cord ends (method depends on material)
- Hand tools for hardware assembly (pliers, wrenches, screwdrivers as needed)
- Organizers for hardware and small parts
- Labeling And Packaging
- Woven labels or printed labels that meet your disclosure needs
- Label attachment method (sewn-in or other secure attachment based on product design)
- Polybags or product bags (if used)
- Boxes or mailers sized for your product
- Protective packing material (as needed)
- Shipping scale
- Tape dispenser and packing tape
- Printer for packing slips and shipping labels
- Testing And Quality Checks
- Measuring tools for finished dimensions
- Inspection checklist (printed or digital)
- Controlled setup for load testing your products (based on your test plan)
- Recordkeeping method for test results and production lots
- Workspace Basics
- Storage shelves or bins for fabric and webbing
- Moisture control as needed for material protection
- Waste and scrap containers
- Basic first aid kit
Skills You’ll Need Or Must Cover
You don’t need to be great at everything. But every skill area must be handled by someone—either you learn it or you pay for help.
Core skill areas for a startup include:
- Industrial sewing and consistent stitching
- Patterning and measurement accuracy
- Basic textile knowledge (fiber types, stretch, abrasion behavior)
- Hardware selection and compatibility for suspension systems
- Quality checking and documentation
- Labeling preparation and claims control
- Supplier communication and reorder consistency
- Basic bookkeeping and clean recordkeeping
If you need professional help, start by building a short list of advisors. A simple way to think about that is building a team of professional advisors.
What Your Day-To-Day Looks Like Before Launch
Forget the idea that you’ll “just start selling” once you buy a sewing machine. Pre-launch days are mostly planning, testing, and setup.
Typical pre-launch activities include:
- Testing materials and adjusting patterns
- Documenting construction steps so your product stays consistent
- Comparing supplier options and confirming lead times
- Creating labels, inserts, and basic instructions
- Confirming location approvals and registrations
- Building product pages, photos, and packaging workflow
- Producing a small pre-launch batch and checking each unit
A Day In The Life During Pre-Launch
Most days start with the boring work you can’t skip: check what you’re building today, confirm you have the right materials, and keep your work area organized.
Then you’ll cut, sew, assemble, and inspect. You’ll also spend time documenting changes, because prototypes evolve fast.
Expect admin time every day too—supplier emails, labeling decisions, and updating product pages. If that sounds annoying, good. Now you’re seeing the real job.
Red Flags To Watch For Before You Commit
These issues can stall a launch or create risk you don’t want. Catch them early while changes are still cheap.
Common red flags include:
- Unclear material specs from suppliers or frequent unannounced changes
- Hardware that lacks clear documentation from the supplier
- Labeling confusion or plans to “figure it out later” after printing packaging
- No testing plan for load-bearing seams and attachment areas
- A workspace that may not allow your activity under zoning or home occupation rules
- Plans to market to children without confirming whether children’s product certification applies
- Plans to use “Made in USA” claims without verifying they meet the Federal Trade Commission standard
Legal And Compliance Notes You Can Verify Quickly
This isn’t legal advice. It’s a practical checklist of what to confirm and where to confirm it.
Start with federal items that apply across the country, then confirm state and local requirements based on your address and activity.
- Employer Identification Number: Verify how to get one through the Internal Revenue Service.
- Textile labeling: Verify whether your product is covered and what disclosures are required through the Federal Trade Commission.
- Registered Identification Number option: If you want to use an RN on labels, verify the Federal Trade Commission process.
- “Made in USA” claims: If you plan to use the claim, verify the Federal Trade Commission standard before printing labels.
- Product hazard reporting: If you learn of a defect that could create a substantial product hazard, verify duty-to-report guidance through the Consumer Product Safety Commission.
- Industrial stormwater: If you operate a facility with outdoor exposure tied to industrial activity, verify stormwater permitting and no-exposure options through the Environmental Protection Agency and your state permitting authority.
For a federal-to-local overview of licensing, the U.S. Small Business Administration explains how requirements vary and where to start verifying your own mix of licenses and permits.
Basic Brand Assets For Launch
You don’t need fancy branding to start. You need consistent branding that matches your labels and product pages.
Common launch assets include a logo, simple packaging design, product inserts, business cards, and a clean website.
- For cards: what to know about business cards
- For signage (only if you have a location that needs it): business sign considerations
- For a coordinated look: corporate identity considerations
Pre-Launch Marketing Plan Basics
You don’t need hype. You need a clear plan for how customers will find you and why they should trust your product.
At minimum, plan product photos, product descriptions that match your materials, and a simple launch announcement. If you will open a small local showroom, you can plan a local kickoff event using ideas for your grand opening.
101 Tips to Run a Successful Hammock Production Business
In this section, you’ll find practical tips that touch planning, production, safety, and customer experience.
Some will fit where you are right now, and some will matter more after you’ve built a little traction.
Save this page so you can come back to it when you hit a new problem.
The easiest way to see progress is to pick one tip, apply it this week, and then move to the next.
What to Do Before Starting
1. Choose one core product to launch first, not five. A smaller line is easier to test, label, and reproduce without quality swings.
2. Write a simple product spec for each item before you order materials. Include dimensions, materials, hardware, and what’s included in the package.
3. Decide your first sales channel early (direct online, wholesale, or private label). Your channel drives packaging, labeling, and how you handle returns.
4. Prototype using the same material types you plan to sell. Testing a “close enough” fabric often creates false confidence.
5. Identify every load-bearing point in your design and treat it like a critical part. End channels, suspension attachment points, and reinforcement seams deserve extra review.
6. Create a basic load test plan for prototypes and keep records. If you can’t explain how you tested, you can’t defend your design decisions.
7. Source hardware from suppliers that provide consistent product identification. If a part changes without notice, your product performance can change too.
8. Build a supplier list with backups for your top three materials. If one supplier goes down, you don’t want your whole launch delayed.
9. Choose a workspace you can legally use for light manufacturing. Don’t assume a garage or spare room is allowed—local rules can limit it.
10. If you lease space, confirm the space is approved for your use before signing. Ask if a Certificate of Occupancy is required for your activity.
11. Plan where you’ll store fabric, webbing, and finished goods so they don’t get damp or sun-damaged. Material damage becomes returns later.
12. Decide whether you will sell stands or frames with hammocks. Adding metal stands changes your risk profile and may change how you test.
13. Set up a basic system to track materials and production batches. If a problem shows up, you should be able to identify which batch is affected.
14. Confirm whether textile labeling rules apply to your products before you print labels. Fixing labels after launch is expensive and messy.
15. Be cautious with origin claims. If you want to say “Made in USA,” confirm you qualify before it appears on packaging or product pages.
16. Register the business and tax accounts before taking your first order. Waiting until money is coming in often creates rushed choices.
17. Build a startup cost list line-by-line and price each item. Your costs will scale fast if you add machines, staff, or inventory depth.
What Successful Hammock Production Business Owners Do
18. They treat repeatability as the goal, not creativity. A product that varies from unit to unit creates customer complaints and rework.
19. They keep a written build sequence for each product. When you’re tired or distracted, the written sequence keeps quality steady.
20. They standardize what “good” looks like with a final inspection checklist. If you can’t define pass or fail, you can’t train anyone later.
21. They photograph key build details for internal reference. A quick visual guide prevents avoidable mistakes when you’re scaling.
22. They test new materials in small quantities before switching suppliers. A “better deal” can quietly change stretch, abrasion, or stitch hold.
23. They track the real time it takes to cut, sew, assemble, and pack. Accurate timing keeps pricing grounded in reality.
24. They separate prototype work from sellable inventory. Mixing them invites accidental shipment of something untested.
25. They write instructions that prevent setup errors. Clear setup steps reduce the odds of unsafe hanging and avoidable returns.
26. They include clear warnings that match real hazards. If falling is a realistic risk, don’t pretend it isn’t.
27. They use quality hardware and confirm compatibility across components. A strong fabric doesn’t matter if the connection points are weak.
28. They label products clearly and consistently, and they keep labeling records. If a regulator or retailer asks questions, records matter.
29. They avoid vague marketing claims and stick to what they can support. If you can’t prove it, don’t say it.
30. They keep customer feedback in one place and review it monthly. Patterns show you what to fix before it becomes a reputation problem.
31. They document defects and what they changed afterward. The point isn’t blame—it’s preventing repeats.
32. They maintain a clean, organized work area with dedicated zones. Cutting, sewing, and packing in one pile creates errors.
33. They protect cash by buying inventory in steps, not in panic. You can’t sell what you can’t store or control.
Running the Business (Operations, Staffing, SOPs)
34. Create a daily production plan that matches your capacity. If you over-promise, you’ll rush, and quality will fall.
35. Use a simple order tracker with due dates and status. You need to know what’s cutting, sewing, packing, and shipping.
36. Separate “custom” work from standard items, or avoid custom at first. Custom requests can destroy consistency and timelines.
37. Keep sharp cutting tools and replace blades on schedule. Clean cuts reduce fraying and make sewing more reliable.
38. Set stitch standards for load-bearing seams and enforce them. If stitch quality varies, performance varies.
39. Use the right needle and thread combination for each material. Wrong combos can cut fibers or create weak seams.
40. Inspect incoming materials before they hit production. Catch defects early so they don’t become finished-product problems.
41. Label storage bins and shelves by material type and lot if possible. When materials get mixed, troubleshooting becomes guesswork.
42. Keep a “first in, first out” approach for materials that can degrade. Some elastics, webbing, and packaging can age poorly depending on storage.
43. Make packaging part of the build process, not an afterthought. If packing is slow or sloppy, shipping errors will spike.
44. Use a shipping scale and confirm package weights match what you charge. Shipping surprises can erase your profit fast.
45. Build a return inspection routine that is consistent and documented. Decide what is resellable, repairable, or scrap.
46. Keep replacement parts on hand for the components that fail most often. Small replacements can prevent full refunds.
47. Write a training checklist before you bring on help. New people need a clear path, not random instructions.
48. Train on safety and machine use before speed. A fast mistake can become an injury or a defective batch.
49. If you have employees, confirm machine guarding requirements apply and meet them. Moving parts and points of operation are not optional safety concerns.
50. Keep maintenance logs for sewing machines and cutting tools. Regular upkeep reduces skipped stitches, timing issues, and breakdowns.
51. Use a simple quality sampling plan even for small batches. Checking only the first and last unit is not enough.
52. Create a product file for each design version. Store specs, photos, test notes, labeling text, and supplier details together.
53. Use consistent product naming and stock keeping units across all channels. Confusion in naming creates wrong shipments and wrong listings.
54. Keep your business records organized by month and year. When taxes, disputes, or audits show up, chaos costs time.
55. Reconcile bank and payment processor deposits on a set schedule. If you don’t, small errors turn into big confusion.
56. Set aside time weekly to review defect rates, returns, and customer complaints. You can’t improve what you refuse to measure.
57. Build a simple policy for product updates. If you change a strap, stitch method, or fabric, track the date and affected units.
58. If you sell to wholesale accounts, standardize your terms in writing. Clarify lead times, minimum orders, and what happens if something arrives damaged.
What to Know About the Industry (Rules, Seasons, Supply, Risks)
59. Assume product liability risk is real and plan accordingly. If someone falls, your design, instructions, and records will matter.
60. Know that textile labeling rules can apply to products made from textile fibers. Confirm what disclosures apply to your specific items before you sell.
61. If you use an origin claim, understand it can be regulated. Don’t treat “Made in USA” as casual wording.
62. Be careful marketing to children. If your product is positioned as primarily for children, different safety expectations and certification issues can come into play.
63. Learn what triggers a safety reporting obligation and take it seriously. If you discover a defect that could create a substantial product hazard, you may need to report it.
64. If you manufacture or store materials outdoors, stormwater rules may apply to your site. Confirm whether your activity needs permit coverage or qualifies for a no-exposure approach in your state.
65. Expect demand to swing with weather and holidays. Plan inventory in smaller runs until you learn your seasonality.
66. Treat supply chain variability as normal, not rare. Lead times change, materials go out of stock, and lots can vary.
67. Plan for component changes over time. A “same” carabiner or buckle can quietly change shape or rating when suppliers switch.
68. Understand that retailers may ask for documentation. Wholesale accounts often want consistent labeling, packaging, and safety instructions.
69. Track which materials are sensitive to moisture and sunlight. Bad storage can weaken fibers and fade products before they ship.
70. Avoid unsupported performance claims like “unbreakable” or “safe for everyone.” Use weight limits and usage guidance you can support.
71. Pay attention to product recalls in adjacent categories like stands and frames. Failures often involve welds, brackets, or structural connections.
72. Confirm sales tax collection rules by state. Product taxability and marketplace rules can differ, and you’re responsible for getting it right.
73. If you plan to protect your brand name, learn the basics of trademarks early. Don’t invest heavily in packaging for a name you might not be able to keep.
Marketing (Local, Digital, Offers, Community)
74. Build your marketing around a specific use case, not a generic product. “Backyard comfort” and “camping packability” require different photos and language.
75. Use product photos that show scale and setup clearly. If customers can’t picture how it hangs, they hesitate or they buy and return.
76. Show what is included in the package, in plain language. Surprises create bad reviews.
77. Publish clear weight limits and usage guidance on every product page. It reduces confusion and sets expectations upfront.
78. Create a short setup video that matches your instructions. Video often prevents the most common setup errors.
79. Build an email list from day one and send helpful updates. Don’t spam—teach setup, care, and safety to earn trust.
80. Use customer photos with permission to show real-life use. Authentic images often answer questions your copy misses.
81. If you sell locally, partner with non-competing businesses that share your customer base. Outdoor clubs, camps, and patio retailers can create warm introductions.
82. Offer a limited launch batch instead of pretending you have unlimited stock. Scarcity caused by honest capacity is better than late shipping.
83. Track which channels produce the lowest return rate, not just the most orders. Low-return channels often produce better long-term profit.
84. Keep your product descriptions consistent across platforms. Differences in claims, materials, or included items trigger disputes.
85. Test one offer at a time. Changing price, bundle, and messaging all at once makes results impossible to interpret.
Dealing With Customers (Trust, Education, Retention)
86. Assume customers may not know how to hang a hammock safely. Treat education as part of the product, not an extra.
87. Use plain-language instructions and avoid technical jargon. If setup is confusing, they’ll blame the product.
88. Include a simple “before you use it” checklist. Remind customers to check anchor points, straps, and hardware before every hang.
89. Make it easy for customers to choose the right hammock. Provide a quick comparison based on use case, size, and included suspension.
90. Respond to questions with specifics, not vague reassurance. If someone asks about weight limits, give a clear answer and point to the instructions included.
91. Keep a record of recurring questions and update your product pages. Every repeated question is a sign your listing is missing something.
92. If a customer reports a failure, treat it as urgent. Ask for photos, identify the batch, and stop shipping anything similar until you understand what happened.
93. Build loyalty with consistent quality and fast, respectful communication. People remember how you handled the problem more than the problem itself.
Customer Service (Policies, Guarantees, Feedback)
94. Publish your return policy in simple terms and follow it consistently. Inconsistent decisions create complaints and chargebacks.
95. Create a clear process for damaged-on-arrival claims. Decide what proof you need and what replacement options you’ll offer.
96. Use product registration or order lookup to support customers faster. When you can confirm the order quickly, you solve issues faster.
97. Ask for feedback after delivery, not just reviews. Private feedback helps you fix problems before they show up publicly.
98. Track refund and replacement reasons by category. If “fraying straps” shows up repeatedly, that’s a supplier or design signal.
What Not to Do
99. Don’t launch with untested designs just because friends say they look good. Test under realistic conditions and keep records.
100. Don’t print labels and packaging before you confirm what disclosures and claims you can legally support. Fixing claims after launch is painful and costly.
101. Don’t ignore early warnings like repeated complaints, near-failures, or unusual wear. Treat them as signals and correct the cause before someone gets hurt.
FAQs
Question: Can I start a Hammock Production Business from home, or do I need a commercial space?
Answer: Many owners start from home if local zoning and home occupation rules allow light manufacturing and shipping.
Verify rules with your city or county planning department before you buy equipment or stock materials.
Question: What registrations do I usually need before I sell my first hammock?
Answer: You typically need a legal business registration at the state level and any required city or county business license.
You may also need a state sales and use tax account if your state taxes the products you sell.
Question: Do I need an Employer Identification Number if I have no employees?
Answer: Not always, but many owners still get one to avoid using a Social Security number on business forms.
Check Internal Revenue Service guidance based on your entity type and tax needs.
Question: Should I start as a sole proprietor or form a limited liability company?
Answer: Many small businesses start as sole proprietorships and later form a limited liability company as they grow.
Because this business involves product safety risk, talk with a qualified professional about liability and structure.
Question: Do I need a doing business as name filing?
Answer: You may need one if you operate under a name that is different from your legal name or entity name.
Rules vary by state and sometimes by county, so verify with your state filing office or county clerk.
Question: What is a Certificate of Occupancy, and when does it matter?
Answer: A Certificate of Occupancy (CO) is a local approval that a building is safe and allowed for a specific use.
If you lease a workspace, ask the local building department if your use requires a CO or a change of occupancy.
Question: What insurance should I look into before launch?
Answer: Many owners consider general liability coverage and product liability coverage because customers rely on the product to hold weight.
Some sales channels, landlords, or events require specific coverage, so confirm requirements in writing.
Question: What labeling rules apply to hammocks made from fabric, webbing, or rope?
Answer: If your product is a covered textile product, federal textile labeling rules can require fiber content disclosure, country of origin, and a responsible party name.
Verify how the rules apply to your exact product and labeling method using Federal Trade Commission guidance.
Question: What is a Registered Identification Number, and do I need one?
Answer: A Registered Identification Number is an identifier issued by the Federal Trade Commission that can be used on textile labels instead of a company name.
It is optional, so decide if it fits your labeling plan and brand approach.
Question: Can I say “Made in USA” on labels or product pages?
Answer: Only if your claim meets the Federal Trade Commission standard for unqualified “Made in USA” claims.
Confirm eligibility before printing labels, packaging, or permanent product tags.
Question: What equipment is essential for a small launch setup?
Answer: Most small launches need a heavy-capable sewing setup, cutting and measuring tools, and a packaging and shipping station.
If you also make stands or frames, you will add metalworking equipment and a different safety plan.
Question: How do I choose suppliers without getting stuck with inconsistent materials?
Answer: Use suppliers that provide stable specifications, clear part numbers, and consistent availability for fabric, webbing, thread, and hardware.
Test small orders first and keep records of what you used in each production batch.
Question: How should I estimate startup costs for a Hammock Production Business?
Answer: Build a line-by-line list that includes machines, tools, initial materials, labels, packaging, and workspace setup.
Startup cost is driven by scale, inventory depth, and whether you hire staff early.
Question: How do I set prices as an owner, not as a shopper?
Answer: Base pricing on material cost, labor time, packaging, shipping expense, platform fees, and expected defects or returns.
Track real build time so your pricing reflects what it takes to produce consistently.
Question: What basic workflow should I use to keep quality consistent?
Answer: Use a repeatable flow: incoming inspection, cutting, sewing and assembly, final inspection, then packing and labeling.
Keep a written build sequence and a final inspection checklist for each product.
Question: What metrics should I track in the first six months?
Answer: Track defect rate, return rate, build time per unit, and gross margin per product version.
Also track which sales channel produces the fewest complaints and the most repeat orders.
Question: When should I hire help, and what should I train first?
Answer: Hire when demand is consistent enough that you can keep work steady and still maintain quality.
Train on safety, quality checks, and your build sequence before speed or output goals.
Question: What are common owner mistakes that cause early problems?
Answer: Launching with too many product variations, changing materials without retesting, and printing labels before confirming required disclosures are common issues.
Another major problem is skipping documentation, which makes defects harder to trace and fix.
Question: Are there product safety reporting duties I should know about as an owner?
Answer: If you obtain information that supports a conclusion that your product contains a defect that could create a substantial product hazard, federal reporting duties may apply.
Use Consumer Product Safety Commission guidance to understand when and how reporting works.
Question: Could environmental rules apply to my production space?
Answer: Some facilities can trigger industrial stormwater requirements if industrial activities or materials are exposed to stormwater.
Check the Environmental Protection Agency overview and confirm your state permitting authority’s rules.
Related Articles
- Start a Backpack Manufacturing Business
- Start a Beach Gear Rental Business
- Start a Campground Business
- How to Open an Ergonomic Furniture Store
- How to Start and Run a Craft Store
- Start a Canoe and Kayak Rental Business
Sources:
- Consumer Product Safety Commission: 15b, Children’s Certificate, Duty, Duty CPSC
- Environmental Protection Agency: Sector V Textile Mills Apparel, Stormwater Discharges Industrial
- Federal Trade Commission: Complying Made USA, Registered Identification Number, Textile Identification, Threading Way Labeling Requireme
- Internal Revenue Service: Get employer identification numb
- Occupational Safety and Health Administration: Machine Guarding
- Office of Environmental Health Hazard Assessment: Businesses Proposition 65
- U.S. Small Business Administration: Apply licenses permits, Register business
- United States Patent and Trademark Office: Apply