Permits, EIN, insurance: startup questions answered
Is Running This Business Right for You?
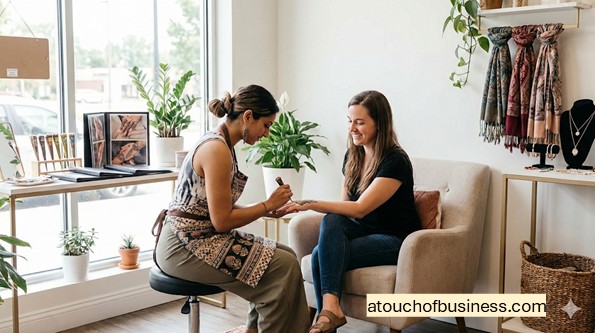
We’ve all seen it. Someone at a party has fresh henna, and the designs look effortless. Then you picture the prep, the cleanup, the rules, and the pressure of working on real skin with real people watching.
If you’re thinking about starting a Henna Tattoo Business, start with fit. Decide if owning and operating a business is for you, and then decide if this specific business fits your skills, lifestyle, and risk tolerance. A helpful reality-check read is points to consider before you start.
Next, check passion. Passion is not hype. It’s what keeps people thinking and solving problems when challenges hit. Without it, many people look for an exit instead of solutions. If you want a clear explanation, read why passion matters before you start.
Now test motivation with one blunt question: “Are you moving toward something or running away from something?” If you’re starting mainly to escape a job or a financial bind, that may not hold up when things get hard.
Be honest about readiness. Income can be uncertain. Hours can be long. Some tasks will be difficult. Vacations can shrink. You’re fully responsible when something goes wrong.
Ask yourself if your family or support system is on board. Ask if you have the skills (or can learn them) and if you can secure enough funds to start and operate until income becomes steady.
Finally, learn from owners. Talk to owners in the same line of work only when they are not direct competitors. Only talk to owners you will not be competing against, such as those in a different city, region, or area.
Here are smart questions to ask those owners:
- What part of the startup process surprised you the most, and what would you do earlier next time?
- Which local approvals or venue rules slowed you down, and where did you find the correct answers?
- What service type was easiest to launch first, and what did you need in place before you felt ready?
If you want a structured way to study the industry before you commit, use an inside look guide and apply it to your local market.
Startup Steps
The goal here is simple. Launch legally, safely, and with a plan you can follow. These steps stay focused on pre-launch work, not ongoing management.
Step 1: Pick Your Launch Style and Your Time Commitment
Start by deciding how you will deliver the service. This business can often start small, sometimes with one person and a portable kit, depending on local rules.
Choose your first setup: mobile appointments, private bookings in a compliant workspace, event work, or a small studio. Then decide if you will run it full time or part time. Your choice affects permits, insurance, and startup spending.
Also decide if you will run it solo, with a partner, or with investors. Most small launches do not require investors, but a storefront build-out or multi-artist studio can push you in that direction.
Step 2: Build Skill First, Then Set Your Safety Line
Before you spend much, get your skill to a level where your work looks consistent in photos and in person. You need clean lines, steady spacing, and reliable timing.
At the same time, set product rules for yourself. Avoid products marketed as “black henna.” The Food and Drug Administration warns that “black henna” may contain p-phenylenediamine (PPD), which can cause serious reactions. Start with the agency overview in the FDA fact sheet on henna and black henna.
If you want a plain-language safety rundown you can understand quickly, review temporary henna tattoo safety guidance and align your choices with it.
Step 3: Decide What You Will Offer First
Keep your first launch simple. Pick a small set of design types you can repeat and finish on time.
Decide what the first offers will look like. Examples include short sessions for simple designs, longer sessions for detailed work, or event stations with fast designs. You can expand later after you see what people actually book.
If you plan to sell packaged products, decide that now. Selling items can trigger sales tax registration and labeling responsibilities.
Step 4: Confirm Demand in Your Area
Do not assume demand. Prove it. Start by looking for real signals: event calendars, fairs, bridal shows, cultural festivals, and local photographers or planners who already work in the wedding space.
Then look at competitors in nearby areas. Focus on what people are actually buying: how often artists are booked, how far they travel, and which event types repeat. A practical guide for this stage is checking market demand.
Step 5: Confirm You Can Make a Profit, Not Just Get Booked
Demand is not enough. You need profit that can cover expenses and still pay the owner. That means you have to estimate realistic bookings and realistic time per booking.
List the costs tied to each job. Include materials, travel time, event fees, payment processing, and supplies you replace often. Add fixed costs like insurance, phone, and marketing. Then compare that to what customers in your area pay.
If the numbers do not work at a small scale, do not try to “fix” it with volume. Fix it with smarter offers, smarter pricing, or a different model.
Step 6: Choose Where You Will Work, Then Verify the Rules
Location choices change everything. If you work only at private events, your main issues are venue requirements, local vending rules, and insurance needs.
If you plan to work from home or have clients come to you, confirm zoning and home occupation rules before you set up a space. If you rent a suite or open a studio, confirm the space is approved for that type of use and ask about a Certificate of Occupancy (CO) when applicable.
If you need help thinking through location tradeoffs, use how to choose a business location and apply it to your local customer base.
Step 7: Build Your Essential Item List and Get Price Quotes
Now you can start building your startup cost estimate. Write down every essential item you must have to deliver a clean, consistent service, plus every item you need to run bookings and accept payment.
Get pricing estimates from multiple sources. Do not guess. Scale drives totals. A solo mobile launch has a very different total than a studio with multiple stations and retail products.
For a structured approach, use estimating startup costs to avoid leaving out key categories.
Step 8: Choose a Business Name and Lock Down Your Online Basics
Your name needs to be usable and available. Start with a name you can say out loud, spell easily, and put on a sign if you ever open a studio.
Check availability for your domain and social profiles early. Even if you launch small, having a consistent name across platforms helps customers find you. For guidance, read how to choose a business name.
If you plan to build a website, start with structure before design. A simple plan reduces confusion later. Use how to build a website as a step-by-step planning resource.
Step 9: Write a Business Plan, Even If You Are Self-Funding
A business plan is not only for loans. It forces you to make decisions while the stakes are low. You will define your model, your target customers, your pricing approach, and your startup spending.
Keep it practical. Use simple numbers and clear assumptions. If you want a straightforward guide, read how to write a practical business plan.
If you do not like numbers, get help. An accountant, bookkeeper, or small business advisor can review your assumptions and help you avoid avoidable gaps.
Step 10: Decide How You Will Fund the Startup and Set Up Business Banking
Match your funding approach to your scale. Many small starts use personal savings and grow slowly. A larger studio build-out may require financing or investors.
Open accounts at a financial institution so you can keep personal and business transactions separate. Set up a clean financial setup early so your records are not a mess later.
If you plan to borrow, prepare before you apply. Review how to get a business loan so you understand what lenders usually ask for.
Step 11: Choose a Legal Structure and Register the Business
In the United States, many small businesses start as sole proprietorships and later form a limited liability company as they grow. The shift can add liability protection and a clearer structure, depending on your situation.
Pick the structure that matches your risk and plans. Then register where required. Use this business registration guide and confirm the exact steps with your state filing office.
For official federal guidance on registering, also review how to register your business from the Small Business Administration.
Step 12: Set Up Tax Accounts Based on What You Will Actually Do
Your tax accounts depend on your structure, whether you hire employees, and whether you sell taxable products. Do not set up accounts you do not need.
Start with federal identification. If you need an Employer Identification Number, use the official Internal Revenue Service page on getting an employer identification number.
Then check state requirements for sales tax, employer withholding, and other registrations. A clear overview is getting federal and state tax ID numbers from the Small Business Administration.
Step 13: Get Licenses, Permits, and Location Approvals Before You Book Clients
This is where many beginners get stuck because rules vary. Your city, county, and state may treat henna differently than permanent tattooing, and the requirements can change by location.
Start with the basics: general business licensing, zoning approvals for a home workspace, and building approvals for a studio. Then confirm any activity-specific rules for body art services or temporary event vending when applicable.
Use licenses and permits guidance to find the correct local offices and the terms to search in your area.
Step 14: Get Insurance and Meet Venue Requirements
Insurance is part of your risk plan. At a minimum, plan for general liability coverage so you are not exposed to one incident.
If you own valuable equipment, consider coverage for tools and supplies. If you work events, read contracts closely. Some venues require proof of insurance, specific limits, or additional insured wording.
For an overview of common coverage types, review business insurance basics and confirm requirements with the venue and your insurance professional.
Step 15: Choose Suppliers, Set Pricing, and Write Simple Client Policies
Suppliers matter because consistency matters. Choose sources you can reorder from reliably and document what you use. Keep ingredient information available for client questions.
Set pricing based on your costs, time, and local market reality. If you need a structured way to think about pricing, use how to price products and services.
Write short policies before you launch. Cover deposits, cancellations, minors, photo permission, and aftercare instructions. Clear policies reduce disputes and help you stay consistent.
Step 16: Build Basic Brand Assets and Proof That You Are Ready
Brand assets do not need to be fancy, but they do need to be consistent. Plan your logo, colors, and basic design style so your online presence looks connected.
If you want a framework for brand basics, review corporate identity package basics.
Then create simple items you will actually use: a clean website or booking page, a service sheet, business cards if you do events, and signage if you work pop-ups. Helpful references include business card guidance and business sign considerations.
Step 17: Set Up Your Workspace and Run a Controlled Pre-Launch Test
Set up your work area so it supports clean work. You need stable lighting, a comfortable client setup, and a clear sanitation routine.
Then do a small pre-launch test with a limited number of sessions. Use it to confirm timing, design consistency, drying time, your setup flow, and your photo process.
If you plan to hire help later, learn the timing and triggers first. A simple reference is how and when to hire, but keep your first launch lean if you can.
Step 18: Prepare Your Launch Plan and Your Pre-Opening Checklist
Your launch plan should match your model. Event-first businesses need bookings and venue relationships. Studio-based businesses need local visibility and a clear booking process.
If you are opening a studio, you may choose a grand opening approach. If you are mobile, your “opening” may be a simple start date with a focused marketing push. For ideas, review grand opening planning tips and apply only what fits your setup.
Before you accept your first public booking, run final checks on permits, insurance, supplies, and payment tools. If you want guidance on building a reliable support network, see building a team of professional advisors.
What This Business Looks Like
Henna is a plant-based dye made from the leaves of the henna plant (Lawsonia inermis). It has been used for body decoration in many cultures and is commonly seen around celebrations and weddings.
In the United States, the Food and Drug Administration notes that henna is approved only for use as a hair dye, not for direct application to the skin.
If you want background on the plant itself, see Britannica’s overview of henna. For cultural context, the Natural History Museum has a clear overview in The henna plant: Transcending time, religion and culture.
Most startups begin as service businesses. Some owners later add product sales, larger events, or a multi-artist studio.
How It Generates Revenue
You can earn income in a few common ways. The right mix depends on your skill, local demand, and local rules.
- Private appointments booked by time or design size
- Bridal sessions and multi-person wedding bookings
- Event work with a set hourly rate or a per-person rate
- On-site bookings where you travel to the client
- Optional product sales, such as aftercare items or packaged products, when compliant
Customers You Are Serving
Know who will pay for the service in your area. This helps you choose offers, locations, and your marketing approach before you spend much.
- Wedding-related clients and wedding parties
- Festival and fair attendees
- Private party hosts planning birthdays, showers, and community gatherings
- Clients who want temporary body decoration without needles
Pros and Cons to Think Through Before You Commit
This business can start small, but it still carries real responsibility. Use these points as a decision tool, not as motivation.
- Pros: Can often start with a small kit and grow into a studio or event-focused brand over time.
- Pros: Flexible models are possible, such as mobile bookings, events, or a private workspace, depending on local rules.
- Cons: Rules can vary widely by city, county, and state, so verification takes time.
- Cons: Product choices matter because adverse reactions have been reported with some temporary tattoo products, especially products marketed as “black henna.” Review the FDA black henna fact sheet.
Essential Equipment and Supplies
Start with essentials only. Buy what you need to deliver clean work and run bookings. Add nicer upgrades after your process is stable.
Use this list to build your cost estimate, then collect price quotes. Your total will change based on whether you are mobile, event-based, or opening a studio.
Henna Materials and Application Supplies
- Henna powder from a supplier you can document
- Mixing liquids used in your standard recipe
- Fine strainer or sifter for powder
- Mixing bowls or cups (non-reactive)
- Measuring spoons and a small scale
- Spatulas or mixing tools
- Applicator cones or cone-making supplies
- Cone sealing supplies (tape or clips)
- Tips or nozzles compatible with your applicators
- Cotton swabs for cleanup and small corrections
- Small disposable applicators for detail work
Sanitation and Client Safety Supplies
- Hand soap and hand-cleaning supplies for on-site work
- Disposable gloves
- Single-use wipes or towels
- Surface disinfectant used per label directions
- Disposable table covers or wipeable surface covers
- Trash bags and a closable waste container for events
- Basic first-aid kit
- Printed aftercare instruction cards
Workstation and Comfort Items
- Stable work table
- Client chair
- Artist stool or chair
- Hand and arm supports (pillows or bolsters)
- Portable task lighting
- Timer or clock for consistent timing
Mobile and Event Setup Items (When Applicable)
- Rolling case or tote system for transport
- Portable sign (when permitted by the venue)
- Display materials for design examples
- Clipboard and pens for forms
- Portable power bank (only when allowed by the venue)
- Canopy for outdoor events (when needed and allowed)
Admin, Booking, and Payment Tools
- Phone or tablet for booking and records
- Card reader or other payment tool to accept payment
- Receipt method (digital is fine)
- Basic printer (optional, for forms and signage)
Brand and Proof Assets
- Camera or phone with strong photo quality
- Neutral backdrop for consistent photos
- Client photo permission form storage (digital or paper)
Skills You Will Need Before You Launch
You do not need to be perfect on day one, but you do need reliable fundamentals. You can learn skills or work with professionals where you are weak.
- Steady application skills: clean lines, spacing, symmetry, and control
- Design composition and the ability to scale designs to hands and arms
- Sanitation discipline and clean setup habits
- Clear communication for expectations, timing, and aftercare instructions
- Basic scheduling, recordkeeping, and customer service
- Comfort with simple marketing: photos, local listings, and event outreach
Business Models and Staffing Paths
This business can be launched by one person, but it can also grow into a studio with multiple artists. Choose the smallest model that works, then expand based on proof, not hope.
- Solo mobile launch: You travel to clients or events, with low overhead and a portable setup.
- Event-focused vendor: You build relationships with organizers and rely on repeat events.
- Private workspace by appointment: You work from a compliant space with controlled scheduling.
- Studio launch: Higher startup spending, more approvals, and possible staff needs.
- Partner model: Two owners share workload and investment, with clear role division.
- Hiring path: Do most tasks yourself at first, then add help later when bookings are stable.
Legal and Compliance Basics
Use this section as a checklist starter. Your next step is verifying requirements with the correct agencies where you live and where you will work.
Entity Formation and Registration
- Confirm your structure and filing requirements with your state’s business filing office. Start with Small Business Administration registration guidance.
- If you use a name that is different from your legal name or legal entity name, check your state, county, or city process for an assumed name filing.
Federal and State Tax Accounts
- If you need an Employer Identification Number, use the official Internal Revenue Service EIN page.
- If you sell products, check state sales tax registration requirements. Use Small Business Administration tax ID guidance to find the correct state agency.
- If you hire employees, you may need state employer accounts for withholding and unemployment insurance. Verify with your state tax agency and state workforce agency.
Licenses, Permits, and Location Approvals
- Check your city or county requirements for a general business license.
- If you work from home, verify zoning and home occupation rules with your planning or zoning office.
- If you rent or open a studio, confirm the space is approved for your use and ask about a Certificate of Occupancy (CO) when applicable.
- If you do events, verify temporary vending requirements and any venue contract requirements. Start with Small Business Administration licenses and permits guidance to find the right local offices.
Product Sales and Labeling (Only When You Sell Packaged Products)
- If you sell packaged cosmetic products, review cosmetics labeling requirements and the FDA cosmetics labeling guide.
Industry Classification for Forms (When Needed)
- Some forms ask for an industry code. If you need a code for “other personal care services,” review the United States Census Bureau NAICS details page and confirm what fits your exact activity.
Varies by Jurisdiction
This is the part you cannot skip. Requirements can change based on where you work and how you work.
Use this quick verification checklist before you accept your first booking:
- State: Search “Secretary of State business registration” plus your state name.
- State: Search “Department of Revenue sales tax permit” plus your state name if you will sell products.
- City or county: Search “business license” plus your city or county name.
- City or county: Search “home occupation permit” plus your city or county name if clients will come to your home.
- City or county: Search “temporary vendor permit” plus your city name if you will do events.
- City: Search “right-of-way permit” plus your city name if you plan to set up on sidewalks, streets, or public spaces.
When you call an office, keep it simple. Ask what the service is classified as in that jurisdiction, what permits apply to your setup, and whether inspections or facility approvals are involved.
What Your Workday Can Look Like
Before you launch, picture your day so you do not underestimate the workload. Even small service businesses include admin work, prep, and cleanup.
A typical day often includes packing supplies, setting up a clean workstation, applying designs, giving aftercare instructions, and resetting your space between clients.
If you work events, add travel, setup, breakdown, and venue compliance checks. If you run a studio, add facility checks and local visibility work.
Red Flags to Watch For Before You Launch
These issues can create safety problems, compliance problems, or reputation damage early. Catch them before you open.
- Any supplier or product marketed as “black henna,” or a supplier that cannot provide ingredient information. Start with FDA guidance on black henna.
- Working from home or booking clients into a space without verifying zoning or home occupation rules.
- Signing event contracts without understanding vendor rules, insurance proof requirements, and setup limits.
- Selling packaged products without confirming labeling responsibilities using FDA labeling requirements.
- Launching without clear client policies for deposits, cancellations, minors, and photo permission.
101 Tips for Building a Solid Henna Tattoo Business
These tips are meant to help with different goals, from getting set up to improving how you work with clients.
Use what fits your current situation and ignore what does not apply to your model or location.
You may want to save this page so you can come back when a new challenge shows up.
The fastest progress usually comes from picking one tip, acting on it, and then moving to the next.
What to Do Before Starting
1. Choose your launch model first: mobile, events, private appointments, or a studio space. Your model drives permits, insurance needs, and how much you must spend up front.
2. Decide whether this will be full time or part time from day one. Your schedule will affect booking windows, response time, and how many clients you can handle safely.
3. Set a clear safety rule: do not use products marketed as “black henna.” Build that into your sourcing checklist and your client disclosures.
4. Write down the exact service types you will offer at launch. Keep the first set small so you can deliver consistent results while you learn what your area books most.
5. Build a photo portfolio before you charge full rates. You need proof that your lines are clean, designs are even, and results look good in normal lighting.
6. Pick a business name that is easy to say, spell, and search. Then secure a matching domain and social handles before you print anything.
7. Confirm your local rules before you accept your first booking. In many places, requirements change by city, county, and state, and also by where you work.
8. Choose a legal structure that matches your risk and growth plan. Many owners start as sole proprietors and later form a limited liability company as they grow.
9. If you need an Employer Identification Number, get it directly from the Internal Revenue Service. Avoid third parties that charge for something you can do yourself.
10. If you plan to sell any packaged products, learn the basics of cosmetic labeling early. Label responsibilities can apply even when your service is the main offer.
11. Open a business bank account so personal and business transactions stay separate. Clean records are easier to keep from the start than to fix later.
12. Build a startup budget from an itemized supply list. Get real price quotes and remember your total changes with your model and scale.
13. Decide how you will accept payment before you start booking. Make sure your payment method works at events and at client locations.
14. Create a simple pricing structure that matches time and design complexity. If pricing feels unclear, track your practice sessions to learn how long designs truly take.
15. Draft your core policies before launch: deposits, cancellations, late arrivals, minors, and photo permission. Clear policies reduce conflict and protect your time.
16. Choose suppliers you can reorder from reliably. Consistency matters more than variety when you are new.
17. Keep ingredient information available for every product you use. Clients will ask, and you should be ready to answer without guessing.
18. Set up a clean workstation plan you can repeat anywhere. Your setup should support sanitation, comfort, and steady application.
19. Create a basic client info form that asks about allergies and sensitivities in plain language. Do not promise medical outcomes; stick to clear warnings and client choice.
20. Practice explaining aftercare in short, simple steps. What clients do in the first hours affects the final result and the photos they share.
21. If you plan to work events, create a small “event kit” checklist. Include backup supplies for common failures like torn cones, dead batteries, or spilled disinfectant.
22. Build a pre-launch test phase with a limited number of sessions. Use it to confirm timing, setup flow, and how well your policies work.
23. Talk to owners in other regions only, not direct competitors. Ask what approvals slowed them down, what they wish they bought first, and what they would not do again.
24. Write a business plan even if you are not borrowing. Use it to lock decisions on model, target clients, pricing, and the first six months of spending.
What Successful Henna Tattoo Business Owners Do
25. They set boundaries on what they will and will not apply. A clear “no” list protects clients and reduces risk.
26. They standardize their design approach so results are consistent. Consistency builds trust faster than having endless design options.
27. They track timing for common designs and price accordingly. This keeps bookings realistic and protects the owner’s time.
28. They keep a clean, repeatable setup routine. A consistent routine lowers errors when you are working fast or in public.
29. They collect clear photos with permission and store them in organized folders. This makes future marketing easier and keeps proof easy to find.
30. They use written policies and enforce them politely. Consistent enforcement is what makes policies work.
31. They confirm event requirements in writing before showing up. That includes load-in times, tables provided, power rules, and proof of insurance requirements.
32. They keep receipts and basic records from the first day. You will not want to sort a pile of paperwork later.
33. They build relationships with planners, photographers, and venues. One strong referral partner can produce steady bookings.
34. They explain what henna can and cannot do without overselling. Clear expectations reduce complaints and refunds.
35. They keep a backup plan for common problems. Have spare gloves, extra cones, and a second lighting option ready.
36. They stay consistent on brand basics: name, colors, photo style, and tone. Consistency helps people recognize you across platforms.
37. They limit travel zones or add travel pricing rules. This prevents the owner from spending half the day driving for one booking.
38. They treat every public booking as a reputation event. Clean setup, clear communication, and calm pacing matter as much as design skill.
39. They revisit pricing after they have real timing data. Early pricing is a starting point, not a permanent decision.
40. They ask for feedback at the right moment, after the service and aftercare are explained. This improves reviews and helps catch issues early.
What to Know About the Industry (Rules, Seasons, Supply, Risks)
41. Requirements can vary by jurisdiction, even in neighboring cities. Always verify rules where you physically perform the service.
42. Some areas may classify henna under body art, cosmetics, or general personal services. Classification can change which permits and inspections apply.
43. If you sell packaged products, labeling duties can apply. Learn what information must be on the label before you sell anything to the public.
44. Expect seasonal demand in many markets, especially around weddings and festivals. Plan your launch date and marketing push around local event calendars.
45. Event work often has gatekeepers. Organizers may require applications, vendor fees, and proof of insurance before you are approved.
46. Public reaction risk is real. Even a small number of adverse reactions can damage trust, so product choice and disclosures matter.
47. Use sanitation supplies that are appropriate for the surfaces you touch. Follow product label directions for contact time and safe use.
48. Hand hygiene is not optional in a close-contact service. Set a handwashing and hand-cleaning routine you can follow at every booking.
49. Your workspace affects your speed and quality. Poor lighting and awkward client positioning lead to shaky lines and fatigue.
50. Mobile work changes your costs. Travel time, fuel, parking, and load-in time must be part of your pricing math.
51. Event pricing is not the same as private booking pricing. Your time includes setup, waiting, and breakdown, not just application time.
52. Supplies fail at the worst times. Always bring backups for application tools, cleaning supplies, and basic comfort items.
53. If you work outdoors, heat and humidity can change how your paste behaves. Test your setup in similar conditions before an event day.
54. Client expectations are shaped by social media photos. Be ready to explain how lighting, filters, and skin tone affect what they see online.
55. Reviews matter early, but review rules matter too. If you use endorsements or partnerships, disclose material connections clearly.
56. When you grow, a multi-artist model can add complexity fast. More artists can mean more scheduling, more equipment, and more compliance steps.
Running the Business (Operations, Staffing, SOPs)
57. Use a booking system that captures date, time, location, contact info, and service type. Missing details create day-of chaos and late starts.
58. Confirm bookings in writing with a short message template. Include arrival time, prep steps, and your cancellation policy.
59. Create a packing checklist for each model you run (mobile, event, studio). A checklist prevents last-minute supply runs.
60. Standardize your workstation layout so you can work without searching for tools. Place high-use items in the same spot every time.
61. Track inventory for essentials like gloves, cones, and disinfectant. Reorder before you are low so you do not settle for unknown substitutes.
62. Keep a simple incident log for any reaction, complaint, or unusual outcome. Record product used and what was reported without adding medical conclusions.
63. Use a written photo permission process. A verbal “sure” is not as clear as a signed or digital consent.
64. Store client records safely and limit who can access them. Even a small business should protect personal information.
65. Set a “no rush” rule for quality control. Rushing creates uneven lines, smudges, and a higher chance of refunds.
66. Build time buffers between clients. Buffers allow cleaning, payment handling, and short delays without snowballing into the next booking.
67. Decide when you will hire help and what that help will do. Common first hires include event assistants, scheduling help, or another artist.
68. If you hire, document the process step by step before training. A clear process helps new staff work safely and consistently.
69. Use written agreements for subcontractors or guest artists. Define who handles supplies, payments, taxes, and client issues.
70. Keep your insurance documents organized and easy to send. Venues may ask for proof with little notice.
71. Review contracts before signing, especially for events. Look for rules on setup space, timing, cancellation, and what happens if weather cancels the event.
72. Schedule regular admin time so you do not fall behind on confirmations, records, and supply reorders. Small daily blocks beat a stressful catch-up day.
Marketing (Local, Digital, Offers, Community)
73. Build your marketing around proof: clear photos, consistent results, and easy booking steps. A beginner’s advantage is reliability, not hype.
74. Create a simple offer structure customers can understand quickly. Keep names and choices clear so people can book without a long call.
75. Use local event calendars to plan outreach early. Many events fill vendor slots months in advance.
76. Partner with wedding vendors who serve your ideal clients. Photographers, planners, and bridal shops often know who is actively booking.
77. Use location-specific wording in your profiles and posts. People search by city, neighborhood, and event type.
78. Post photos that show scale and placement, not just close-ups. Clients want to visualize size on a hand, wrist, or forearm.
79. Use short educational posts that answer common questions. This reduces repetitive messages and improves booking confidence.
80. Ask happy clients for reviews while the experience is fresh. Make it easy by telling them where to leave the review and what details help.
81. Build a referral method that rewards partners without breaking advertising rules. If you have a paid relationship, disclose it clearly.
82. Use before-and-after style content carefully. Make sure you are showing realistic outcomes and not implying permanent results.
83. Create a simple press-ready package for local features. Include a short bio, a few photos, and your booking contact details.
84. Use event signage that can be read from a distance. Clear pricing and clear “how to book” steps help people decide fast.
85. Offer a rebooking prompt at the end of the service. A simple “If you want another session, here is how to book” can lift repeat bookings.
86. Track which marketing actions lead to bookings. If you cannot name where clients came from, you cannot improve what works.
Dealing with Customers (Trust, Education, Retention)
87. Set expectations before you start applying. Confirm placement, size, and what the client wants in plain terms.
88. Ask about allergies and sensitive skin every time, even for repeat clients. People change products, medications, and routines.
89. Explain drying time and how to avoid smudging in the first hour. Most complaints start with aftercare confusion, not the design itself.
90. Use simple language to describe what the stain may look like over time. Avoid absolute promises about color depth or longevity.
91. For minors, follow your local rules and use written parent permission. If rules are unclear, verify with your city or county office before you book.
92. Keep communication calm when a client is unhappy. Ask what they expected, what they received, and what solution fits your written policy.
93. Do not argue about photos. If you have permission, use the photo. If you do not have permission, do not use it.
94. Educate clients on product safety without fear tactics. Clear warnings and honest choices build more trust than dramatic language.
95. Create a repeat-client touchpoint that is helpful, not spammy. For example, share a seasonal booking reminder tied to local events.
Customer Service (Policies, Guarantees, Feedback)
96. Put your deposit and cancellation rules in writing and send them before payment. Surprises create conflict and chargebacks.
97. Use a simple service agreement for events. Include start time, end time, space needs, and what happens if the event runs late.
98. Make your refund and redo rules clear. Decide what you will do for smudges, late arrivals, or a client who ignores aftercare.
99. Create a consistent way to handle complaints within 24 hours. A quick response often prevents a public review from becoming the first message.
100. Ask for feedback in a structured way after each job. One good question is, “What should I improve for next time?”
101. Keep a short checklist you review before every booking. When quality is consistent, customer service becomes easier.
FAQs
Question: What business model is easiest to launch for a henna service?
Answer: A mobile or event-based model usually needs less space and fewer fixed costs than a dedicated studio. Your local rules and venue requirements can still change what is allowed.
Question: Do I need a business license to start?
Answer: Many cities and counties require a general business license, and requirements can change by location. Use the U.S. Small Business Administration (SBA) license and permit guide to find the right local offices to contact.
Question: Do states treat henna the same as tattooing or body art?
Answer: Not always, and the classification can vary by state and city. Verify how your area classifies your service before you book clients or events.
Question: Can I legally run this from home?
Answer: It depends on local zoning and home-occupation rules, and some areas restrict client visits at home. Call your city or county planning office and ask what is allowed for at-home personal services.
Question: When do I need a Certificate of Occupancy for a studio?
Answer: If you rent or open a commercial space, the city may require a Certificate of Occupancy (CO) for your use type. Ask the building department if the space is approved for your service and what inspections apply.
Question: Should I start as a sole proprietor or form a limited liability company?
Answer: Many small businesses start as sole proprietors and later form a limited liability company as they grow. Check SBA guidance and confirm filing steps with your state business registration office.
Question: Do I need an Employer Identification Number (EIN)?
Answer: You may need an Employer Identification Number (EIN) based on your structure, hiring plans, or banking needs. Apply directly through the Internal Revenue Service (IRS) to avoid paid middle sites.
Question: Do I need to collect sales tax?
Answer: If you sell taxable goods, your state may require sales and use tax registration and collection. Some states also tax certain services, so check your state department of revenue rules for your exact activity.
Question: What insurance should I set up before I take my first booking?
Answer: Start with general liability coverage, since claims can come from accidents and property damage at events or client locations. SBA also recommends assessing risks and choosing coverage based on how and where you work.
Question: What are the essential supplies I should budget for first?
Answer: Budget for core application supplies, sanitation supplies, lighting, a stable workstation setup, and payment tools. Your model drives the list, since events often require more portable gear and backups.
Question: How do I avoid unsafe products like “black henna”?
Answer: Follow the Food and Drug Administration’s warnings on “black henna” and treat it as a sourcing red flag. Keep ingredient information for what you use and avoid products with unclear contents.
Question: If I sell packaged cones or aftercare items, what rules change?
Answer: If you sell packaged cosmetic products, labeling rules can apply to what you put on the container. Use the Food and Drug Administration’s cosmetics labeling overview to confirm what must be included.
Question: How should I set pricing in a way that actually pays the owner?
Answer: Track your true time per design, including setup, cleanup, and travel, and then add your supply costs and fees. Price should cover expenses and still leave room to pay the owner for their time.
Question: How do I set up a clean workflow for mobile and event work?
Answer: Use a standard packing checklist and a repeatable station layout so you do not improvise in public. Follow Centers for Disease Control and Prevention (CDC) handwashing guidance and bring supplies to clean hands and surfaces between clients.
Question: What disinfectants should I use on my work surfaces?
Answer: Use disinfectants that are registered as disinfectants and follow the label directions for contact time and safe use. The Environmental Protection Agency (EPA) explains how disinfectant labels and registrations work.
Question: How do I market with partners without getting into trouble with endorsements?
Answer: If you pay for promotions or get free services in exchange for posts, you may need clear disclosures. Review Federal Trade Commission (FTC) endorsement guidance and set a simple disclosure rule you always follow.
Question: When does it make sense to hire help or add another artist?
Answer: Hire when demand is steady and you can define the role in writing, such as event setup help or scheduling support. If you add another artist, use clear agreements on who handles supplies, payment, and client issues.
Question: What should I track each week so I know if the business is working?
Answer: Track leads, bookings, show-up rate, average earnings per hour worked, travel time, and supply usage. Also track complaints and rework requests so you can spot problems early.
Question: What are the most common mistakes new owners make?
Answer: Common issues include skipping local permit checks, using products with unclear ingredients, and launching without written policies. Another common problem is underpricing because the owner forgets to count travel, setup, and cleanup time.
Question: What documents should I have ready when opening a business bank account?
Answer: Banks often ask for formation documents, ownership information, and an Employer Identification Number (EIN) when applicable. The SBA outlines common documents used to open a business bank account.
Related Articles
- Starting an Airbrushing Business
- Start a Body Piercing Studio
- Start a Bridal Makeup Business
- How to Open an Eyebrow Threading Business
- How to Start an Eyelash Extension Business
- How to Start a Facial Spa Business
- Starting a Beauty Salon
- Start a Tanning Business
- How to Start a Wig Business
- Launch Your Aromatherapy Business
Sources:
- Britannica: Henna tree description uses
- Centers for Disease Control and Prevention: About handwashing clean hands
- Cleveland Clinic: Temporary henna tattoos safe
- Environmental Protection Agency: Selected EPA-registered disinfectants
- FDA: Temporary tattoos black henna, Cosmetics labeling requirements summary, Cosmetics labeling guide
- Federal Trade Commission: Endorsements testimonials advertising guides
- Internal Revenue Service: Get employer identification number
- Natural History Museum: Henna plant time religion culture
- Small Business Administration: Register your business, Apply licenses permits, Federal state tax ID numbers, Get business insurance, Open business bank account
- U.S. Census Bureau: NAICS 812199 details 2022, NAICS 812199 page 2022